Love this? Save it for later!
Share the inspiration with your friends
There used to be a tiny, sun-faded bakery tucked between a laundromat and a hardware store on the corner of Elm and 4th that made the most incredible snickerdoodles. I mean, they were legendary around here. When the owner retired and the bakery became a vape shop, I honestly felt a little lost. After a dozen attempts — some hockey pucks, some flat as tortillas — I finally got it.
These cozy pumpkin snickerdoodles are my love letter to that bakery, but with a fall twist. They have that same soft, chewy center and that perfect cinnamon-sugar crunch, but with a whisper of pumpkin and warm spices that just screams autumn. Let me tell you, cracking the egg-free version was the real challenge. I spent a whole Tuesday covered in flour, muttering to myself, but when I pulled that first perfect batch out of the oven, I knew I had it. Maybe you’ve been there, chasing a flavor memory from a place that no longer exists.
These cookies are the reason I keep baking. They bring back that feeling of walking into the bakery on a crisp October morning, the little bell above the door jingling, and knowing something wonderful was about to happen. Trust me, this is the pumpkin cookie recipe you’ll come back to all season long.
Why You’ll Love This Recipe
I’ve tested this recipe more times than I care to admit, tweaking the flour ratio, the spice blend, and the baking time until it was absolutely perfect. These cozy pumpkin snickerdoodles aren’t just another fall cookie — they are the fall cookie. Here’s why you’ll be completely hooked:
- Egg-Free & Delicious: No eggs needed! This recipe uses a clever combination of pumpkin puree and a touch of cornstarch to create that soft, chewy texture without any eggs. Perfect for those with allergies or when you’re just out of eggs.
- Simple Ingredients: You probably have almost everything in your pantry right now. No weird specialty flours or hard-to-find extracts. Just good, honest baking staples.
- Perfect for Fall Gatherings: Whether it’s a cozy Thanksgiving dessert, a Halloween party treat, or just a Tuesday afternoon pick-me-up, these cookies fit right in. They’re the star of any cookie swap.
- Crowd-Pleaser: Kids love the classic snickerdoodle vibe, and adults appreciate that subtle pumpkin warmth. I’ve never brought a batch anywhere that didn’t disappear in minutes.
- Unbelievably Cozy: The combination of pumpkin, cinnamon, and nutmeg with that signature tangy cream of tartar is pure comfort in cookie form. It’s the kind of cookie that makes you want to curl up with a blanket and a cup of tea.
What makes these different from every other pumpkin cookie out there? It’s the texture. Most pumpkin cookies are cakey and soft, which is fine, but these have that distinct snickerdoodle chew. The secret is in how we handle the pumpkin puree and the specific ratio of butter to sugar. I spent weeks getting it right, and I’m so excited to share it with you. This isn’t just another version — it’s the best version.
What Ingredients You Will Need
This recipe uses simple, wholesome ingredients to deliver that signature snickerdoodle flavor with a cozy pumpkin twist. Most of these are pantry staples, which makes these cookies perfect for a spontaneous baking session.
- Unsalted Butter: 1 cup (2 sticks), softened to room temperature. I really prefer using unsalted butter so I can control the salt level. Let it sit out for about an hour before you start.
- Granulated Sugar: 1 ½ cups, divided. We’ll use 1 cup in the dough and ½ cup for the cinnamon-sugar coating. Regular white sugar works best here for that classic snickerdoodle texture.
- Pumpkin Puree: ½ cup, not pumpkin pie filling. Make sure you grab 100% pure pumpkin puree. I like Libby’s brand for its consistent texture and flavor. Pat the puree with a paper towel to remove a bit of excess moisture — this is key for the perfect texture.
- Vanilla Extract: 1 teaspoon. Pure vanilla extract makes a difference, but imitation works in a pinch. I always use Nielsen-Massey when I’m feeling fancy.
- All-Purpose Flour: 2 ½ cups. Spoon and level your flour for the most accurate measurement. Scooping directly from the bag can pack in too much flour and make your cookies dry.
- Cream of Tartar: 2 teaspoons. This is non-negotiable for snickerdoodles. It gives them that signature tangy flavor and helps with the chewy texture. Don’t skip it!
- Baking Soda: 1 teaspoon. This helps the cookies spread just enough and gives them a little lift.
- Cornstarch: 1 tablespoon. This is my secret weapon for egg-free baking. It adds tenderness and helps mimic the structure that eggs usually provide.
- Salt: ½ teaspoon. Just fine table salt. It balances the sweetness and enhances all the warm spices.
- Ground Cinnamon: 2 teaspoons for the dough, plus 2 tablespoons for the coating. I use Saigon cinnamon when I can find it — it’s warmer and more aromatic.
- Ground Nutmeg: ½ teaspoon. Freshly grated is amazing, but pre-ground works perfectly.
- Ground Ginger: ¼ teaspoon. Just a whisper of ginger adds that cozy warmth without being overpowering.
- Ground Cloves: ⅛ teaspoon. Go easy here — cloves are potent. A tiny pinch goes a long way.
For the coating, you’ll need an extra ½ cup of granulated sugar and 2 tablespoons of ground cinnamon. Mix them together in a shallow bowl and you’re ready to roll.
Equipment Needed
You don’t need any fancy equipment for these cozy pumpkin snickerdoodles, which is part of their charm. Here’s what you’ll need:
- Mixing Bowls: At least two — one large for the wet ingredients and one medium for the dry ingredients. I love my set of nesting glass bowls.
- Electric Hand Mixer or Stand Mixer: A hand mixer works great and is easier to clean. If you’re using a stand mixer, use the paddle attachment. You could mix by hand with a wooden spoon, but your arm will get a workout.
- Baking Sheets: Two large, light-colored baking sheets. Dark sheets can cause the bottoms to brown too quickly. I use Nordic Ware aluminum sheets and they’re perfect.
- Parchment Paper or Silicone Baking Mats: Absolutely essential for preventing sticking and ensuring even baking. Silpat mats are my go-to.
- Cookie Scoop: A 1.5-tablespoon scoop makes perfectly uniform cookies. If you don’t have one, just use two spoons to portion the dough.
- Cooling Rack: A wire rack allows air to circulate around the cookies so they cool evenly and stay chewy.
- Shallow Bowl: For the cinnamon-sugar coating. A small pie plate works perfectly.
If you don’t have a cookie scoop, don’t worry. I’ve used a regular spoon for years before I finally bought one. Just try to make the dough balls roughly the same size for even baking.
Preparation Method
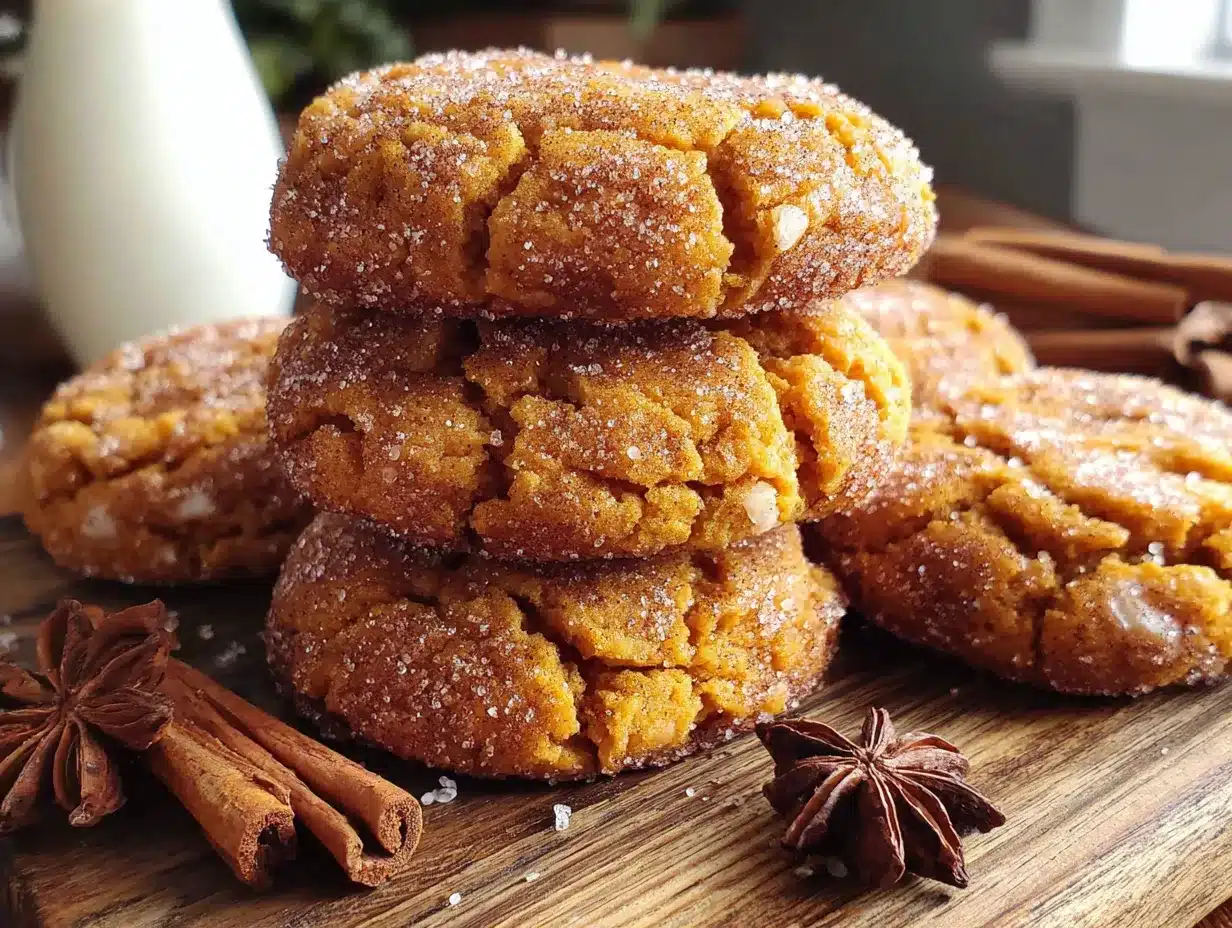
Let me walk you through this step by step. I’ve made these cookies so many times I could do it in my sleep, but I’ll share all the little tricks I’ve learned along the way.
- Preheat and Prep: Preheat your oven to 350°F (175°C). Line two baking sheets with parchment paper or silicone mats. This is important — don’t skip the lining or you’ll be scraping cookies off the pan.
- Cream the Butter and Sugar: In a large mixing bowl, beat 1 cup of softened butter with 1 cup of granulated sugar until light and fluffy. This takes about 3-4 minutes with a hand mixer on medium speed. You want it to look pale and almost doubled in volume. Scrape down the sides of the bowl once or twice.
- Add the Wet Ingredients: Beat in the ½ cup of pumpkin puree and 1 teaspoon of vanilla extract until fully combined. The mixture might look a little curdled at this point — that’s totally normal. Don’t panic. It’ll come together once we add the dry ingredients.
- Whisk the Dry Ingredients: In a separate medium bowl, whisk together 2 ½ cups all-purpose flour, 2 teaspoons cream of tartar, 1 teaspoon baking soda, 1 tablespoon cornstarch, ½ teaspoon salt, 2 teaspoons cinnamon, ½ teaspoon nutmeg, ¼ teaspoon ginger, and ⅛ teaspoon cloves. Whisking ensures everything is evenly distributed — no one wants a pocket of baking soda in their cookie.
- Combine Wet and Dry: Gradually add the dry ingredients to the wet mixture, mixing on low speed until just combined. Stop as soon as you don’t see any more streaks of flour. Overmixing will make your cookies tough. The dough will be soft and slightly sticky — that’s exactly what we want.
- Chill the Dough: Cover the bowl with plastic wrap and refrigerate for at least 30 minutes, or up to 2 hours. This step is crucial. Chilling the dough solidifies the butter, which prevents the cookies from spreading too much in the oven. I learned this the hard way after my first batch turned into one giant cookie pancake.
- Make the Coating: While the dough chills, mix ½ cup granulated sugar with 2 tablespoons cinnamon in a shallow bowl. Set aside.
- Shape the Cookies: Once the dough is chilled, use a 1.5-tablespoon cookie scoop or two spoons to portion out the dough. Roll each portion into a smooth ball between your palms. The dough should be easy to handle now — if it’s too sticky, chill it a little longer.
- Coat Generously: Roll each dough ball in the cinnamon-sugar mixture, making sure it’s completely coated. Place them on the prepared baking sheets, spacing them about 2 inches apart. They will spread a bit, so give them room to breathe.
- Bake: Bake for 10-12 minutes, rotating the pans halfway through. The cookies should look puffed and slightly crackled on top. The edges should be set but the centers will still look a little soft. That’s perfect — they’ll continue to set as they cool.
- Cool: Let the cookies rest on the baking sheet for 5 minutes. This allows them to firm up without becoming hard. Then transfer them to a wire rack to cool completely. If you try to move them too soon, they’ll fall apart. Trust me, I’ve been there.
The smell in your kitchen right now is going to be absolutely incredible. It’s like autumn in a bottle.
Cooking Tips & Techniques
After making these cozy pumpkin snickerdoodles more times than I can count, I’ve picked up a few tricks that make a real difference. Let me share them so you can nail it on your first try.
Don’t Skip the Pumpkin Patting: This is probably the most important tip I can give you. Pumpkin puree has a lot of water in it, and too much moisture will make your cookies spread into flat, sad discs. After measuring out your ½ cup, dump it onto a few layers of paper towels and gently pat it with another paper towel. You’ll see the moisture soak in. This one step transforms the texture completely.
Room Temperature Butter is Non-Negotiable: Cold butter won’t cream properly with the sugar, and melted butter will make greasy, flat cookies. Let your butter sit on the counter for about an hour. It should be soft enough that you can press your finger into it and leave an indent, but not so soft that it’s greasy or melted.
Measure Flour Correctly: This is where so many bakers go wrong. Don’t scoop your measuring cup directly into the flour bag. Instead, fluff the flour with a spoon, then spoon it into your measuring cup and level it off with a knife. This prevents you from packing in too much flour, which leads to dry, crumbly cookies.
The Chill is Your Friend: I know it’s tempting to skip the chilling step when you’re craving cookies right now, but please don’t. That 30 minutes in the fridge is what gives these cookies their perfect texture. Chilled dough spreads less and bakes up thicker and chewier. If you’re in a hurry, pop the dough in the freezer for 15 minutes instead.
Watch the Oven Like a Hawk: Ovens vary wildly. My oven runs a little hot, so I start checking at 9 minutes. You want the edges to be set and the tops to look slightly cracked but still soft in the center. Pull them out when they look just underdone — they’ll finish baking on the hot pan.
One Batch at a Time: Unless you have a convection oven, bake one sheet at a time on the middle rack. Baking two sheets at once can lead to uneven baking. If you need to bake in batches, let the baking sheet cool completely between batches, or use a second cool sheet.
Variations & Adaptations
One of the best things about this recipe is how adaptable it is. Here are a few variations I’ve tried and loved:
- Dairy-Free Version: Swap the butter for a high-quality vegan butter stick, like Miyoko’s or Earth Balance. Make sure it’s the stick form, not the spreadable tub. The cookies will be slightly less tender but still delicious.
- Gluten-Free Option: Use a 1:1 gluten-free baking flour blend that contains xanthan gum. I’ve had great results with King Arthur Measure for Measure. The texture will be a bit more tender, but the flavor is spot on.
- Spice It Up or Down: Not a fan of cloves? Leave it out. Want more warmth? Add an extra ¼ teaspoon of ginger. You can also use 2 teaspoons of pumpkin pie spice instead of the individual spices if that’s what you have on hand.
- Pumpkin-Free Snickerdoodles: If you want classic snickerdoodles without the pumpkin, just omit the pumpkin puree and increase the butter to 1 ¼ cups. The cream of tartar will still give you that classic tang.
- Maple Glaze Drizzle: For an extra decadent touch, whisk together ½ cup powdered sugar, 1 tablespoon maple syrup, and 1-2 teaspoons milk until smooth, and drizzle over the cooled cookies. It’s over the top in the best way.
I once tried a version with a pinch of cardamom added to the spice blend, and it was absolutely lovely. Don’t be afraid to experiment — that’s half the fun of baking.
Serving & Storage Suggestions
These cozy pumpkin snickerdoodles are best served slightly warm, when the centers are still soft and the cinnamon-sugar coating is perfectly crunchy. I love them with a mug of hot apple cider or a cozy chai latte. They’re also wonderful alongside a scoop of vanilla ice cream for a simple fall dessert.
For a cookie platter, they pair beautifully with other fall treats like pumpkin bread or apple crisp. The warm spices in the cookies make them a natural match for anything with caramel or chocolate.
Storage: Store these cookies in an airtight container at room temperature for up to 5 days. Place a slice of bread in the container to keep them extra soft — the bread absorbs excess air and releases moisture. Just replace the bread slice every couple of days.
Freezer Instructions: These cookies freeze beautifully. You can freeze the baked cookies in a freezer-safe bag for up to 3 months. Thaw at room temperature for about 30 minutes. Even better, you can freeze the unbaked dough balls. Roll them in the cinnamon-sugar, place them on a baking sheet, and freeze until solid. Then transfer to a freezer bag. Bake from frozen, adding 2-3 minutes to the baking time.
The flavors actually develop and deepen over the first day or two, so don’t be surprised if they taste even better on day two. If you can resist eating them all, that is.
Nutritional Information & Benefits
Here’s the estimated nutritional information per cookie (based on 28 cookies):
- Calories: Approximately 165
- Fat: 8g
- Saturated Fat: 5g
- Carbohydrates: 23g
- Sugar: 13g
- Fiber: 1g
- Protein: 2g
Pumpkin puree is packed with vitamin A and fiber, which adds a tiny nutritional boost to these treats. The cream of tartar is actually a byproduct of winemaking and adds that unique tang without any extra calories. While these are definitely a treat, using real butter and pure pumpkin makes them feel a little more wholesome than a boxed mix.
These cookies are naturally egg-free, making them suitable for those with egg allergies. They can be made dairy-free with the substitution mentioned above. Please note they contain gluten and dairy in the standard version.
Conclusion
These cozy pumpkin snickerdoodles are everything I hoped they would be — soft, chewy, warmly spiced, and absolutely perfect for fall. They capture that bakery magic I was chasing, but with a seasonal twist that makes them feel entirely new.
I hope you give them a try and make them your own. Maybe you’ll add a little extra cinnamon, or skip the nutmeg, or drizzle them with that maple glaze. That’s the beauty of baking — it’s yours to play with. I’d love to hear how they turn out for you.
Drop a comment below and let me know if these cookies brought a little extra coziness to your kitchen. Did you make any changes? Did they disappear as fast as mine always do? Share a photo on Pinterest and tag me — I love seeing your bakes. Until next time, happy baking, and may your kitchen always smell like cinnamon and pumpkin.
Frequently Asked Questions
Can I use pumpkin pie filling instead of pumpkin puree?
No, please don’t. Pumpkin pie filling has added sugar and spices, and it will throw off the texture and sweetness of the cookies. Stick with 100% pure pumpkin puree for the best results.
Why did my cookies turn out flat?
Flat cookies usually mean the dough wasn’t chilled long enough, or the butter was too soft. Make sure you chill the dough for at least 30 minutes. Also, check that your baking soda is fresh — old baking soda loses its potency.
Can I make the dough ahead of time?
Absolutely! You can refrigerate the dough for up to 2 days. Just let it sit at room temperature for about 10 minutes before shaping, as it will be quite firm. You can also freeze the dough balls as mentioned above.
How do I know when the cookies are done baking?
The edges should look set and lightly golden, while the centers will still appear slightly soft and puffed. They’ll continue to set on the hot baking sheet as they cool. If the edges are browning too fast, your oven might be running hot.
Can I double this recipe?
Yes, this recipe doubles beautifully. Just make sure you have enough baking sheets and space in your fridge to chill all the dough. You may need to bake in more batches, which is totally fine.
Pin This Recipe!
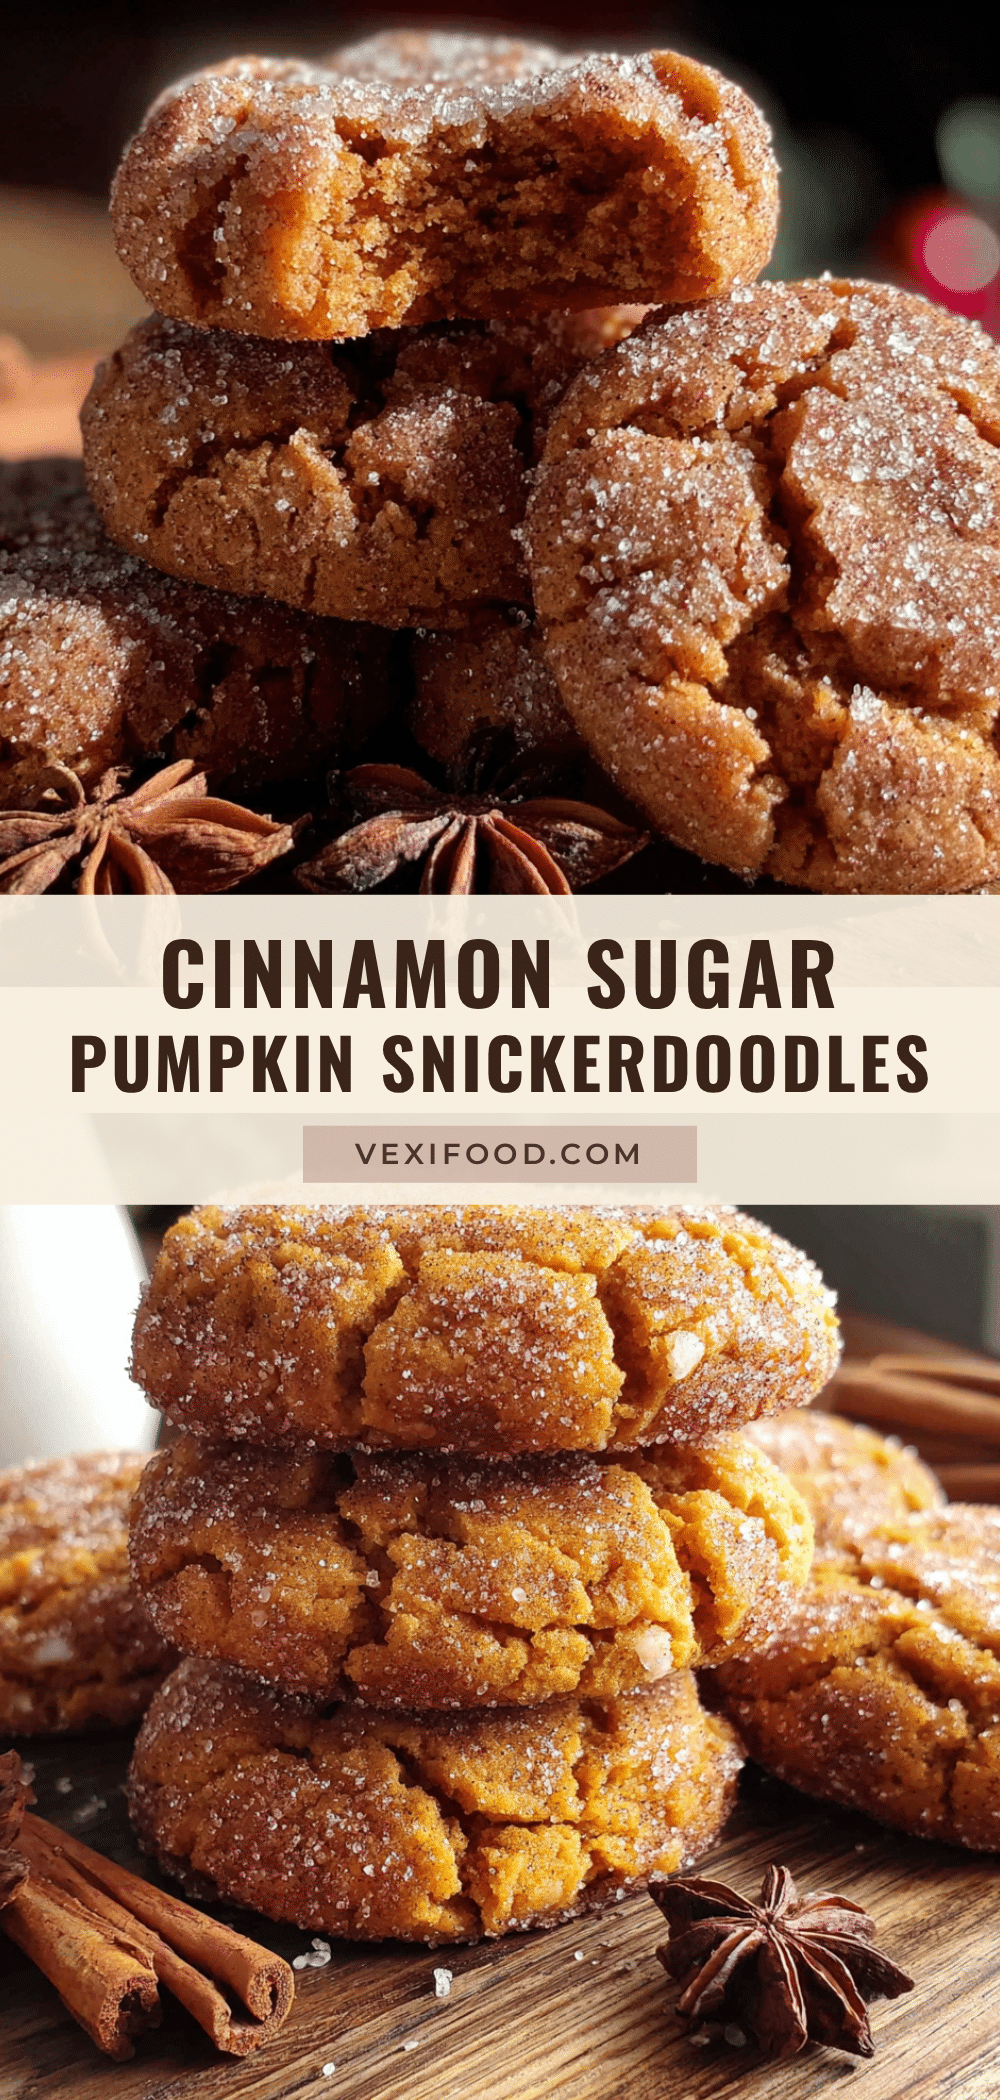
Cozy Pumpkin Snickerdoodles: Easy Egg-Free Fall Cookies Recipe
These cozy pumpkin snickerdoodles are soft, chewy, and warmly spiced with a perfect cinnamon-sugar crunch. They are egg-free and made with simple pantry ingredients, making them the ultimate fall cookie.
- Prep Time: 15 minutes
- Cook Time: 12 minutes
- Total Time: 57 minutes
- Yield: 28 cookies 1x
- Category: Dessert
- Cuisine: American
Ingredients
- 1 cup (2 sticks) unsalted butter, softened
- 1 ½ cups granulated sugar, divided (1 cup for dough, ½ cup for coating)
- ½ cup pumpkin puree (not pumpkin pie filling), patted dry
- 1 teaspoon vanilla extract
- 2 ½ cups all-purpose flour
- 2 teaspoons cream of tartar
- 1 teaspoon baking soda
- 1 tablespoon cornstarch
- ½ teaspoon salt
- 2 teaspoons ground cinnamon (for dough)
- ½ teaspoon ground nutmeg
- ¼ teaspoon ground ginger
- ⅛ teaspoon ground cloves
- 2 tablespoons ground cinnamon (for coating)
Instructions
- Preheat oven to 350°F (175°C). Line two baking sheets with parchment paper or silicone baking mats.
- In a large mixing bowl, beat 1 cup softened butter with 1 cup granulated sugar until light and fluffy, about 3-4 minutes.
- Beat in ½ cup pumpkin puree and 1 teaspoon vanilla extract until fully combined.
- In a separate medium bowl, whisk together 2 ½ cups all-purpose flour, 2 teaspoons cream of tartar, 1 teaspoon baking soda, 1 tablespoon cornstarch, ½ teaspoon salt, 2 teaspoons cinnamon, ½ teaspoon nutmeg, ¼ teaspoon ginger, and ⅛ teaspoon cloves.
- Gradually add the dry ingredients to the wet mixture, mixing on low speed until just combined. Do not overmix.
- Cover the bowl with plastic wrap and refrigerate for at least 30 minutes, or up to 2 hours.
- While dough chills, mix ½ cup granulated sugar with 2 tablespoons cinnamon in a shallow bowl for the coating.
- Using a 1.5-tablespoon cookie scoop or two spoons, portion out the chilled dough and roll into smooth balls.
- Roll each dough ball in the cinnamon-sugar mixture until completely coated. Place on prepared baking sheets, spacing 2 inches apart.
- Bake for 10-12 minutes, rotating pans halfway through. Cookies should look puffed and slightly crackled on top with set edges and soft centers.
- Let cookies rest on the baking sheet for 5 minutes, then transfer to a wire rack to cool completely.
Notes
Pat pumpkin puree with paper towels to remove excess moisture for best texture. Chill dough for at least 30 minutes to prevent spreading. For dairy-free, use vegan butter sticks. For gluten-free, use a 1:1 gluten-free baking flour blend with xanthan gum. Store in an airtight container at room temperature for up to 5 days. Freeze baked cookies for up to 3 months or unbaked dough balls for up to 3 months.
Nutrition
- Serving Size: 1 cookie
- Calories: 165
- Sugar: 13
- Sodium: 95
- Fat: 8
- Saturated Fat: 5
- Carbohydrates: 23
- Fiber: 1
- Protein: 2
Keywords: pumpkin snickerdoodles, egg-free cookies, fall cookies, pumpkin cookies, snickerdoodle recipe, easy cookies