Love this? Save it for later!
Share the inspiration with your friends
It was 11:47 PM on a random Thursday in October, and I had a very specific, almost inconvenient craving for pumpkin cheesecake. The kind of craving that feels urgent, like a thought that won’t let you sleep. I didn’t have a full block of cream cheese, or the energy for a complicated water bath, or honestly, the will to make a dessert that would feed twelve people when it was just me and a quiet apartment. But I had half a can of pumpkin puree, a sad little leftover block of cream cheese hiding in the back of the fridge, and an idea that felt a little reckless at that hour. What if I just scaled everything down? What if I made a tiny, no-fuss version in a loaf pan, with a press-in crust that didn’t require any chilling? The late-night kitchen felt like a different world—quieter, more forgiving, where rules felt more like suggestions. I grabbed a bowl, forgot to set a timer twice, and ended up with something so good I actually texted my sister a photo at 1 AM. That’s the thing about late-night cooking. Sometimes the best ideas come when you’re too tired to overthink. These Cozy Small-Batch Pumpkin Cheesecake Bars are proof that a big craving doesn’t need a big dessert. They’re just enough—and honestly, sometimes that’s exactly what you need.
Why You’ll Love This Recipe
Let me tell you why this little recipe has earned a permanent spot in my fall rotation. It solves all the problems a big cheesecake creates without losing any of the magic.
- Small-Batch Perfection: This is a 6×6-inch pan recipe, not a 9×13. It makes exactly 6 to 9 bars, perfect for a quiet weekend or a small gathering. No leftovers lingering for a week.
- No Water Bath Needed: I tested this three times to make sure. The crust and filling bake together without cracking, thanks to a low oven temperature and a simple trick I’ll share below.
- Simple Ingredients: You likely have everything already. No trip to a specialty store for obscure ingredients. Just pantry staples and a can of pumpkin.
- Perfect for Fall Evenings: This is the dessert you make when you want something cozy but don’t want to commit to a full-size project. It pairs beautifully with coffee, tea, or a glass of cold milk.
- Crowd-Pleaser: I brought these to a small Friendsgiving, and they disappeared before the pie. The combination of spiced pumpkin and creamy cheesecake is just unbeatable.
What makes this version different? It’s the texture. I use a press-in shortbread-style crust that stays buttery and firm, paired with a silky filling that bakes up smooth without any cracks. It’s the kind of dessert that makes you close your eyes after the first bite—comfort food reimagined for a smaller, cozier moment.
What Ingredients You Will Need
This recipe uses simple, wholesome ingredients to deliver that classic pumpkin cheesecake flavor without the fuss. Most of these are pantry staples, especially if you bake during the fall season.
For the Crust
- Graham cracker crumbs (3/4 cup / 85g): You can crush your own from about 6 full sheets, or use store-bought crumbs. I prefer the texture of homemade, but both work.
- Granulated sugar (2 tablespoons / 25g): Just enough to sweeten the crust without making it candy-like.
- Unsalted butter, melted (3 tablespoons / 42g): Use real butter here—it makes the crust hold together better and adds richness. I like using Kerrygold for the flavor.
- Pinch of salt: Balances the sweetness and enhances the buttery flavor.
For the Cheesecake Filling
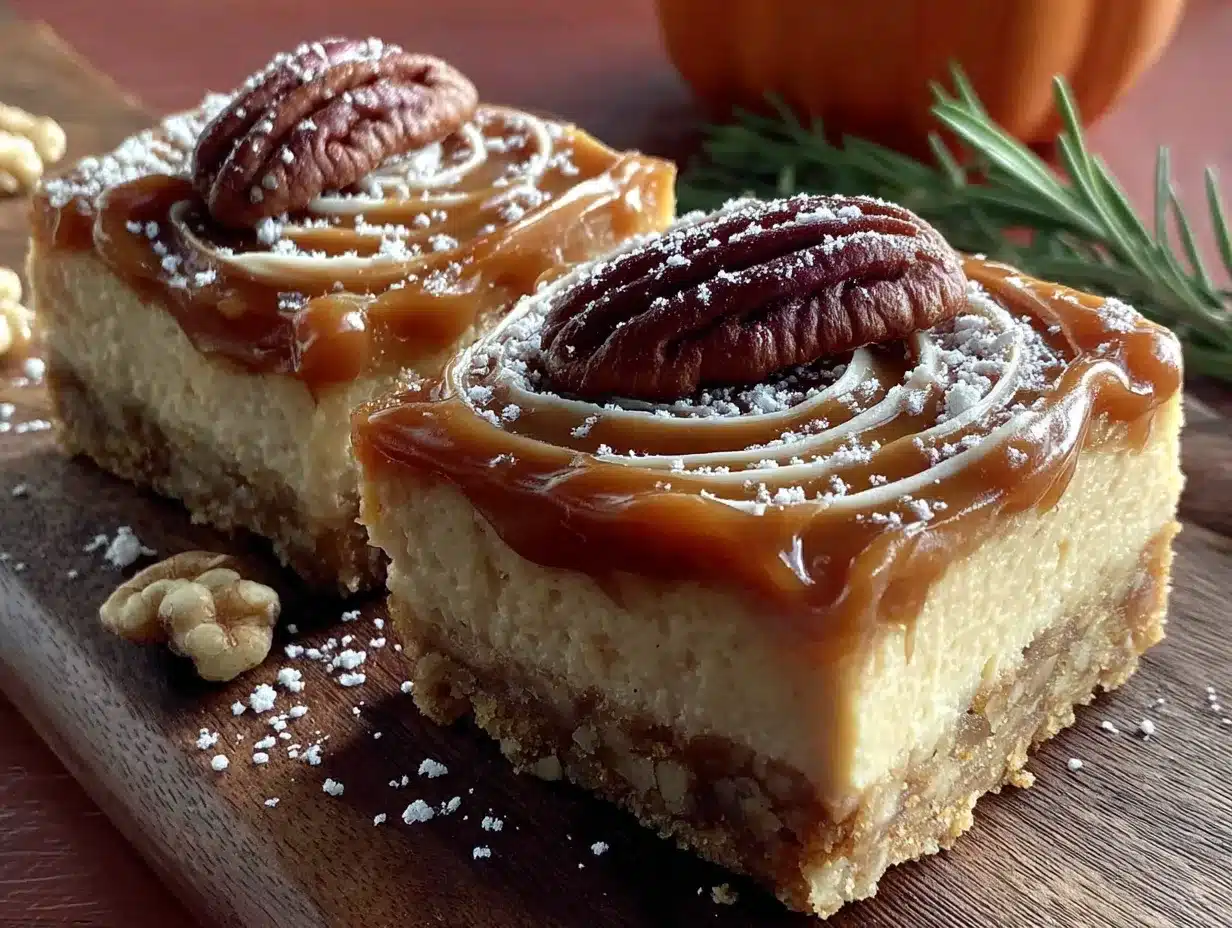
- Cream cheese, softened (8 ounces / 226g): Use full-fat block cream cheese, not the spreadable kind in a tub. Let it sit at room temperature for at least 30 minutes for a smooth filling.
- Granulated sugar (1/4 cup / 50g): Sweetens the cheesecake without overpowering the pumpkin.
- Pumpkin puree (1/2 cup / 120g): Use 100% pure pumpkin puree, not pumpkin pie filling. Libby’s is my go-to brand for consistent texture.
- Large egg (1): Room temperature is best—it incorporates more evenly into the filling.
- Sour cream (2 tablespoons / 30g): Adds tanginess and creates a creamier texture. Greek yogurt works as a substitute.
- Vanilla extract (1 teaspoon): Pure vanilla extract makes a difference here. Avoid imitation if you can.
- Pumpkin pie spice (1 teaspoon): You can use store-bought or make your own with cinnamon, nutmeg, ginger, and cloves.
- Cinnamon (1/2 teaspoon): Adds extra warmth to the pumpkin flavor.
For the Topping (Optional but Recommended)
- Whipped cream (for serving): Homemade or store-bought. A dollop on each bar takes it over the top.
- Caramel sauce (for drizzling): Adds a lovely sweetness that pairs with the spices.
Equipment Needed
- 6×6-inch baking pan or 8×4-inch loaf pan: This is the key to the small-batch approach. I use a metal 6×6-inch square pan for even baking. A glass dish works too, but you may need to add 5 minutes to the bake time.
- Parchment paper: Line the pan with two overhanging strips for easy removal. This is non-negotiable—don’t skip it.
- Mixing bowls (2 medium): One for the crust, one for the filling.
- Electric hand mixer or stand mixer: A hand mixer is fine for this small batch. You can also mix by hand with a whisk, but the texture won’t be as smooth.
- Spatula: For scraping the bowl clean and smoothing the filling.
- Measuring cups and spoons: Accurate measurements matter in small batches—too much of anything can throw off the balance.
- Ziploc bag or rolling pin: For crushing graham crackers if you’re making your own crumbs.
I’ve made these bars in a disposable foil pan when traveling, and they turned out just fine. The key is to not overfill the pan—leave a little room for the filling to expand slightly.
Preparation Method
- Preheat and Prep: Preheat your oven to 325°F (163°C). Line your 6×6-inch pan with parchment paper, leaving a 2-inch overhang on two opposite sides. This will help you lift the bars out cleanly later.
- Make the Crust: In a medium bowl, combine the graham cracker crumbs, granulated sugar, and a pinch of salt. Pour in the melted butter and stir with a fork until the mixture looks like wet sand and holds together when pressed. Transfer to the prepared pan and press firmly into an even layer. I use the bottom of a measuring cup to get it really flat. Bake for 8 minutes at 325°F, then set aside to cool slightly while you make the filling. The crust should be lightly golden and fragrant.
- Make the Cheesecake Filling: In a large bowl, beat the softened cream cheese with an electric mixer on medium speed until smooth and creamy, about 1 minute. Scrape down the sides of the bowl. Add the granulated sugar and beat for another 30 seconds until combined. Add the pumpkin puree, egg, sour cream, vanilla extract, pumpkin pie spice, and cinnamon. Beat on low speed until just combined—don’t overmix, or the filling can become too airy and crack during baking. Scrape the bowl one more time to ensure everything is incorporated.
- Assemble and Bake: Pour the cheesecake filling over the pre-baked crust. Use a spatula to spread it evenly to the edges. Tap the pan gently on the counter a few times to release any air bubbles. Bake at 325°F for 28 to 32 minutes, or until the edges are set and the center is slightly jiggly—like a firm Jell-O. It should not be liquidy. The top should look matte, not shiny. If you see any cracks forming, that’s a sign it’s slightly overbaked. Remove from the oven and let it cool completely on a wire rack, about 1 hour. Then refrigerate for at least 3 hours, or preferably overnight. This chilling step is crucial for clean slices.
- Slice and Serve: Once chilled, use the parchment overhang to lift the entire block out of the pan. Place it on a cutting board and use a sharp knife to slice into 6 to 9 bars. Wipe the knife clean between cuts for neat edges. Serve cold or at room temperature, topped with whipped cream and a drizzle of caramel sauce if you like.
One thing I learned the hard way—don’t rush the cooling process. I once tried to speed it up by putting the pan in the freezer, and the texture turned out slightly grainy. Patience pays off here.
Cooking Tips & Techniques
After testing this recipe several times, I’ve picked up a few tricks that make a real difference.
- Room Temperature Ingredients Are Non-Negotiable: Cold cream cheese creates lumps that are nearly impossible to smooth out. Let your cream cheese, egg, and sour cream sit on the counter for 30 minutes before starting. A smooth filling bakes into a smooth bar.
- Don’t Overmix the Filling: Once you add the egg, mix on low speed and stop as soon as it’s incorporated. Overmixing incorporates too much air, which can cause the cheesecake to puff up and then crack as it cools.
- The Jiggle Test: The center of the cheesecake should jiggle slightly when you gently shake the pan. If it’s completely firm, it’s overbaked. If it’s liquidy, it needs more time. Look for a 2-inch diameter of jiggle in the very center.
- Use a Sharp Knife for Clean Slices: Run the knife under hot water, dry it, then slice. Wipe the blade between each cut. This gives you those beautiful, clean edges you see in photos.
I once forgot to add the sour cream entirely, and the bars turned out a bit denser and less creamy. They were still good, but not as silky. So don’t skip it!
Variations & Adaptations
This recipe is easy to adapt for different needs and preferences.
- Gluten-Free Option: Use gluten-free graham crackers or crushed gluten-free shortbread cookies for the crust. The rest of the recipe is naturally gluten-free.
- Dairy-Free Adaptation: Use dairy-free cream cheese (like Kite Hill or Tofutti) and substitute the sour cream with a dairy-free yogurt or coconut cream. The texture will be slightly less firm but still delicious.
- Spice It Up: Add a pinch of cayenne pepper or black pepper to the filling for a subtle warmth that pairs beautifully with the pumpkin. I tried this on a whim and loved the unexpected kick.
- Chocolate Swirl Variation: Melt 2 tablespoons of dark chocolate chips and drizzle it over the filling before baking. Use a knife to gently swirl it in for a marbled effect.
- Nutty Crust: Replace half the graham cracker crumbs with finely chopped pecans or walnuts for a richer, crunchier base.
My personal favorite variation is adding a tablespoon of bourbon to the filling. It adds a warm, caramel-like depth that feels very grown-up. Just reduce the sour cream by a tablespoon to keep the liquid balance right.
Serving & Storage Suggestions
These bars are best served chilled, straight from the fridge, with a generous dollop of whipped cream and a drizzle of caramel sauce. The cold, creamy texture contrasts beautifully with the crunchy crust. For a warmer presentation, let them sit at room temperature for 10 minutes before serving—the flavors become more pronounced.
They pair wonderfully with a hot cup of chai, a spiced latte, or even a glass of dessert wine like a late-harvest Riesling. For a full fall dessert spread, serve them alongside a warm apple crisp or a slice of pumpkin bread.
Storage: Keep the bars in an airtight container in the refrigerator for up to 5 days. They actually taste better on day two as the flavors meld together. To freeze, wrap individual bars tightly in plastic wrap, then place them in a freezer-safe bag. They’ll keep for up to 2 months. Thaw overnight in the fridge before serving. I don’t recommend microwaving them—it ruins the texture. Let them thaw naturally.
If you’re making these for a gathering, prepare them a day ahead. The extra chilling time makes for cleaner slices and a more developed flavor. Trust me, your future self will thank you.
Nutritional Information & Benefits
Here’s an approximate nutritional breakdown per bar (based on 9 servings):
- Calories: 245
- Fat: 16g
- Carbohydrates: 22g
- Protein: 5g
- Fiber: 1g
- Sugar: 14g
Pumpkin is packed with vitamin A, which supports eye health and immune function. It’s also a good source of fiber, which helps with digestion. The cream cheese provides calcium and protein, making this a more balanced dessert option. While it’s still a treat, it’s a more wholesome one than many store-bought alternatives. Plus, the small-batch size naturally encourages portion control—you’re not tempted by a full 9×13 pan sitting on the counter.
For those watching their sugar intake, you can reduce the granulated sugar to 3 tablespoons in the filling without compromising the texture too much. The pumpkin and spices provide enough natural sweetness.
Conclusion
These Cozy Small-Batch Pumpkin Cheesecake Bars are exactly what fall dessert should be—warm, spiced, creamy, and just enough to satisfy without overwhelming. They came from a late-night craving and a willingness to break the rules, and they’ve become a tradition I look forward to every October. The best part? You can make them on a whim, with ingredients you already have, and feel like you’ve created something special.
I’d love to hear how yours turn out. Did you try a variation? Add a swirl? Share your creation in the comments below, and don’t forget to tag me if you post a photo. This recipe is meant to be shared, even if it’s just with yourself on a quiet evening. Go ahead—treat yourself to a little fall magic.
Frequently Asked Questions
Can I use a different pan size?
Yes, you can use an 8×4-inch loaf pan instead of a 6×6-inch square pan. The bake time will be similar, but keep an eye on it starting at 25 minutes. The bars will be slightly thicker.
Can I make these ahead of time?
Absolutely. These bars actually taste better the next day. Prepare them up to 2 days in advance and store them in the refrigerator. Just add the whipped cream and caramel sauce right before serving.
Can I use pumpkin pie filling instead of pumpkin puree?
No, I don’t recommend it. Pumpkin pie filling already contains sugar and spices, which will throw off the balance of the recipe. Stick with 100% pure pumpkin puree for the best results.
Why did my cheesecake crack?
Overbaking is the most common cause. The center should still jiggle slightly when you remove it from the oven. Also, make sure your ingredients are at room temperature and don’t overmix the filling. A water bath isn’t necessary for this small batch, but if you’re worried, place a small pan of hot water on the rack below the cheesecake while it bakes.
Can I freeze these bars?
Yes, they freeze beautifully. Wrap individual bars tightly in plastic wrap, then place them in a freezer-safe bag. They’ll keep for up to 2 months. Thaw overnight in the refrigerator before serving.
Pin This Recipe!
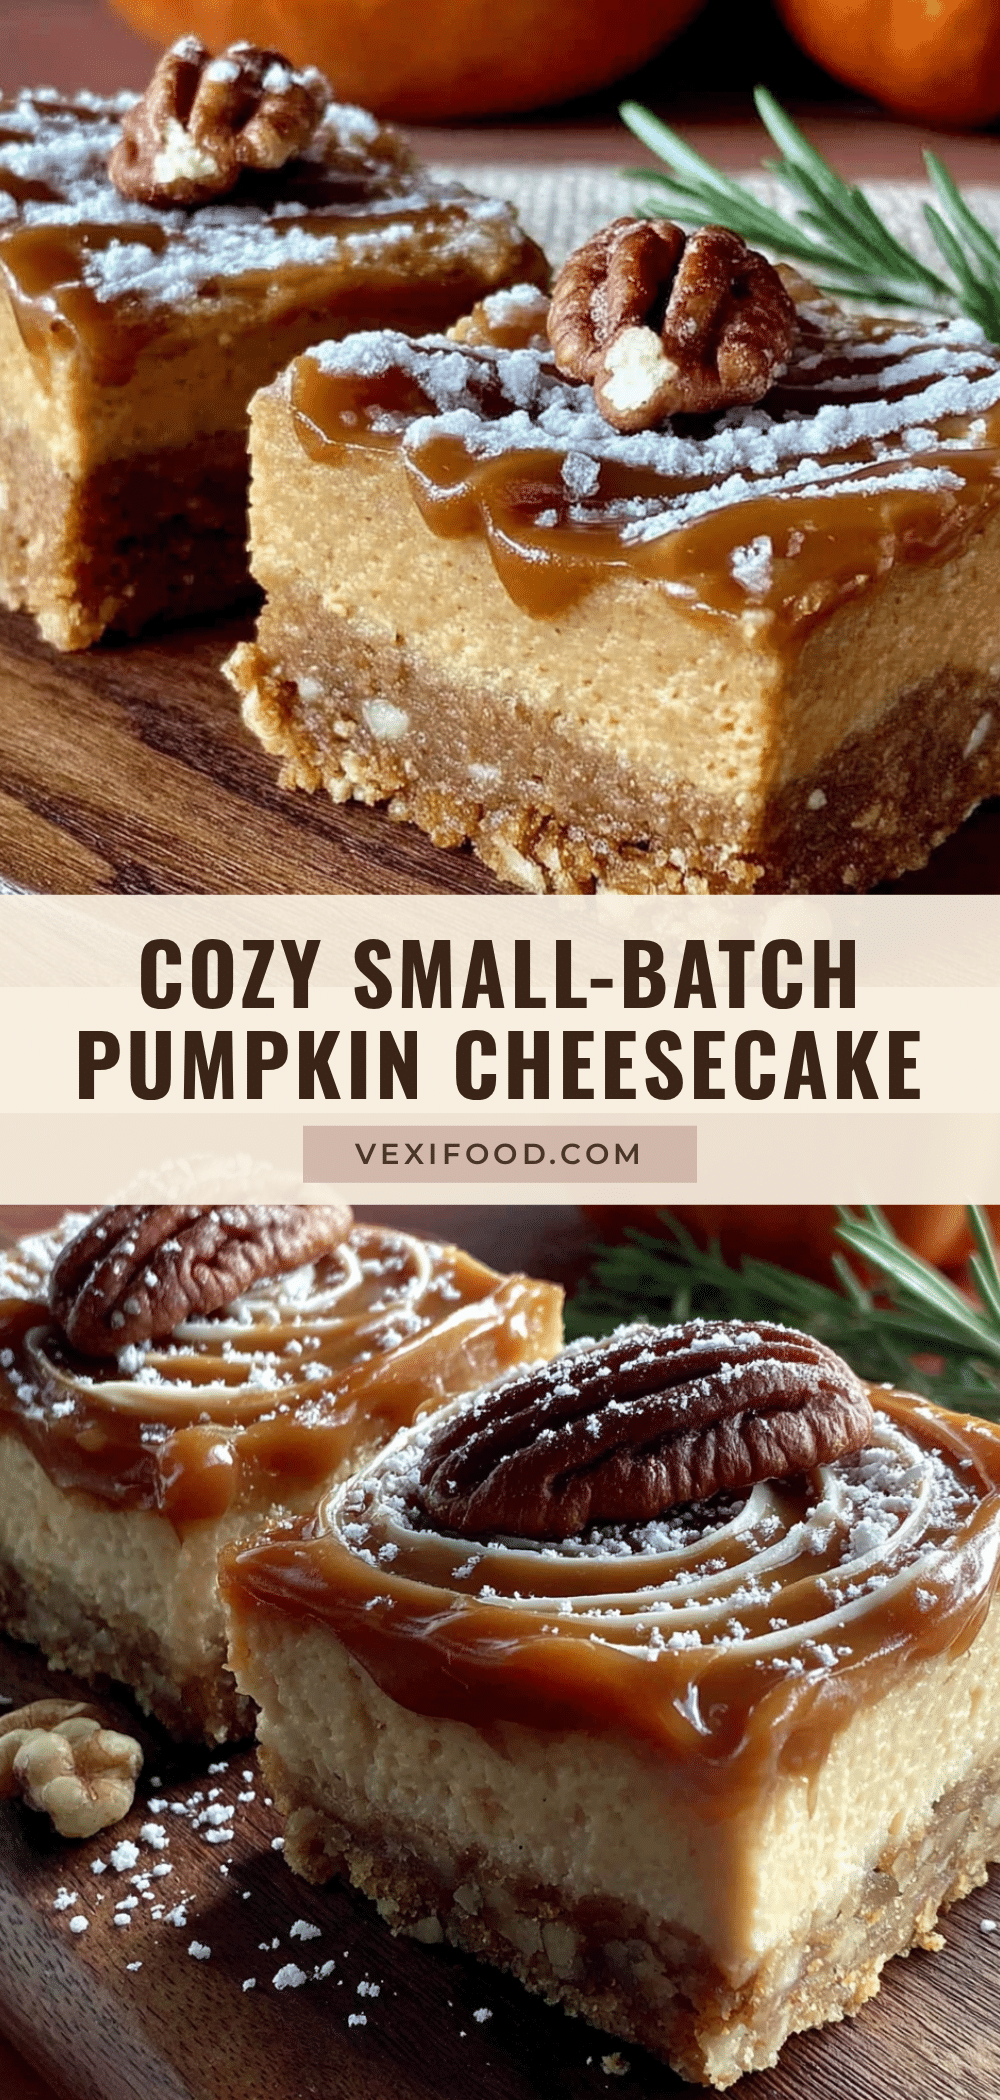
Cozy Small-Batch Pumpkin Cheesecake Bars: Easy Fall Dessert
These small-batch pumpkin cheesecake bars are the perfect fall dessert for when you want something cozy but don’t want to commit to a full-size project. Made in a 6×6-inch pan, they feature a buttery graham cracker crust and a silky, spiced pumpkin cheesecake filling that bakes up smooth without a water bath.
- Prep Time: 15 minutes
- Cook Time: 30 minutes
- Total Time: 45 minutes
- Yield: 6 to 9 bars 1x
- Category: Dessert
- Cuisine: American
Ingredients
- 3/4 cup (85g) graham cracker crumbs
- 2 tablespoons (25g) granulated sugar
- 3 tablespoons (42g) unsalted butter, melted
- Pinch of salt
- 8 ounces (226g) cream cheese, softened
- 1/4 cup (50g) granulated sugar
- 1/2 cup (120g) pumpkin puree
- 1 large egg, room temperature
- 2 tablespoons (30g) sour cream
- 1 teaspoon vanilla extract
- 1 teaspoon pumpkin pie spice
- 1/2 teaspoon cinnamon
- Whipped cream (for serving, optional)
- Caramel sauce (for drizzling, optional)
Instructions
- Preheat your oven to 325°F (163°C). Line a 6×6-inch pan with parchment paper, leaving a 2-inch overhang on two opposite sides.
- Make the crust: In a medium bowl, combine graham cracker crumbs, 2 tablespoons sugar, and a pinch of salt. Pour in melted butter and stir with a fork until the mixture looks like wet sand and holds together when pressed. Transfer to the prepared pan and press firmly into an even layer. Bake for 8 minutes, then set aside to cool slightly.
- Make the cheesecake filling: In a large bowl, beat the softened cream cheese with an electric mixer on medium speed until smooth and creamy, about 1 minute. Scrape down the sides. Add 1/4 cup sugar and beat for another 30 seconds. Add pumpkin puree, egg, sour cream, vanilla extract, pumpkin pie spice, and cinnamon. Beat on low speed until just combined—do not overmix.
- Assemble and bake: Pour the cheesecake filling over the pre-baked crust. Spread evenly to the edges. Tap the pan gently on the counter a few times to release air bubbles. Bake at 325°F for 28 to 32 minutes, or until the edges are set and the center is slightly jiggly (like firm Jell-O). The top should look matte, not shiny.
- Cool and chill: Remove from the oven and let cool completely on a wire rack, about 1 hour. Then refrigerate for at least 3 hours, or preferably overnight.
- Slice and serve: Use the parchment overhang to lift the entire block out of the pan. Place on a cutting board and slice into 6 to 9 bars using a sharp knife. Wipe the knife clean between cuts for neat edges. Serve cold or at room temperature, topped with whipped cream and a drizzle of caramel sauce if desired.
Notes
Don’t rush the cooling process—chilling overnight yields the cleanest slices. For a gluten-free version, use gluten-free graham crackers. For a dairy-free version, use dairy-free cream cheese and yogurt. Add a tablespoon of bourbon to the filling for a grown-up twist.
Nutrition
- Serving Size: 1 bar
- Calories: 245
- Sugar: 14
- Sodium: 200
- Fat: 16
- Saturated Fat: 9
- Carbohydrates: 22
- Fiber: 1
- Protein: 5
Keywords: pumpkin cheesecake bars, small batch cheesecake, fall dessert, pumpkin dessert, easy cheesecake bars, no water bath cheesecake



