Love this? Save it for later!
Share the inspiration with your friends
This was supposed to be a batch of citrus marmalade. I had the Seville oranges, the sugar, the fancy sterilized jars, and a whole Saturday afternoon blocked off. But somewhere between the third cup of coffee and the realization that my candy thermometer had been living in the back of a drawer since 2019, things went sideways. The pectin never set. The mixture stayed runny. And I was standing there, staring at a pot of beautiful, fragrant orange syrup that was absolutely not jam. I was already running late for a dinner I’d promised to bring dessert to. So I threw the slices onto a sheet pan, cranked the oven to low, and figured I’d salvage something. What came out was nothing like the plan — and better. Those chewy, jewel-toned slices became the star of the evening. People picked them off the platter before the actual dessert even made it to the table. Honestly, I’ve never gone back to making the marmalade. These easy oven-dried orange slices are my accidental masterpiece, and I bet once you try them, you’ll understand why I keep a bag of oranges in my fruit bowl at all times. Maybe you’ve had that moment where a kitchen flop turns into a happy discovery — this is mine.
Why You’ll Love This Recipe
Let’s be real — most garnishes are decorative afterthoughts that get pushed to the side of the plate. These easy oven-dried orange slices are different. They’re edible, beautiful, and shockingly simple to make.
- Quick & Easy : The active prep time is under 10 minutes. The oven does the heavy lifting while you do literally anything else.
- Simple Ingredients : You need oranges and nothing else. No fancy syrups, no special sugars, no preservatives.
- Perfect for Weeknights : Pop them in the oven while you’re making dinner, and by the time you’ve eaten, you’ve got a garnish ready for tea, cocktails, or tomorrow’s yogurt bowl.
- Crowd-Pleaser : I’ve brought these to holiday parties and casual get-togethers, and people always ask for the recipe.
- Unbelievably Versatile : They’re not just for looks — they add a concentrated burst of citrus flavor to everything from hot tea to baked chicken.
What makes this recipe different from every other dried citrus tutorial out there is the timing and temperature I’ve dialed in after a dozen batches. No burnt edges, no leathery slices — just perfectly chewy, translucent rounds that keep their color. This isn’t just another version. It’s the one that actually works on a busy Tuesday night.
What Ingredients You Will Need
This recipe keeps things refreshingly simple — the ingredient list is short, but choosing the right oranges makes all the difference. Here’s what you’ll need and why each element matters.
- Fresh oranges, 3-4 medium (look for firm, heavy fruit with smooth skin — navel oranges are my go-to for their sweetness and low seed count; blood oranges make stunning red slices)
- Optional: Granulated sugar, 1-2 tablespoons (for a light candied finish; I skip this when using naturally sweet oranges like Cara Cara or Sumo citrus)
- Optional: Cinnamon stick, 1 (for a warm, spiced aroma — I add this to the baking tray when making slices for holiday tea)
- Optional: Vanilla extract, 1 teaspoon (mixed into a simple syrup if you’re going for a sweeter, dessert-style slice; I’ve done this for cocktail garnishes and it’s lovely)
I’ve tried this with organic and conventional oranges, and honestly, the main difference is the peel. Organic oranges have a thinner, more tender skin that dries beautifully without turning tough. If you’re using conventional oranges, just give them a good scrub under warm water to remove any wax coating. For the best texture, look for oranges that feel heavy for their size — that means they’re juicy and fresh. Avoid any with soft spots or wrinkled skin, as those will dry unevenly.
If you want to get creative, you can swap in lemons, limes, or grapefruit using the exact same method. Just adjust the slice thickness — thinner for limes, slightly thicker for grapefruit. I’ve also used Meyer lemons in the winter when they’re in season, and the floral notes are incredible in iced tea.
Equipment Needed
You don’t need a dehydrator or any fancy gadgets for this recipe. Here’s what actually works:
- Sharp chef’s knife or mandoline (a mandoline gives you perfectly even slices, but a good knife works fine — I’ve used both; just go slow and keep your fingers safe)
- Cutting board (preferably one with a groove to catch juice)
- Baking sheet, 1 large (rimmed is best to catch any drips)
- Parchment paper or silicone baking mat (parchment is easier for cleanup; silicone mats can sometimes leave a pattern on the slices)
- Wire cooling rack (optional but helpful for airflow — I place it on the baking sheet for more even drying)
- Paper towels (for blotting the slices before baking)
- Airtight container (for storing the finished slices — a mason jar works perfectly)
If you don’t have a mandoline, don’t sweat it. I’ve made dozens of batches using just a sharp chef’s knife. The key is to keep your slices consistent — about 1/4-inch thick is the sweet spot. Too thin and they burn; too thick and they take forever to dry.
Preparation Method
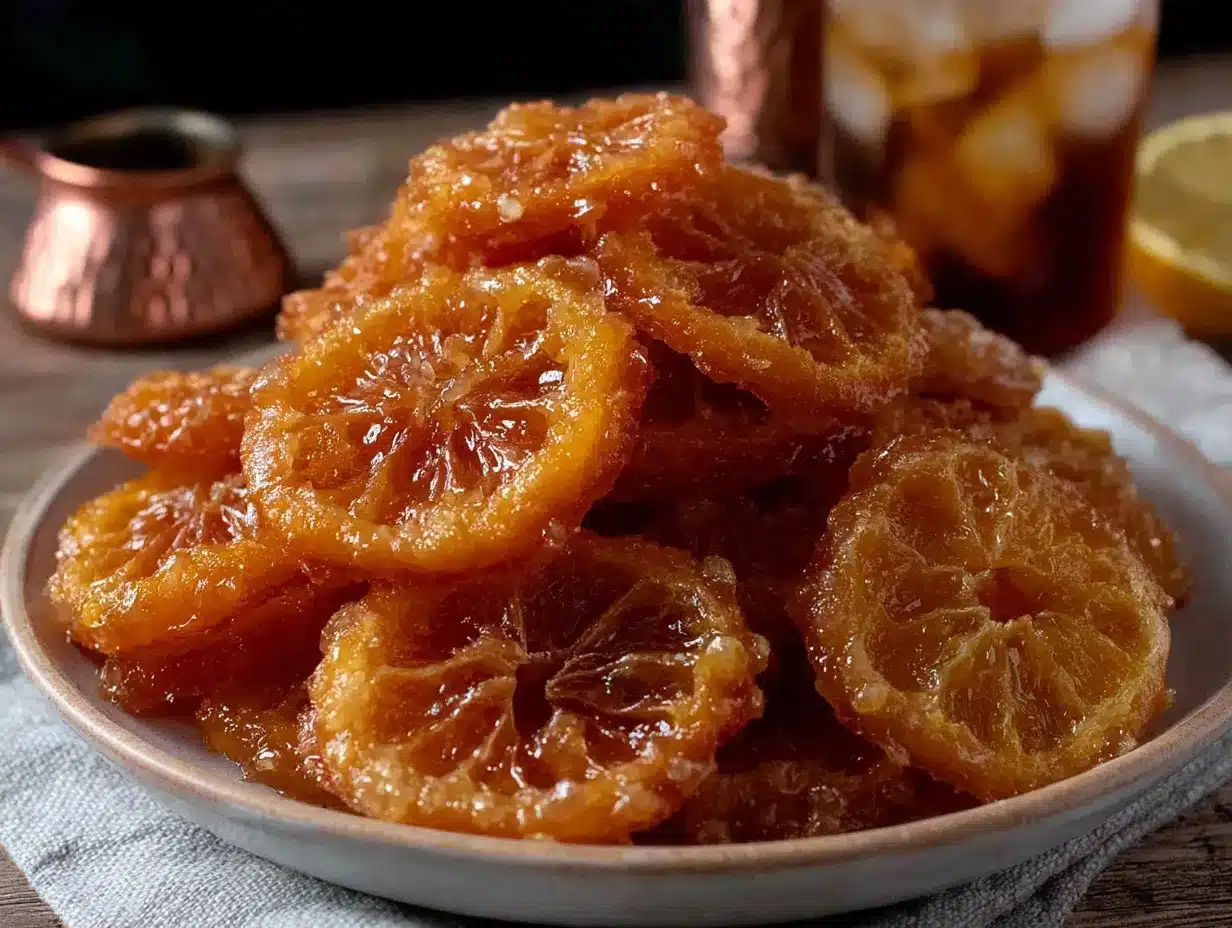
Follow these steps, and you’ll have beautiful, chewy orange slices in a few hours. The process is almost entirely hands-off.
- Preheat your oven to 200°F (93°C). This low temperature is crucial — anything higher will cook the oranges instead of drying them, leading to bitter, burnt edges. I learned this the hard way after a batch at 250°F came out looking like charcoal coasters.
- Wash and dry the oranges thoroughly. Scrub them under warm water to remove any wax or residue, then pat them completely dry with a clean towel. Any moisture on the skin will steam the slices instead of drying them.
- Slice the oranges into 1/4-inch (6mm) rounds. Use a sharp knife or mandoline. Try to keep the slices as even as possible — thickness matters for consistent drying. Discard the end pieces (they’re mostly peel and dry poorly).
- Blot the slices with paper towels. Lay the slices flat on a double layer of paper towels, then press another paper towel gently on top to absorb excess juice. This step is non-negotiable — too much juice means soggy slices that take forever to dry.
- Arrange the slices on your baking sheet. If you’re using a wire rack, place it on the sheet and arrange the slices in a single layer. If you’re going directly on parchment, leave a little space between each slice for air to circulate. Don’t overlap them.
- Bake for 2.5 to 3 hours. Flip the slices gently with a spatula halfway through. The slices are done when they feel dry to the touch but still slightly pliable — they should bend without cracking. If they snap, they’re overdone. If they feel sticky or wet, give them another 30 minutes.
- Let them cool completely on the baking sheet. They’ll continue to firm up as they cool. Don’t skip this step — moving them while they’re warm can cause them to tear or stick together.
- Store in an airtight container. Layer them between sheets of parchment paper if you’re stacking them. They’ll keep for up to 2 weeks at room temperature, or up to 3 months in the refrigerator.
A quick note: your kitchen will smell absolutely amazing during this process. It’s like a natural air freshener that also happens to produce a beautiful garnish. I’ve started making these on Sunday afternoons just for the scent alone.
Cooking Tips & Techniques
After more batches than I care to count, here’s what I’ve learned about getting perfect results every time.
Don’t rush the temperature. I know it’s tempting to crank the oven to 350°F and hope for the best, but that’s a one-way ticket to burnt sugar and bitter peel. Low and slow is the only way. Think of it as a long, gentle hug for the oranges.
Blotting is not optional. I used to skip this step because I was impatient, and my slices took nearly 5 hours to dry. The excess juice creates steam that slows down the whole process. Take the extra 30 seconds to blot them — it saves you an hour of baking time.
Watch for hot spots in your oven. Every oven has them. I rotate my baking sheet halfway through and also swap the racks if one side is drying faster than the other. You’ll know you have a hot spot if the slices on one side are drying twice as fast as the others.
Use a mandoline for uniformity. I resisted buying one for years, but honestly, it’s a game-changer for this recipe. Even slices mean even drying. If you’re using a knife, take your time and aim for consistent thickness — it really does matter.
Don’t over-dry them. The perfect texture is chewy, not crunchy. They should still have a little give when you bend them. Over-dried slices are brittle and tend to shatter when you try to use them as a garnish. Trust the pliability test.
Variations & Adaptations
Once you’ve mastered the basic method, there are so many ways to play with this recipe. Here are a few I’ve tried and loved.
Candied Orange Slices — Before baking, brush the slices lightly with a simple syrup (equal parts sugar and water, simmered until dissolved) and sprinkle with a little extra sugar. They’ll come out with a lovely crystallized coating that’s perfect for dessert platters. I did this for a holiday cookie exchange and they disappeared faster than the actual cookies.
Spiced Tea Slices — Add a cinnamon stick, a few star anise, and a vanilla bean to the baking sheet. The spices infuse the slices as they dry, creating a beautiful flavor for hot tea. I keep a jar of these on my counter all winter long.
Savory Orange Slices — Skip the sugar entirely and sprinkle the slices with flaky sea salt and a pinch of smoked paprika before baking. These are incredible in cocktails or as a garnish for roasted pork or chicken. I served them at a dinner party last month and people couldn’t figure out what made the dish so interesting.
Citrus Medley — Don’t stop at oranges. Combine orange, lemon, lime, and grapefruit slices on the same tray. Each citrus dries at a slightly different rate, so keep an eye on them and remove the thinner slices (limes) earlier. The mix of colors is stunning in a glass jar on the counter.
Dehydrator Method — If you own a dehydrator, set it to 135°F (57°C) and dry for 6-8 hours. The result is even more consistent than the oven method, but it takes longer. I use my oven more often because I don’t have to plan that far ahead.
Serving & Storage Suggestions
These slices are incredibly versatile, and I’ve found more uses for them than I ever expected.
For tea — Drop one or two slices into a mug of hot water or black tea. They rehydrate slightly and release a beautiful citrus flavor. I do this every morning with my Earl Grey, and it’s become a ritual I genuinely look forward to.
For cocktails — Use them as a garnish for gin and tonics, margaritas, or even a simple glass of sparkling water. They look gorgeous floating in the glass, and they add a subtle citrus note without making the drink too sweet.
For baked goods — Chop them finely and fold into muffin batter, scone dough, or cookie recipes. They add concentrated orange flavor without extra moisture. I’ve done this with my basic scone recipe, and the results are fantastic.
For gift-giving — Layer the slices in a mason jar with a ribbon tied around the lid. They make thoughtful, homemade gifts that look much more impressive than they are to make.
Storage — Keep them in an airtight container at room temperature for up to 2 weeks. For longer storage, refrigerate them for up to 3 months. If they lose their pliability, you can pop them in a 200°F oven for 10 minutes to refresh them.
One thing I’ve noticed — the flavor actually deepens after a day or two. The slices mellow and become more aromatic. So don’t worry if you make them ahead of time. They only get better.
Nutritional Information & Benefits
These orange slices are a surprisingly healthy addition to your kitchen routine. Here’s the breakdown per slice (based on a medium navel orange, without added sugar):
- Calories: 15-20
- Carbohydrates: 4g
- Fiber: 1g
- Vitamin C: 15% of the daily value
- Natural sugars: 3g
Oranges are packed with vitamin C, which supports immune health and collagen production. They also contain flavonoids like hesperidin, which have anti-inflammatory properties. The drying process concentrates these nutrients, so even a small slice delivers a decent antioxidant boost.
If you’re watching your sugar intake, you can skip the optional sugar coating entirely — the natural sweetness of the oranges is plenty for most uses. The slices are naturally gluten-free, vegan, and paleo-friendly, making them a great option for a wide range of dietary needs.
Honestly, I love that something this beautiful and useful is also genuinely good for you. It’s rare to find a garnish that’s both stunning and nutritious.
Conclusion
These easy oven-dried orange slices started as a kitchen accident, but they’ve become one of my most-used recipes. They’re beautiful, versatile, and so simple that you’ll wonder why you ever bought dried citrus from the store. Whether you’re dressing up a cup of tea, impressing guests with a cocktail garnish, or just want to make your kitchen smell amazing, this recipe delivers every time.
I’d love to hear how you use them. Do you add them to tea, cocktails, or baked goods? Maybe you’ve found a use I haven’t thought of yet. Drop a comment below and share your favorite way to enjoy these slices. And if you make a batch, tag me in your photos — I always love seeing your creations.
Happy drying, friend. Your kitchen is about to smell incredible.
Frequently Asked Questions
Can I use a dehydrator instead of an oven?
Absolutely. Set your dehydrator to 135°F (57°C) and dry the slices for 6-8 hours. The result is even more consistent than the oven method, but it takes longer. I use my oven when I’m short on time and the dehydrator when I’m making a big batch for gifts.
How do I prevent the slices from sticking to the baking sheet?
Use parchment paper or a silicone baking mat. If you’re using parchment, make sure it’s a good quality brand — cheaper parchment can sometimes stick. I’ve never had an issue with parchment paper sticking to the slices.
Can I use these in baking?
Yes, but chop them finely first. Whole slices can be too chewy in baked goods. I’ve used them in scones, muffins, and even a citrus olive oil cake. Just reduce the liquid in the recipe slightly to account for the moisture the slices will release.
How do I know when they’re done?
The slices should feel dry to the touch but still slightly pliable. They should bend without cracking. If they snap, they’re overdone. If they feel sticky or wet, give them another 30 minutes. The pliability test is the most reliable indicator.
Can I use other citrus fruits?
Absolutely. Lemons, limes, and grapefruit all work beautifully with the same method. Just adjust the slice thickness — thinner for limes, slightly thicker for grapefruit. Keep an eye on them because different citrus fruits dry at slightly different rates.
Pin This Recipe!
Easy Oven-Dried Orange Slices: The Best Homemade Recipe

These easy oven-dried orange slices are an accidental masterpiece—chewy, jewel-toned, and perfect for garnishing tea, cocktails, or baked goods. With just 10 minutes of prep and a low oven, you’ll have a versatile, crowd-pleasing treat that’s healthier than store-bought.
- Prep Time: 10 minutes
- Cook Time: 2.5 to 3 hours
- Total Time: 2 hours 40 minutes to 3 hours 10 minutes
- Yield: Approximately 20-30 slices (depending on orange size) 1x
- Category: Garnish / Snack
- Cuisine: American
Ingredients
- 3–4 medium fresh oranges (navel, blood, or Cara Cara)
- 1–2 tablespoons granulated sugar (optional, for candied finish)
- 1 cinnamon stick (optional, for spiced aroma)
- 1 teaspoon vanilla extract (optional, for dessert-style slices)
Instructions
- Preheat your oven to 200°F (93°C).
- Wash and dry the oranges thoroughly. Scrub under warm water to remove wax, then pat completely dry.
- Slice the oranges into 1/4-inch (6mm) rounds using a sharp knife or mandoline. Discard the end pieces.
- Blot the slices with paper towels to absorb excess juice—this is crucial for even drying.
- Arrange the slices in a single layer on a parchment-lined baking sheet or on a wire rack set over a baking sheet. Do not overlap.
- Bake for 2.5 to 3 hours, flipping gently halfway through. Slices are done when dry to the touch but still pliable (they should bend without cracking).
- Let them cool completely on the baking sheet—they will firm up as they cool.
- Store in an airtight container, layered between parchment paper if stacking. Keep at room temperature for up to 2 weeks or refrigerate for up to 3 months.
Notes
Blotting the slices is non-negotiable—it prevents soggy slices and reduces drying time. Use a mandoline for even slices. Watch for oven hot spots and rotate the pan halfway through. The perfect texture is chewy, not crunchy; slices should bend without cracking. Flavor deepens after a day or two.
Nutrition
- Serving Size: 1 slice
- Calories: 1520
- Sugar: 3
- Carbohydrates: 4
- Fiber: 1
Keywords: dried orange slices, oven-dried oranges, citrus garnish, homemade dried fruit, easy orange slices, candied orange slices, tea garnish, cocktail garnish



