Love this? Save it for later!
Share the inspiration with your friends
It was 11:47 PM on a random Wednesday in mid-October, and I had this overwhelming need to make something that looked ridiculous and tasted amazing. I didn’t have any fancy Halloween cookie cutters or those elaborate cake pop molds everyone uses for spooky treats. But I had a box of Rice Krispies that was about to expire, a bag of marshmallows I’d bought for camping that never happened, and—this is the part that mattered—a jar of those wiggly candy eyes I’d grabbed on a whim at the dollar store three weeks ago.
Honestly, I was supposed to be meal prepping for the week. But the craving for something chewy, buttery, and just a little bit unhinged won out. I mean, have you ever tried to fall asleep when your brain is screaming “make the eyeball treats”? It doesn’t work. So I stood there in my kitchen, barefoot, wearing sweatpants with a hole in the knee, and I started melting butter. The microwave beeped too loud for that hour, and I swear my neighbor’s dog barked in protest. But I didn’t care. I was on a mission.
The thing about late-night cooking is that the rules get loose. You stop second-guessing yourself. You don’t worry about presentation being perfect—you just want the payoff. And that’s how these Favorite Chewy Halloween Rice Krispie Treats with Candy Eyes were born. I added an extra half-cup of marshmallows because why not? I pressed them into the pan with a buttered spatula because that’s what felt right at the moment. And then I stuck those little candy eyes all over the top, pressing them in just enough so they’d stay put. They stared back at me from the pan, all googly and ridiculous, and I laughed out loud at 12:15 AM. Maybe you’ve been there—that moment when a kitchen experiment turns into something way better than you expected. These treats are that moment, every single time.
Why You’ll Love This Recipe
Let me tell you why these are going to be your new go-to Halloween dessert. I’ve tested this recipe about seven times now—yes, seven—because I had to get the chewiness just right. No one wants a rock-hard Rice Krispie treat that cracks your teeth, and no one wants one that falls apart the second you pick it up. These are the Goldilocks version. They hold their shape but give you that satisfying, soft pull when you bite into them.
- Perfect for Parties : These are made for showing off at a Halloween gathering. The candy eyes make people smile before they even take a bite, and trust me, that first impression matters when you’re hosting.
- Incredibly Easy : You don’t need a pastry degree or any special baking skills. If you can melt butter and stir, you can make these. Seriously. I’ve had friends who claim they “can’t cook” nail these on the first try.
- Simple Ingredients : Everything comes from a regular grocery store. No hunting down specialty baking aisles or ordering weird ingredients online. Rice Krispies, marshmallows, butter, and candy eyes. That’s it.
- Kid-Approved and Adult-Loved : I brought a batch to a friend’s Halloween party last year, and the adults ate them faster than the kids did. There’s something nostalgic about Rice Krispie treats that hits everyone right in the childhood feels.
- Make-Ahead Friendly : You can prep these a full day before your event. They actually get better after sitting overnight—the flavors meld and the texture settles into that perfect chewy state.
What makes this version different from every other Halloween treat recipe out there is the texture science. Most recipes call for the standard ratio on the cereal box, which gives you treats that are either too hard or too crumbly. I tweaked the marshmallow-to-butter ratio to get that ultra-chewy, almost fudge-like consistency that stays soft for days. Plus, the candy eyes aren’t just decorative—they add a tiny bit of texture contrast that makes each bite interesting.
Ingredients Needed
This recipe uses simple, everyday ingredients that come together to create something truly memorable. You probably already have most of these in your kitchen, which is the whole point—no last-minute panic trips to the store.
For the Treat Base
- 6 tablespoons unsalted butter (I use Land O’Lakes for consistent results; salted butter works too, just reduce the added salt)
- 1 (10-ounce) bag mini marshmallows (about 4 cups; Jet-Puffed is my go-to because they melt evenly)
- 1/2 teaspoon vanilla extract (pure, not imitation—trust me on this one)
- 1/4 teaspoon salt (flaky sea salt if you have it, regular table salt is fine)
- 6 cups Rice Krispies cereal (or any crispy rice cereal; store brands work perfectly)
For Decoration
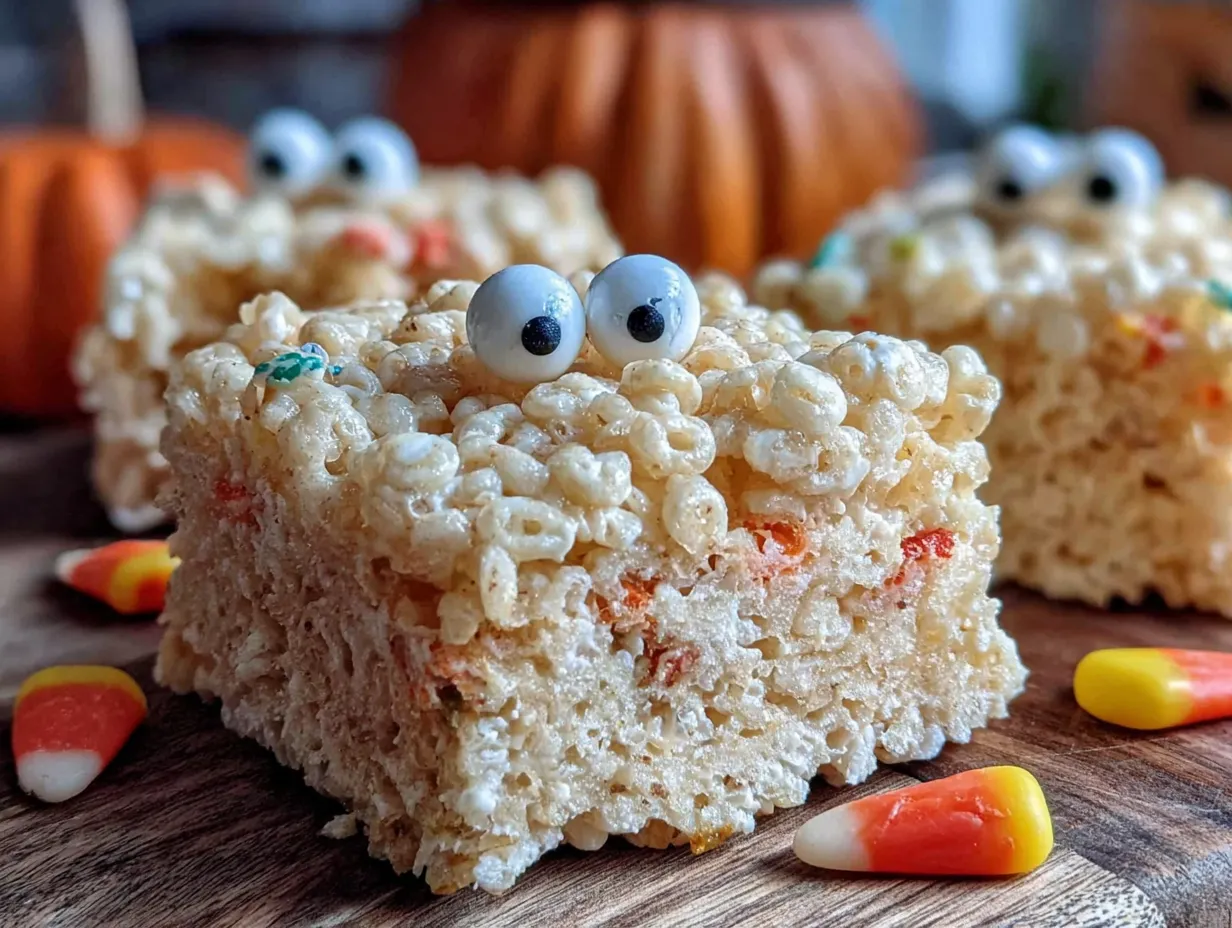
- 1/2 cup candy eyes (the kind with the little black pupils; Wilton brand holds up best, but any brand works)
- 1 tablespoon unsalted butter (for greasing your hands and spatula—don’t skip this)
A quick note on ingredient selection: Look for marshmallows that are fresh and soft. Stale marshmallows won’t melt as smoothly and can give you lumpy treats. If your marshmallows feel hard or dry, steam them for about 10 seconds in the microwave before using. For the cereal, make sure your box isn’t stale—crunchy cereal equals crunchy treats, and we want that signature crisp-tender texture.
If you’re dairy-free, you can substitute the butter with a high-quality vegan butter like Miyoko’s. It changes the flavor slightly but still gives you that rich, buttery base. For a gluten-free version, this recipe is naturally gluten-free as long as you check your cereal label—most rice cereals are, but some brands add malt flavoring that contains gluten.
Equipment Needed
You don’t need a fancy kitchen for these, which is honestly my favorite thing about this recipe. Here’s what you’ll need:
- Large pot or Dutch oven (at least 5-quart capacity; you need room to stir everything without it spilling over)
- 9×13-inch baking pan (metal works best for even cooling; glass is fine but takes longer to cool)
- Rubber spatula (silicone is best—it won’t scratch your pan and it handles the sticky mixture well)
- Parchment paper (non-negotiable for easy removal; I’ve tried greasing the pan alone and regretted it every time)
- Microwave-safe bowl (if you’re melting the marshmallows in the microwave instead of on the stove)
- Sharp knife (for cutting clean squares; a bench scraper works even better)
If you don’t have a 9×13 pan, you can use a 9×9 square pan for thicker treats—just increase the cooking time by about 2 minutes. I’ve also used disposable aluminum pans for parties, and they work fine. Just line them with parchment paper first. One tip I learned the hard way: don’t use a nonstick pan without parchment. The butter in the mixture can still stick, and then you’re scraping treat fragments off the bottom for twenty minutes.
Preparation Method
Alright, let’s get to the fun part. I’ve broken this down step by step so you don’t miss anything. Read through the whole thing once before you start—trust me, it makes a difference.
- Prep your pan. Line your 9×13-inch baking pan with parchment paper, leaving about 2 inches of overhang on two opposite sides. This creates little handles that let you lift the whole block out later. Grease the parchment lightly with a thin layer of butter. Set it aside.
- Melt the butter. In your large pot, melt the 6 tablespoons of butter over medium-low heat. Don’t rush this—if the butter gets too hot, it can brown, and while browned butter is delicious, it changes the flavor profile here. You want it just melted, not sizzling. Swirl the pot occasionally to help it melt evenly. This takes about 2-3 minutes.
- Add the marshmallows. Dump the entire bag of mini marshmallows into the melted butter. Stir constantly with your rubber spatula. The marshmallows will start to puff up and then collapse into a gooey mass. Keep stirring until they’re completely melted and smooth—about 4-5 minutes. The mixture should look glossy and uniform, with no white marshmallow streaks.
- Season the mixture. Remove the pot from the heat. Stir in the vanilla extract and salt. The vanilla will bubble up a little when it hits the hot marshmallow—that’s normal. Stir until everything is combined. Taste a tiny bit (careful, it’s hot!) and adjust the salt if needed. I like mine with a noticeable salty-sweet contrast.
- Add the cereal. Pour the 6 cups of Rice Krispies into the pot. Fold everything together gently but thoroughly. Use a cutting motion with your spatula to incorporate the cereal without crushing it. You want every piece coated in marshmallow, but you don’t want pulverized cereal dust. This takes about 2 minutes of patient folding.
- Transfer to the pan. Scrape the mixture into your prepared pan. Don’t dump it all in one spot—spread it around as you go. This prevents thick clumps that are hard to press down evenly.
- Press it down. Here’s the trick: butter your hands lightly (use that extra tablespoon of butter) and press the mixture into an even layer. Don’t use a spatula for this—it’ll stick and pull up chunks. Use your fingers, pressing firmly but not smashing. You want the treats to be compact enough to hold together but not so dense that they lose their airy texture. Aim for an even thickness of about 3/4 inch.
- Add the candy eyes. While the mixture is still warm and slightly sticky, press the candy eyes into the surface. Arrange them however you like—I do a scattered pattern with some clustered together and some spread out. Press each eye in just enough so it stays put. Don’t push them all the way in or they’ll disappear into the treat.
- Cool completely. Let the treats sit at room temperature for at least 1 hour. Don’t put them in the refrigerator—that can make them hard and dry. They need to cool slowly to maintain that chewy texture. After an hour, lift the whole block out using the parchment handles.
- Cut into squares. Use a sharp knife to cut the block into squares. I go for 12 large squares (3 rows by 4 rows) for parties, or 24 smaller ones for snacking. Wipe the knife clean between cuts to keep the edges neat. The treats should cut cleanly without crumbling.
Cooking Tips & Techniques
I’ve made this recipe enough times to know where things can go wrong. Here are the lessons I learned the hard way so you don’t have to.
Don’t overheat the marshmallows. This is the number one mistake people make. If you cook the marshmallow mixture too long or at too high a temperature, the sugar crystallizes and your treats turn into hard, brittle blocks. Keep the heat on medium-low and stir constantly. The moment the marshmallows are smooth, pull the pot off the heat. I once got distracted by a phone call and left the mixture on the heat an extra minute—the treats were edible but had the texture of stale popcorn balls.
Work quickly but calmly. The marshmallow mixture starts setting as soon as it leaves the heat. You have about 5-7 minutes to get everything mixed, pressed into the pan, and decorated before it becomes too stiff to work with. Have all your ingredients measured and your pan prepped before you start. I learned this the hard way when I had to microwave the mixture back to life halfway through pressing it down.
Butter is your best friend. Butter your hands, butter your spatula, butter the parchment paper. The marshmallow mixture sticks to everything, and butter is the only thing that stops it. I keep a stick of softened butter on the counter specifically for this purpose. If you’re using a silicone spatula, a light coating of cooking spray works too.
Use fresh marshmallows. Stale marshmallows don’t melt properly. They get this weird, grainy texture that never fully smooths out. Check the date on your bag before you start. If your marshmallows are a few months old, they might still work, but the texture won’t be as good.
Let them rest overnight. I know it’s hard to wait, but these treats genuinely taste better the next day. The marshmallow sets fully, the flavors meld, and the texture reaches that ideal chewy state. Make them the day before your Halloween party and thank me later.
Variations & Adaptations
One of the best things about this recipe is how easy it is to customize. Here are some variations I’ve tried and loved:
Chocolate Drizzle Version : Melt 1/2 cup of dark chocolate chips with 1 teaspoon of coconut oil and drizzle it over the cooled treats before adding the candy eyes. The chocolate hardens into a shell that cracks beautifully when you bite into it. I did this for a friend’s Halloween party and people lost their minds.
Peanut Butter Swirl : Warm 1/4 cup of creamy peanut butter in the microwave for 15 seconds, then swirl it into the marshmallow mixture before adding the cereal. The peanut butter creates these rich, salty ribbons throughout the treats. Just make sure your peanut butter is well-stirred before you start.
Spooky Color Version : Add 5-6 drops of orange food coloring to the marshmallow mixture after it’s melted. Stir until the color is evenly distributed before adding the cereal. You can also add black food coloring for a darker, more dramatic look. Gel food coloring works better than liquid—it doesn’t thin out the marshmallow mixture.
Gluten-Free Adaptation : This recipe is naturally gluten-free if you use certified gluten-free rice cereal. Some brands add malt flavoring that contains gluten, so check the label. I’ve used Nature’s Path Organic Crispy Rice Cereal with great results.
Vegan Version : Substitute the butter with vegan butter and use vegan marshmallows (Dandies brand works perfectly). The texture is slightly different—a little less stretchy—but the flavor is still spot-on. I made these for a vegan friend’s Halloween party and they were gone within an hour.
Serving & Storage Suggestions
These treats are best served at room temperature, right out of the pan. That’s when the texture is at its peak—soft, chewy, and just slightly firm. If you’re serving them at a party, arrange them on a platter with the candy eyes facing up so everyone can see them. They’re a conversation starter, honestly.
For a complete Halloween spread, serve these alongside some classic pumpkin bread or a batch of spooky sugar cookies. The combination of textures and flavors is unbeatable. I also like to serve them with cold milk or hot apple cider—the contrast between the warm drink and the cool, chewy treat is perfect.
Storage: Keep the treats in an airtight container at room temperature for up to 5 days. Layer them between sheets of parchment paper so the candy eyes don’t stick to each other. Don’t refrigerate them—the cold air dries them out and makes them hard. If you live in a humid climate, add a piece of bread to the container to absorb excess moisture.
Freezing: These freeze beautifully for up to 3 months. Wrap each square individually in plastic wrap, then place them in a freezer-safe bag. To thaw, let them sit at room temperature for about 30 minutes. The texture comes back almost completely. I’ve pulled these out for last-minute Halloween parties and no one could tell they were frozen.
Make-Ahead Tip: You can prepare these up to 2 days in advance. The flavor actually improves as the marshmallow sets and the cereal softens slightly. Just keep them in an airtight container and add the candy eyes right before serving if you want them to look their freshest.
Nutritional Information & Benefits
Let’s be real—these are a treat, not a health food. But here’s the breakdown so you know what you’re working with:
Per serving (1 large square, based on 12 servings):
- Calories: 245
- Fat: 8g
- Carbohydrates: 42g
- Protein: 2g
- Sugar: 24g
- Sodium: 185mg
The main ingredients here are simple pantry staples. Rice Krispies are fortified with iron and B vitamins, so there’s a tiny nutritional upside. The butter adds vitamin A, and the marshmallows are mostly sugar—but hey, it’s Halloween. One of these treats won’t derail your whole week, and the joy they bring is worth every calorie.
If you’re watching your sugar intake, you can reduce the marshmallows by 1/2 cup, but the texture will be less chewy. For a lower-calorie version, use a sugar-free marshmallow alternative, though I haven’t tested that myself so I can’t vouch for the results.
Potential allergens: This recipe contains dairy (butter) and may contain gluten depending on your cereal choice. The candy eyes are typically made from sugar and cornstarch, but check the package for allergen warnings.
Conclusion
These Favorite Chewy Halloween Rice Krispie Treats with Candy Eyes are everything I want in a Halloween dessert—fun, delicious, and ridiculously easy to make. They’re the kind of treat that makes people smile before they even take a bite, and that first chewy, buttery mouthful never disappoints. Whether you’re hosting a big Halloween bash or just want something special for a quiet night in, these treats deliver.
I love that this recipe doesn’t take itself too seriously. It’s playful and forgiving and perfect for getting kids involved in the kitchen. Plus, the candy eyes make every batch unique—you can arrange them in patterns, spell out words, or just go wild and stick them everywhere. There’s no wrong way to do it.
So go ahead and make these for your next Halloween gathering. Your guests will thank you, and honestly, you’ll thank yourself when you see how fast they disappear. If you try this recipe, let me know how it goes in the comments—I’d love to hear about your candy eye arrangements and any fun variations you come up with. Happy Halloween, and happy snacking!
Frequently Asked Questions
Can I use regular-sized marshmallows instead of mini marshmallows?
Yes, but you’ll need to chop them into smaller pieces first so they melt evenly. About 40 regular marshmallows equals one 10-ounce bag of minis. They take slightly longer to melt, so be patient.
Why did my Rice Krispie treats turn out hard?
This usually happens when the marshmallow mixture is cooked too long or at too high a heat. The sugar crystallizes and creates a hard texture. Keep the heat on medium-low and remove the pot from the stove as soon as the marshmallows are smooth.
Can I use a different cereal?
Absolutely! Fruity Pebbles, Cocoa Pebbles, or even crushed-up graham crackers work well. Just keep in mind that different cereals absorb moisture differently, so you might need to adjust the marshmallow amount slightly.
How do I keep the candy eyes from falling off?
Press them into the treats while the mixture is still warm and slightly sticky. If the treats have already cooled, warm the surface gently with a hair dryer for a few seconds to soften it before pressing in the eyes.
Can I make these ahead of time for a party?
Yes! These are actually better when made 1-2 days in advance. Store them in an airtight container at room temperature. Add the candy eyes right before serving for the freshest look, or add them after cooling if you don’t mind them setting in place.
Pin This Recipe!
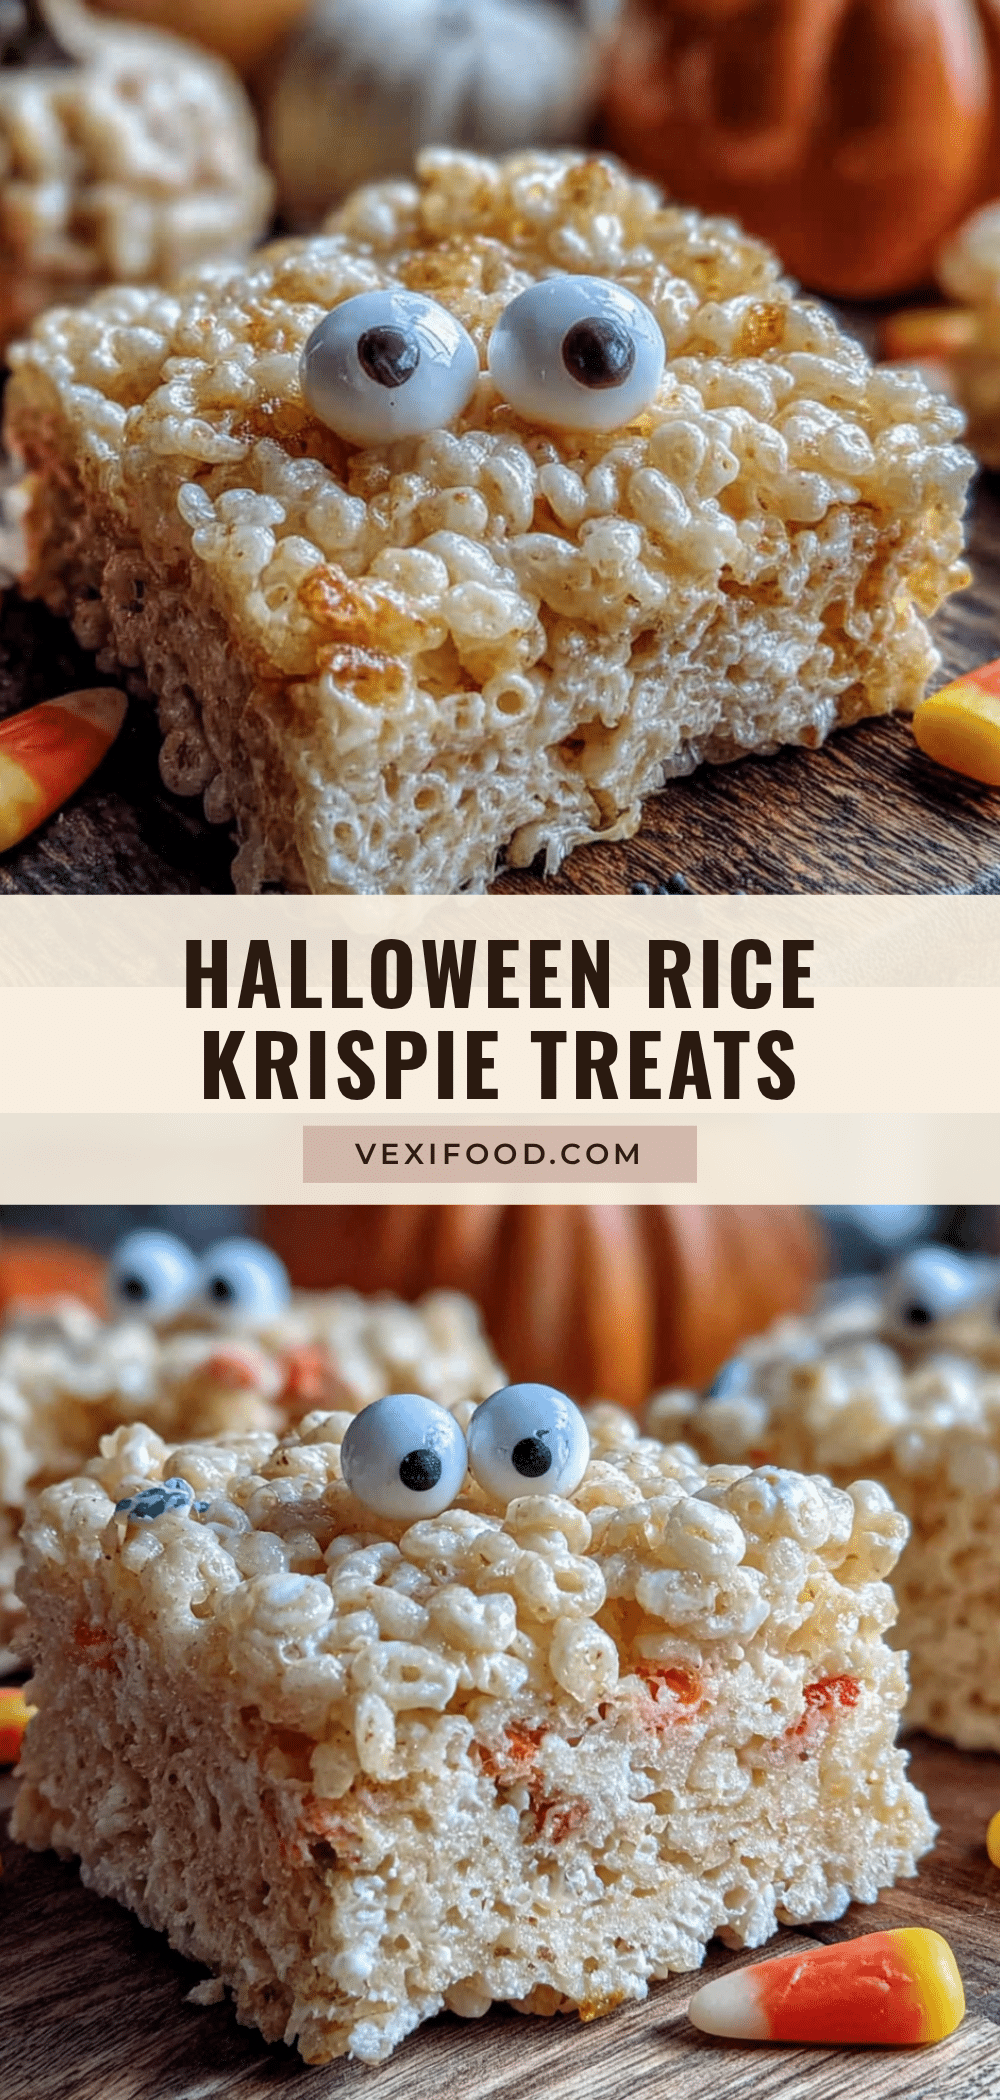
Favorite Chewy Halloween Rice Krispie Treats with Candy Eyes
These ultra-chewy, buttery Rice Krispie treats are studded with googly candy eyes for a fun and spooky Halloween dessert. They’re incredibly easy to make with simple ingredients and are perfect for parties, kids, and adults alike.
- Prep Time: 15 minutes
- Cook Time: 10 minutes
- Total Time: 1 hour 25 minutes (includes cooling)
- Yield: 12 servings 1x
- Category: Dessert
- Cuisine: American
Ingredients
- 6 tablespoons unsalted butter (plus 1 tablespoon for greasing)
- 1 (10-ounce) bag mini marshmallows (about 4 cups)
- 1/2 teaspoon vanilla extract (pure)
- 1/4 teaspoon salt (flaky sea salt or table salt)
- 6 cups Rice Krispies cereal (or any crispy rice cereal)
- 1/2 cup candy eyes (with black pupils)
Instructions
- Prep your pan: Line a 9×13-inch baking pan with parchment paper, leaving about 2 inches of overhang on two opposite sides. Grease the parchment lightly with a thin layer of butter. Set aside.
- Melt the butter: In a large pot, melt 6 tablespoons of butter over medium-low heat. Swirl occasionally until just melted, about 2-3 minutes. Do not let it brown.
- Add the marshmallows: Dump the entire bag of mini marshmallows into the melted butter. Stir constantly with a rubber spatula until completely melted and smooth, about 4-5 minutes. The mixture should be glossy and uniform.
- Season the mixture: Remove the pot from the heat. Stir in the vanilla extract and salt until combined. Taste and adjust salt if needed.
- Add the cereal: Pour the 6 cups of Rice Krispies into the pot. Fold gently but thoroughly with a cutting motion to incorporate the cereal without crushing it, about 2 minutes.
- Transfer to the pan: Scrape the mixture into the prepared pan, spreading it around as you go to avoid thick clumps.
- Press it down: Butter your hands lightly with the extra tablespoon of butter. Press the mixture into an even layer, about 3/4 inch thick. Do not use a spatula; use your fingers to avoid sticking.
- Add the candy eyes: While the mixture is still warm and slightly sticky, press the candy eyes into the surface in a scattered pattern. Press each eye in just enough so it stays put, but not all the way in.
- Cool completely: Let the treats sit at room temperature for at least 1 hour. Do not refrigerate. After an hour, lift the whole block out using the parchment handles.
- Cut into squares: Use a sharp knife to cut the block into 12 large squares (3 rows by 4 rows) or 24 smaller squares. Wipe the knife clean between cuts for neat edges.
Notes
Don’t overheat the marshmallows; remove from heat as soon as smooth to avoid hard treats. Work quickly as the mixture sets fast. Butter your hands and spatula to prevent sticking. For best texture, let treats rest overnight. Store in an airtight container at room temperature for up to 5 days. Freeze for up to 3 months.
Nutrition
- Serving Size: 1 large square
- Calories: 245
- Sugar: 24
- Sodium: 185
- Fat: 8
- Saturated Fat: 5
- Carbohydrates: 42
- Protein: 2
Keywords: Halloween Rice Krispie treats, chewy Rice Krispie treats, candy eyes, spooky treats, easy Halloween dessert, no-bake dessert, kid-friendly Halloween recipe



