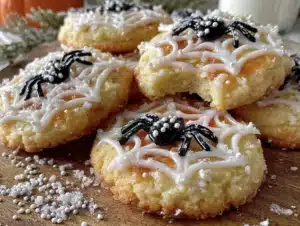
Love this? Save it for later!
Share the inspiration with your friends
There used to be a tiny bakery tucked into a converted garage on Cedar Lane called The Sugar Web. They only lasted two autumns, but every October, they’d roll out these spider sugar cookies that were so light they practically floated off the plate. When the owner moved back to Vermont in 2019, that was it. I stood outside their shuttered door for a solid minute, honestly feeling a little ridiculous about how sad I was over a cookie. After eleven tries—some that crumbled into dust, a few that tasted more like butter than cookie—I finally got it.
The secret, I learned, is in the creaming method. You have to beat the butter and sugar until it’s almost white, so light it looks like frosting before you even add the flour. That first successful batch came out of the oven on a rainy Tuesday, and I swear the kitchen smelled exactly like that little garage bakery. The spiders looked back at me from the cooling rack, eight little pretzel legs sticking out at all angles, and I just stood there grinning like a fool. Maybe you’ve been there—that moment when a recipe you’ve been chasing finally clicks. It’s a good feeling.
These cookies are everything I wanted them to be: tender, buttery, with just enough sweetness to satisfy without being cloying. The chocolate spider bodies sit right in the center, and those pretzel legs give them the perfect salty crunch. I keep making them because they remind me that sometimes the best things in life are temporary, but you can always find your way back to the flavor of a memory.
Why You’ll Love This Recipe
I’ve tested this recipe more times than I care to admit, and I can tell you with confidence—this is the spider cookie that delivers. These aren’t those dense, dry sugar cookies that crumble the second you try to add legs. They’re light, tender, and actually stay soft for days.
- Quick & Easy: From start to finish, you’re looking at about 45 minutes. The dough comes together in one bowl, and there’s no chilling time required. Perfect for a last-minute Halloween treat.
- Simple Ingredients: You probably have everything in your pantry right now. Butter, sugar, flour, eggs, vanilla—that’s it. No weird extracts or specialty flours.
- Perfect for Halloween Parties: These spiders are adorable without being fussy. Kids love making them, and adults can’t resist grabbing one off the platter.
- Crowd-Pleaser: I brought a batch to a neighbor’s Halloween gathering, and they were gone in twenty minutes. One guy asked for the recipe three times.
- Unbelievably Delicious: The texture is what gets everyone. They’re light as air but somehow rich and buttery at the same time. That first bite makes you close your eyes.
What makes this version different from every other spider cookie out there is the technique. Most recipes use baking powder or soda, which gives you that puffy, cakey texture. I use a combination of cream of tartar and a very specific creaming method that creates a cookie that’s thin, delicate, and almost shortbread-like in its tenderness. It’s not just another Halloween cookie—it’s the one you’ll come back to year after year.
This recipe is comfort food reimagined for the spooky season. It’s healthier than most holiday treats because it’s not loaded with artificial colors or preservatives. It’s just real, simple ingredients doing what they do best. Perfect for impressing guests without stress, or turning a simple October afternoon into something memorable.
What Ingredients You Will Need
This recipe uses simple, wholesome ingredients to deliver that light, buttery texture and just the right amount of sweetness. Most of these are pantry staples, which makes this a great last-minute Halloween project.
- Unsalted butter, softened (1 cup, 2 sticks) — I prefer Land O’Lakes for consistent results. The butter needs to be truly soft, not just out of the fridge. Let it sit on the counter for at least an hour.
- Granulated sugar (1 cup) — Regular white sugar works perfectly here. It dissolves into the butter during creaming, creating that light texture.
- Large egg (1, room temperature) — Cold eggs can seize the butter mixture. If you forgot to take it out early, place the egg in a bowl of warm water for five minutes.
- Vanilla extract (1 teaspoon) — Pure vanilla makes a difference here. I use Nielsen-Massey, but any good quality extract works. Avoid imitation vanilla if you can.
- All-purpose flour (2 cups, spooned and leveled) — Don’t scoop directly from the bag. Spoon the flour into your measuring cup and level it off. Too much flour makes dense cookies.
- Cream of tartar (1 teaspoon) — This is the secret ingredient. It reacts with the baking soda to create that tender, almost melt-in-your-mouth texture. Don’t skip it.
- Baking soda (½ teaspoon) — Make sure it’s fresh. If it’s been sitting in your cabinet for a year, it might not work properly.
- Salt (¼ teaspoon) — Balances the sweetness and enhances the buttery flavor. I use fine sea salt.
- Chocolate candy melts or chocolate chips (for spider bodies) — I use Ghirardelli dark chocolate melting wafers. They hold their shape well and have a nice snap when set.
- Pretzel sticks (for spider legs) — Snyder’s of Hanover are sturdy and the right thickness. Break them into smaller pieces for the legs.
- Candy eyes (optional, for decoration) — Wilton makes good ones. You can find them at any craft store or online.
For the chocolate, you can use milk chocolate if you prefer a sweeter spider body. Dark chocolate gives a nice contrast to the sweet cookie. If you’re making these for a peanut-free event, double-check your chocolate brand—some are processed in facilities that also handle peanuts.
The pretzel sticks are non-negotiable for the legs, but if you can’t find them, thin breadsticks work in a pinch. Just make sure they’re sturdy enough to stick into the cookie without breaking.
Equipment Needed
You don’t need anything fancy for these cookies. I’ve made them in a tiny apartment kitchen and a full-sized one—same results every time.
- Electric mixer (stand or hand-held) — You can cream the butter and sugar by hand, but it takes serious elbow grease. A hand mixer works perfectly and costs around $20.
- Large mixing bowl — Any bowl works. I use a glass one so I can see the color change as the mixture lightens.
- Baking sheets (2-3) — Light-colored metal sheets work best. Dark sheets can cause the bottoms to brown too quickly.
- Parchment paper — Non-stick and makes cleanup a breeze. Silicone baking mats also work well.
- Cooling rack — Essential for letting the cookies cool evenly. If you don’t have one, a clean dish towel works temporarily.
- Spatula — For scraping down the bowl and transferring cookies.
- Small piping bag or zip-top bag — For piping the chocolate spider bodies. A zip-top bag with a tiny corner snipped off works just fine.
- Measuring cups and spoons — Accurate measurements matter here, especially for the cream of tartar.
If you’re on a budget, skip the stand mixer and use a hand mixer. Skip the piping bag and use a zip-top bag. The only thing I wouldn’t skip is the parchment paper—it really does make a difference in how evenly the cookies bake.
Preparation Method
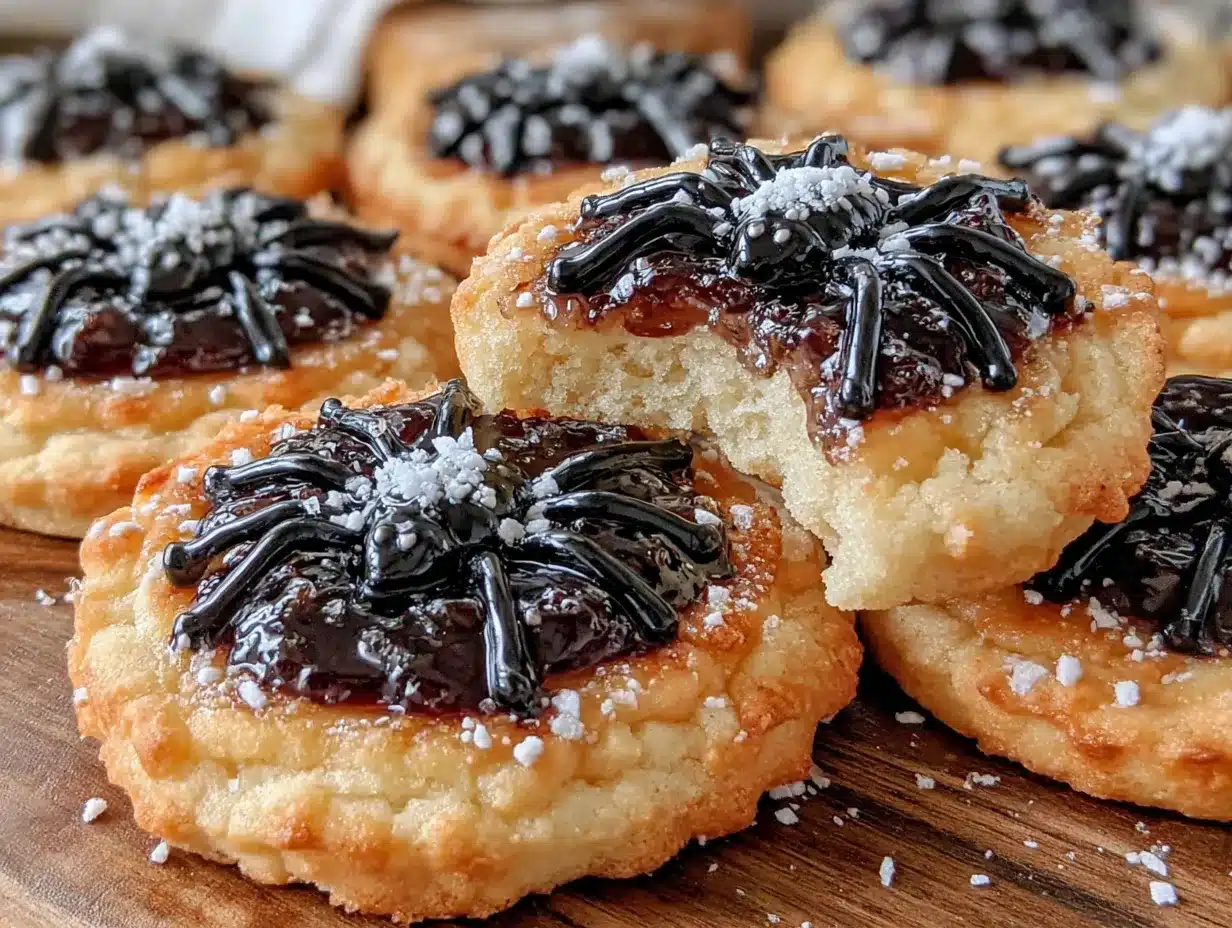
Let me walk you through this step by step. I’ve included all the little details I wish someone had told me when I was trying to recreate those bakery cookies.
- Preheat your oven to 350°F (175°C). Line two baking sheets with parchment paper. This is important—don’t use greased sheets. The cookies spread differently on parchment.
- Cream the butter and sugar. In your large mixing bowl, beat the softened butter and granulated sugar together on medium speed for 3-4 minutes. You’re looking for a color change here—it should go from pale yellow to almost white. The mixture should look fluffy and light, like a cloud. Scrape down the sides of the bowl halfway through. This step is where the magic happens. Don’t rush it.
- Add the egg and vanilla. Crack the egg into a small bowl first (just in case you get shell pieces). Add it to the butter mixture along with the vanilla. Beat on medium speed until fully combined, about 30 seconds. The mixture might look slightly curdled at this point—that’s normal. Keep going.
- Mix the dry ingredients. In a separate bowl, whisk together the flour, cream of tartar, baking soda, and salt. Whisking ensures everything is evenly distributed. I learned this the hard way after one batch had a pocket of baking soda that tasted terrible.
- Combine wet and dry. Add the flour mixture to the butter mixture in two additions. Mix on low speed just until the flour disappears. Overmixing here will make your cookies tough. Stop when you see the last streak of flour disappear. The dough will be soft but not sticky.
- Scoop the cookies. Use a tablespoon or small cookie scoop to portion the dough. Roll each portion into a smooth ball. Place them on the prepared baking sheets about 2 inches apart. They spread quite a bit, so don’t crowd them. I fit about 8 cookies per standard sheet.
- Bake for 8-10 minutes. The cookies are done when the edges are just barely golden brown. The centers will look slightly underdone and puffy. That’s exactly what you want. They’ll continue to set as they cool. If you overbake them, they’ll be crisp instead of tender.
- Cool on the baking sheet for 2 minutes. This is crucial. If you try to move them immediately, they’ll fall apart. After 2 minutes, transfer them to a cooling rack to cool completely. They should be firm enough to handle by then.
- Add the spider legs. While the cookies are still slightly warm (but not hot), gently insert 8 pretzel pieces into each cookie—four on each side. Push them in about halfway. The warmth of the cookie helps them stay in place. If you wait until the cookies are completely cool, the pretzels might crack when you try to insert them.
- Pipe the chocolate bodies. Melt your chocolate according to package directions. Transfer it to a small piping bag or zip-top bag with a tiny corner snipped off. Pipe a small circle in the center of each cookie, covering the points where the pretzel legs meet the cookie. The chocolate should be thick enough to hold its shape but thin enough to pipe smoothly.
- Add the eyes. While the chocolate is still wet, press two candy eyes into each spider body. If you don’t have candy eyes, you can pipe tiny dots of white chocolate and add a smaller dot of dark chocolate in the center. It’s a little more work, but the result is just as cute.
- Let the chocolate set completely. This takes about 20 minutes at room temperature, or 10 minutes in the refrigerator. Don’t stack the cookies until the chocolate is fully set, or you’ll smudge the spiders.
A quick note on timing: If you’re making these with kids, I recommend having the pretzel legs pre-broken and ready to go. Once those cookies come out of the oven, you have a very small window to insert the legs before they cool too much. Trust me on this—I learned the hard way with a batch of legless spiders.
Cooking Tips & Techniques
I’ve made these cookies more times than I can count, and I’ve made every mistake in the book. Here’s what I’ve learned.
The creaming method is everything. You have to beat that butter and sugar until it’s light and fluffy. I’m talking at least 3 minutes with a hand mixer, 4 if you’re doing it by hand. The mixture should look almost white and have a soft, mousse-like texture. If you under-cream, your cookies will be dense and flat. If you over-cream, they’ll spread too much. There’s a sweet spot, and you’ll know it when you see it.
Don’t skip the cream of tartar. This is the ingredient that gives these cookies their signature tenderness. It reacts with the baking soda to create tiny air bubbles that make the cookies light and delicate. I once tried to make these without it, thinking it wouldn’t matter. It did. The cookies were dense and almost tough. Never again.
Watch your oven temperature. Ovens run hot or cold more often than you’d think. I recommend getting an oven thermometer if you don’t have one. My oven runs about 25°F hot, so I set it to 325°F instead of 350°F. The first few times I made these, they came out dark on the bottom and pale on top. That’s a sure sign your oven is running hot.
Multitask strategically. While the first batch is baking, scoop the second batch onto the other prepared sheet. That way, as soon as the first batch comes out, the second batch goes in. This saves a ton of time. Just make sure your second sheet isn’t still warm from the first batch, or the cookies will start spreading before they hit the oven.
One mistake I still make sometimes: I get distracted and leave the cookies on the baking sheet too long. They continue to cook from the residual heat, so if you leave them on the sheet for more than 2 minutes, they’ll overbake. Set a timer. I use my phone and set it for 2 minutes after the oven timer goes off.
Variations & Adaptations
One of the best things about this recipe is how easily it adapts. Here are some variations I’ve tried and loved.
Gluten-Free Version: Substitute the all-purpose flour with a 1:1 gluten-free baking flour blend. I’ve used King Arthur Measure for Measure with great results. The texture is slightly more delicate, so be gentle when inserting the pretzel legs. Make sure your pretzels are also gluten-free—there are several brands available.
Vegan Adaptation: Use vegan butter sticks (not tub margarine) and a flax egg (1 tablespoon ground flaxseed mixed with 3 tablespoons water, let sit for 5 minutes). The texture is a bit less tender, but the flavor is still excellent. Use vegan chocolate for the spider bodies and check that your candy eyes are vegan-friendly.
Flavor Twists: Add ½ teaspoon of almond extract along with the vanilla for a subtle nutty flavor. Or add 1 teaspoon of lemon zest for a bright, citrusy note that pairs beautifully with the buttery cookie. My personal favorite is adding ¼ teaspoon of cinnamon to the dry ingredients—it gives the cookies a warm, cozy flavor that’s perfect for fall.
Different Spider Designs: Instead of pretzel sticks, use thin licorice strings for a chewier leg. Or use black sesame seeds pressed into the chocolate for a more natural look. For a less spooky version, pipe the chocolate into a round body and add a tiny tail to make them look like little mice. My kids love that version for non-Halloween parties.
Dietary Swaps: If you’re watching your sugar intake, you can reduce the granulated sugar to ¾ cup. The cookies will be slightly less tender, but still delicious. For a lower-fat version, substitute half the butter with unsweetened applesauce. The texture changes significantly—they’re more cake-like—but the flavor is still lovely.
One variation I keep coming back to is the chocolate-orange version. I add 1 teaspoon of orange zest to the butter mixture and use dark chocolate with orange essential oil for the spider bodies. The combination of buttery cookie, rich chocolate, and bright citrus is absolutely addictive. It’s become my signature Halloween treat.
Serving & Storage Suggestions
These cookies are best served at room temperature. The texture is at its peak—tender, buttery, with that slight crunch from the pretzel legs. I like to arrange them on a dark platter to make the spiders pop. A few fake spiderwebs around the edges of the platter add a fun touch without being over the top.
For a Halloween party spread, pair these with a warm mug of apple cider or a glass of cold milk. They also go surprisingly well with a cup of hot cocoa—the chocolate spider body melts slightly into the warm drink, and it’s just divine. If you’re serving adults, a glass of bourbon or a dark rum cocktail complements the buttery sweetness beautifully.
Storage: These cookies keep well in an airtight container at room temperature for up to 5 days. Place a piece of bread in the container to help maintain moisture—the cookies will absorb the bread’s moisture and stay soft. Just don’t forget to change the bread every couple of days.
Freezer instructions: You can freeze the baked cookies (without the chocolate spiders) for up to 3 months. Wrap them tightly in plastic wrap and place them in a freezer-safe bag. When you’re ready to serve, thaw them at room temperature, then add the pretzel legs and chocolate bodies. The chocolate doesn’t freeze well, so it’s best to add it fresh.
You can also freeze the cookie dough. Scoop it into balls, place them on a baking sheet, and freeze until solid. Transfer the frozen dough balls to a freezer bag. When you’re ready to bake, place them directly on a parchment-lined baking sheet and add 1-2 minutes to the baking time. No need to thaw first.
Flavor development note: These cookies actually taste better the day after baking. The flavors meld together, and the texture becomes even more tender. I sometimes make them a day ahead on purpose. Just store them in an airtight container and add the spider elements the day you plan to serve them.
Nutritional Information & Benefits
Here’s the honest truth: these are cookies, not health food. But they’re made with real ingredients, and there’s something to be said for that. Each cookie (with chocolate and pretzels) contains approximately:
- Calories: 180
- Total Fat: 10g
- Saturated Fat: 6g
- Carbohydrates: 22g
- Sugar: 12g
- Protein: 2g
- Sodium: 120mg
The butter provides a small amount of vitamin A, and the pretzels add a touch of iron. The dark chocolate, if you use it, contains antioxidants and a little bit of magnesium. It’s not a significant source of any nutrient, but it’s a treat made with love and real food.
For dietary considerations: These cookies contain wheat, dairy, and eggs. They are not suitable for vegans or those with celiac disease unless you use the adaptations I mentioned earlier. The chocolate may contain traces of soy and nuts, depending on the brand.
From a wellness perspective, I believe in balance. These cookies are a special treat for a fun holiday. They’re not something you eat every day, but they’re something you can feel good about enjoying. Real butter, real sugar, real chocolate—there’s no guilt in that. Just joy.
Conclusion
These Light & Buttery Halloween Spider Sugar Cookies are the recipe I’ve been chasing for years, and I’m so happy to finally share them with you. They’re tender, buttery, and just sweet enough—everything a sugar cookie should be, with a fun Halloween twist that makes them impossible to resist.
I encourage you to make them your own. Add a little cinnamon, swap the chocolate for white chocolate, or use different shaped candies for the bodies. The base recipe is forgiving and adaptable, so don’t be afraid to experiment. That’s how the best recipes are born.
What I love most about these cookies is how they bring people together. There’s something about a plate of spider cookies that makes everyone smile, from the littlest goblins to the grumpiest adults. They’re a little bit spooky, a whole lot delicious, and they remind me that sometimes the best things in life are the simplest.
I’d love to hear how yours turn out! Drop a comment below and tell me about your spider cookie adventures. Did you add a special twist? Did your kids help make them? Every story makes this recipe a little bit better. Happy Halloween, and happy baking!
Frequently Asked Questions
Can I make these cookies ahead of time?
Absolutely. You can bake the cookies up to two days in advance and store them in an airtight container. Add the pretzel legs and chocolate spiders the day you plan to serve them for the best texture and appearance.
My cookies spread too much. What went wrong?
This usually happens when the butter is too soft or the dough is too warm. Make sure your butter is softened but not melted. If your kitchen is warm, chill the scooped dough balls for 15 minutes before baking. Also, check that your baking soda is fresh.
Can I use a different type of pretzel for the legs?
Yes! Thin pretzel sticks work best, but you can also use thick pretzel rods broken into smaller pieces. Just make sure they’re sturdy enough to insert into the cookie without breaking. Regular salted pretzel twists can work if you break them carefully.
How do I keep the pretzel legs from falling off?
Insert the pretzel pieces while the cookies are still slightly warm, about 2 minutes after they come out of the oven. The warmth helps the pretzel stick to the cookie. The chocolate spider body also helps anchor them in place once it sets.
Can I freeze these cookies with the chocolate spiders on them?
I don’t recommend it. The chocolate can develop a white bloom (fat separation) when frozen and thawed, and the pretzels can become soft. Freeze the plain cookies instead, then add the spider elements after thawing.
Pin This Recipe!

Light & Buttery Halloween Spider Cookies – Easy Recipe

These tender, buttery spider cookies are light as air with a perfect salty crunch from pretzel legs and a rich chocolate body. A fun Halloween treat that stays soft for days.
- Prep Time: 15 minutes
- Cook Time: 10 minutes
- Total Time: 45 minutes
- Yield: 24 servings 1x
- Category: Dessert
- Cuisine: American
Ingredients
- 1 cup (2 sticks) unsalted butter, softened
- 1 cup granulated sugar
- 1 large egg, room temperature
- 1 teaspoon vanilla extract
- 2 cups all-purpose flour, spooned and leveled
- 1 teaspoon cream of tartar
- ½ teaspoon baking soda
- ¼ teaspoon fine sea salt
- Chocolate candy melts or chocolate chips (for spider bodies)
- Pretzel sticks (for spider legs)
- Candy eyes (optional, for decoration)
Instructions
- Preheat oven to 350°F (175°C). Line two baking sheets with parchment paper.
- In a large mixing bowl, beat softened butter and granulated sugar on medium speed for 3-4 minutes until light and fluffy, almost white. Scrape down sides halfway through.
- Add egg and vanilla; beat on medium speed until fully combined, about 30 seconds.
- In a separate bowl, whisk together flour, cream of tartar, baking soda, and salt.
- Add flour mixture to butter mixture in two additions, mixing on low speed just until flour disappears. Do not overmix.
- Scoop dough by tablespoonfuls and roll into smooth balls. Place on prepared baking sheets about 2 inches apart.
- Bake for 8-10 minutes until edges are just barely golden brown. Centers will look slightly underdone.
- Cool on baking sheet for 2 minutes, then transfer to a cooling rack to cool completely.
- While cookies are still slightly warm, gently insert 8 pretzel pieces into each cookie (4 on each side), pushing them in about halfway.
- Melt chocolate according to package directions. Transfer to a small piping bag or zip-top bag with a tiny corner snipped off. Pipe a small circle in the center of each cookie, covering the points where pretzel legs meet the cookie.
- While chocolate is still wet, press two candy eyes into each spider body.
- Let chocolate set completely, about 20 minutes at room temperature or 10 minutes in the refrigerator.
Notes
The creaming method is crucial—beat butter and sugar until almost white. Don’t skip cream of tartar; it gives the cookies their tender texture. Insert pretzel legs while cookies are still slightly warm for best adhesion. Cookies taste even better the day after baking.
Nutrition
- Serving Size: 1 cookie
- Calories: 180
- Sugar: 12
- Sodium: 120
- Fat: 10
- Saturated Fat: 6
- Carbohydrates: 22
- Protein: 2
Keywords: Halloween cookies, spider cookies, sugar cookies, buttery cookies, pretzel cookies, easy Halloween treat