Love this? Save it for later!
Share the inspiration with your friends
The woman at the community garden plot next to mine watched me trying to wrangle a bag of arugula that kept slipping out of my reusable tote. She didn’t say anything at first, just kept watering her tomato plants with this quiet patience. Then she reached into her own basket and pulled out a small jar of something green and fragrant. “For your chicken,” she said, handing it to me like it was the most normal thing in the world. “Garlic and herbs. Rub it on, don’t marinate it too long, and use that hot air machine you young people love.” I laughed because I’d only mentioned my air fryer once, weeks earlier, while we were both weeding. She remembered. That jar became the starting point for what I now call my Light & Crispy Air Fryer Chicken Breast with Garlic Herb Rub — a recipe that honestly changed how I feel about chicken breast forever.
I used to think chicken breast was the boring cousin of chicken thighs. You know, dry, flavorless, the kind of thing you eat because you should, not because you want to. But this air fryer chicken breast recipe? It’s different. The rub creates this incredible crust that locks in moisture while the air fryer works its magic. I mean, honestly, the first time I made it, I stood there in my kitchen eating pieces straight off the cutting board, barely able to believe it was actually chicken breast. Maybe you’ve been there — staring at a piece of dry, sad chicken wondering where you went wrong. That was me for years. But not anymore.
The thing about this recipe is how simple it really is. A handful of pantry spices, some fresh herbs if you have them, and about fifteen minutes of active time. The air fryer does all the heavy lifting. That woman from the garden, her name is Rosa, and she told me her grandmother used to make something similar in a clay oven back in Mexico. My version uses what I have — an air fryer and a spice grinder — and somehow, it still captures that same warmth. That’s why I keep making it. It’s not just a recipe; it’s a conversation that keeps going every time I smell garlic and herbs hitting hot air.
Why You’ll Love This Recipe
Let’s be real for a second. Chicken breast has a reputation for being dry, bland, and honestly, a bit of a chore to eat. This Light & Crispy Air Fryer Chicken Breast with Garlic Herb Rub shatters that reputation completely. After testing this recipe at least a dozen times — tweaking the spice ratios, adjusting cooking times, even burning a batch or two (RIP to those poor chicken breasts) — I can confidently say this is the version you’ve been looking for.
- Quick & Easy: From prep to plate in under 25 minutes. Seriously. This is perfect for those nights when you’re staring at the fridge wondering what to make and the clock is ticking.
- Simple Ingredients: You probably have most of these in your kitchen right now. Garlic powder, dried herbs, salt, pepper, olive oil. No fancy trips to specialty stores required.
- Perfect for Meal Prep: Make a batch on Sunday and you’ve got protein ready for salads, wraps, grain bowls, or quick lunches all week. It reheats beautifully, which is rare for chicken breast.
- Crowd-Pleaser: I’ve served this to picky eaters, health-conscious friends, and even my uncle who claims he “doesn’t do air fryer food.” Everyone asks for the recipe.
- Unbelievably Delicious: The texture is what gets me every time. That golden, herb-flecked crust gives way to juicy, tender meat. It’s the kind of chicken that makes you close your eyes after the first bite — and I’m not exaggerating.
What makes this recipe different from every other air fryer chicken breast out there? It’s the garlic herb rub technique. Instead of just sprinkling spices on top, we’re creating a paste that adheres to the chicken, forming a flavorful crust as it cooks. The ratio of oil to herbs matters — too much oil and the rub slides off, too little and it burns. I’ve found the sweet spot through trial and error (and a few smoky kitchen moments). This isn’t just another version of air fryer chicken; it’s the best version I’ve ever made.
This recipe connects with that deeper need we all have — to eat well without spending hours in the kitchen, to feel good about what we’re putting in our bodies without sacrificing flavor. It’s comfort food reimagined for real life. Healthier, faster, but with the same soul-soothing satisfaction that a good meal should bring.
What Ingredients You Will Need
This recipe uses simple, wholesome ingredients that work together to create something genuinely special. The beauty is in the balance — each component plays a role in building flavor and texture without overwhelming the chicken itself.
For the Garlic Herb Rub
- 2 tablespoons olive oil — Use a good-quality extra virgin olive oil here. It helps the herbs stick and encourages browning. I prefer California Olive Ranch for its balanced flavor.
- 4 cloves garlic, minced — Fresh garlic makes a huge difference. Don’t use the jarred stuff for this; it won’t give you the same punch. If you’re in a rush, a microplane works beautifully.
- 1 teaspoon dried rosemary — Crush it between your fingers before adding to release the oils. Rosemary and chicken are a classic pairing for good reason.
- 1 teaspoon dried thyme — Adds an earthy, slightly floral note that complements the garlic perfectly.
- 1 teaspoon dried oregano — Brings a hint of Mediterranean warmth. I use Mexican oregano when I can find it — it’s slightly more robust.
- 1 teaspoon dried basil — For a touch of sweetness that balances the savory elements.
- 1 teaspoon garlic powder — Yes, both fresh and powdered garlic. Trust me on this. The powder adds depth while the fresh provides that sharp kick.
- ½ teaspoon onion powder — Rounds out the savory profile without being overpowering.
- 1 teaspoon salt — I use fine sea salt. If you’re using kosher salt, you might need a bit more.
- ½ teaspoon black pepper — Freshly ground is always better, but pre-ground works in a pinch.
- ½ teaspoon smoked paprika (optional) — This isn’t traditional, but I love the subtle smokiness it adds. Rosa would probably shake her head at this addition, but hey, we all adapt.
For the Chicken
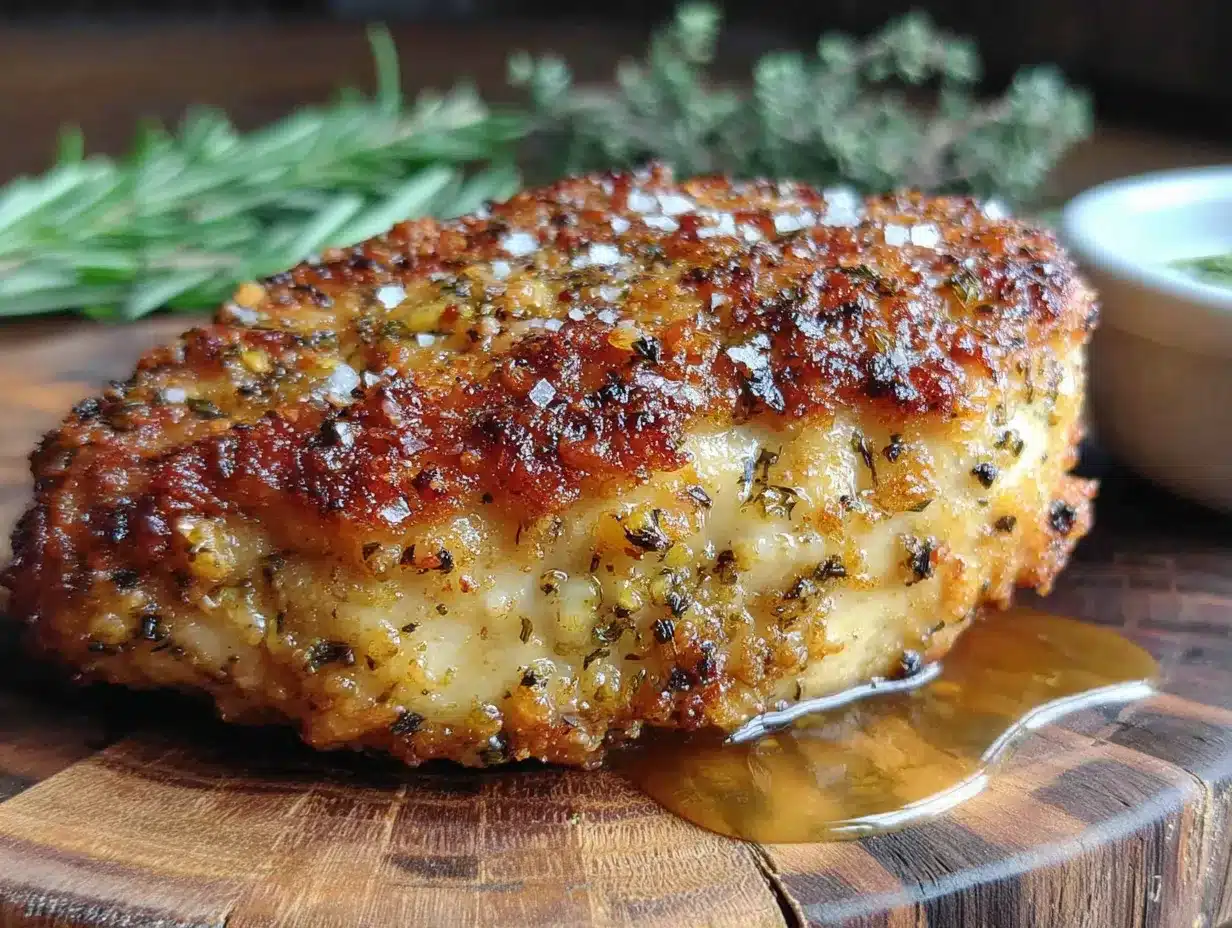
- 2 boneless, skinless chicken breasts (about 6-8 ounces each) — Look for breasts that are relatively even in thickness. If they’re huge, consider butterflying them so they cook evenly. I’ve had good luck with organic, air-chilled chicken — it tends to be less watery.
- Olive oil spray or cooking spray — For the air fryer basket. Avocado oil spray works great too.
Substitution Guidance
If you’re out of fresh garlic, use 1 teaspoon of garlic powder instead of the fresh cloves — but honestly, fresh is where the magic happens. For a dairy-free option, you’re already good since this recipe has no dairy. If you want to go low-sodium, reduce the salt to ½ teaspoon and add a squeeze of lemon juice at the end for brightness. You can swap dried herbs for fresh — just use three times the amount since fresh herbs are less concentrated.
Equipment Needed
You don’t need a professional kitchen to make this Light & Crispy Air Fryer Chicken Breast with Garlic Herb Rub. Here’s what you’ll actually use:
- Air Fryer — Any model works. I use a 5.8-quart Cosori, but I’ve tested this in a smaller Ninja too. Just adjust cooking time if your basket is smaller — you might need to cook in batches.
- Small Bowl — For mixing the garlic herb rub. Any bowl works, but a small one prevents waste.
- Cutting Board — For prepping the chicken. I prefer wood, but plastic is fine too. Just make sure it’s clean.
- Chef’s Knife — A sharp knife makes mincing garlic and trimming chicken so much easier. Dull knives are dangerous — I learned that the hard way.
- Tongs — For flipping the chicken in the air fryer. Silicone-tipped ones won’t scratch your basket.
- Meat Thermometer — This is non-negotiable for me. An instant-read thermometer ensures your chicken hits exactly 165°F without overcooking. I’ve ruined too many chicken breasts guessing by sight alone.
- Paper Towels — For patting the chicken dry. This step matters more than you think.
If you don’t have an air fryer, you can use a convection oven at 400°F — just expect a slightly longer cooking time and less crispiness. A regular oven works too, but you won’t get that same golden crust. Honestly, air fryers are worth the investment for recipes like this one.
Preparation Method
Let’s get cooking. This Light & Crispy Air Fryer Chicken Breast with Garlic Herb Rub comes together faster than you’d think, but the order of steps matters. Here’s exactly how I do it:
- Prep the chicken (5 minutes): Place your chicken breasts on a cutting board. If they’re uneven in thickness — you know, one end thick and the other thin — place them between two sheets of plastic wrap and gently pound them to an even thickness using a rolling pin or heavy skillet. Don’t go crazy; about ¾ inch thick is perfect. Pat them completely dry with paper towels. This is crucial — moisture is the enemy of crispiness. Season both sides lightly with salt and pepper.
- Make the garlic herb rub (3 minutes): In a small bowl, combine the olive oil, minced garlic, dried rosemary, thyme, oregano, basil, garlic powder, onion powder, salt, pepper, and smoked paprika if using. Mix until it forms a thick, fragrant paste. The smell at this point is incredible — I always take a moment to appreciate it. If the mixture seems too thick, add another teaspoon of olive oil.
- Apply the rub (5 minutes): Using your hands (yes, get in there), rub the garlic herb mixture all over both chicken breasts. Don’t be shy — really massage it into the meat. Make sure every surface is covered, including the sides. Let the chicken sit at room temperature for 10 minutes while you preheat the air fryer. This rest allows the flavors to start penetrating the meat.
- Preheat the air fryer (3 minutes): Set your air fryer to 375°F (190°C) and let it preheat for 3 minutes. Some newer models don’t require preheating, but I find it helps create that initial sear. Spray the air fryer basket lightly with olive oil spray to prevent sticking.
- Cook the chicken (12-15 minutes): Place the chicken breasts in the air fryer basket in a single layer. Don’t overcrowd — they need space for air to circulate. If you’re cooking more than two, do it in batches. Cook at 375°F for 6 minutes, then carefully flip the chicken using tongs. Cook for another 6-8 minutes, depending on thickness. The chicken is done when an instant-read thermometer inserted into the thickest part reads 165°F (74°C).
- Rest the chicken (5 minutes): This step is easy to skip when you’re hungry, but don’t. Transfer the chicken to a cutting board and let it rest for 5 minutes before slicing. Resting allows the juices to redistribute throughout the meat. If you cut too early, all those precious juices will run out onto the board, leaving you with dry chicken.
- Slice and serve: Slice against the grain into ½-inch thick pieces. The exterior should be golden brown and crispy, with flecks of herbs visible. The inside should be white, juicy, and tender. If you see any pink, pop it back in the air fryer for 2 more minutes.
Visual cue: The chicken should look golden and slightly crackled on the outside, like a well-baked bread crust. When you press it with a finger, it should feel firm but with a little give — not hard or rock-solid.
Cooking Tips & Techniques
After making this Light & Crispy Air Fryer Chicken Breast with Garlic Herb Rub more times than I can count, I’ve collected a few lessons worth sharing. Some came from success, others from spectacular failure.
Don’t skip drying the chicken. I know it seems like an extra step, but wet chicken steams instead of crisping. I once forgot to pat the chicken dry and ended up with pale, sad-looking breasts that tasted more boiled than air-fried. Never again. Use multiple paper towels and really press them in.
Temperature matters more than time. Every air fryer runs slightly differently. My friend’s air fryer cooks everything two minutes faster than mine. That’s why a meat thermometer is your best friend. I’ve pulled chicken at exactly 165°F and had it be perfectly juicy. I’ve left it in two minutes longer and gotten dry results. Trust the thermometer, not the timer.
Let the rub sit. That 10-minute rest after applying the rub isn’t just for show. It gives the salt time to start drawing moisture back into the meat (osmosis, if you want to get scientific) and allows the garlic to infuse. I’ve tested this side by side — the rested chicken is noticeably more flavorful.
Spacing is everything. If you crowd the air fryer basket, the chicken steams instead of crisping. I learned this when I tried to cook three large breasts at once. They came out okay but not great. Now I always cook in batches if needed. It adds a few minutes but the texture difference is worth it.
One mistake I still make occasionally: Forgetting to flip the chicken. Set a timer for the halfway point. Trust me, nothing ruins a good crust like forgetting to flip and ending up with one perfectly golden side and one pale side.
Variations & Adaptations
This Light & Crispy Air Fryer Chicken Breast with Garlic Herb Rub is incredibly versatile. Here are some ways I’ve adapted it over the years:
Lemon Herb Version: Add the zest of one lemon to the garlic herb rub and squeeze fresh lemon juice over the chicken after it rests. The brightness cuts through the richness beautifully. I make this version in spring when I want something lighter.
Spicy Kick: Add ½ teaspoon of cayenne pepper or red pepper flakes to the rub. I tried this on a whim one night and ended up loving it. The heat pairs well with the garlic and herbs without overwhelming them.
Parmesan Crust: After applying the garlic herb rub, press each chicken breast into ¼ cup of finely grated Parmesan cheese. The cheese creates an extra-crispy, golden crust. Just note that this adds dairy and changes the nutrition profile.
Dairy-Free Adaptation: The base recipe is already dairy-free, which is great. For the Parmesan version, use nutritional yeast mixed with a bit of almond flour for a similar texture.
Different Cooking Methods: If you don’t have an air fryer, bake at 400°F (200°C) for 20-25 minutes, flipping halfway. You won’t get the same crispiness, but the flavor will still be excellent. For grilling, cook over medium-high heat for 6-7 minutes per side.
Herb Swaps: Use whatever fresh or dried herbs you have on hand. Tarragon adds a lovely anise note, while sage gives a more earthy, wintery flavor. I once made this with only dill and parsley because that’s what I had — it turned out surprisingly good.
Serving & Storage Suggestions
This Light & Crispy Air Fryer Chicken Breast with Garlic Herb Rub is incredibly versatile when it comes to serving. Here’s how I like to enjoy it:
Serving Temperature: Serve warm, right after resting. The crust is at its crispiest within the first 15 minutes of cooking. If it sits too long, the steam softens the exterior slightly.
Presentation: Slice against the grain and fan the pieces out on a plate. Garnish with fresh herbs like parsley or basil, and a wedge of lemon. It looks beautiful with minimal effort — perfect for impressing dinner guests.
Complementary Dishes: This chicken pairs beautifully with roasted vegetables (asparagus, broccoli, or Brussels sprouts), a fresh green salad with vinaigrette, garlic mashed potatoes, or a simple quinoa pilaf. For a low-carb option, serve over cauliflower rice or zucchini noodles.
Beverage Pairing: A crisp white wine like Sauvignon Blanc or Pinot Grigio complements the herbal notes. For non-alcoholic options, sparkling water with lemon or iced green tea works wonderfully.
Storage Instructions: Store leftover chicken in an airtight container in the refrigerator for up to 4 days. The crust will soften, but the flavor remains excellent. To reheat, place in the air fryer at 350°F for 3-4 minutes — this restores some of the crispiness. The microwave works in a pinch but will make the coating soggy.
Freezing: Cooked chicken freezes well for up to 3 months. Wrap individually in plastic wrap, then place in a freezer bag. Thaw overnight in the refrigerator before reheating. I often double the batch and freeze half for busy weeks.
Flavor Development: The garlic and herb flavors actually deepen after a day in the fridge. Cold slices make excellent sandwich fillings or salad toppers. I’ve been known to eat leftovers straight from the fridge — no judgment here.
Nutritional Information & Benefits
This Light & Crispy Air Fryer Chicken Breast with Garlic Herb Rub is as nutritious as it is delicious. Here’s what you’re getting per serving (one chicken breast with rub):
| Nutrient | Amount |
|---|---|
| Calories | 285 |
| Protein | 38g |
| Fat | 12g |
| Saturated Fat | 2g |
| Carbohydrates | 3g |
| Fiber | 1g |
| Sugar | 0g |
| Sodium | 620mg |
Pin This Recipe!
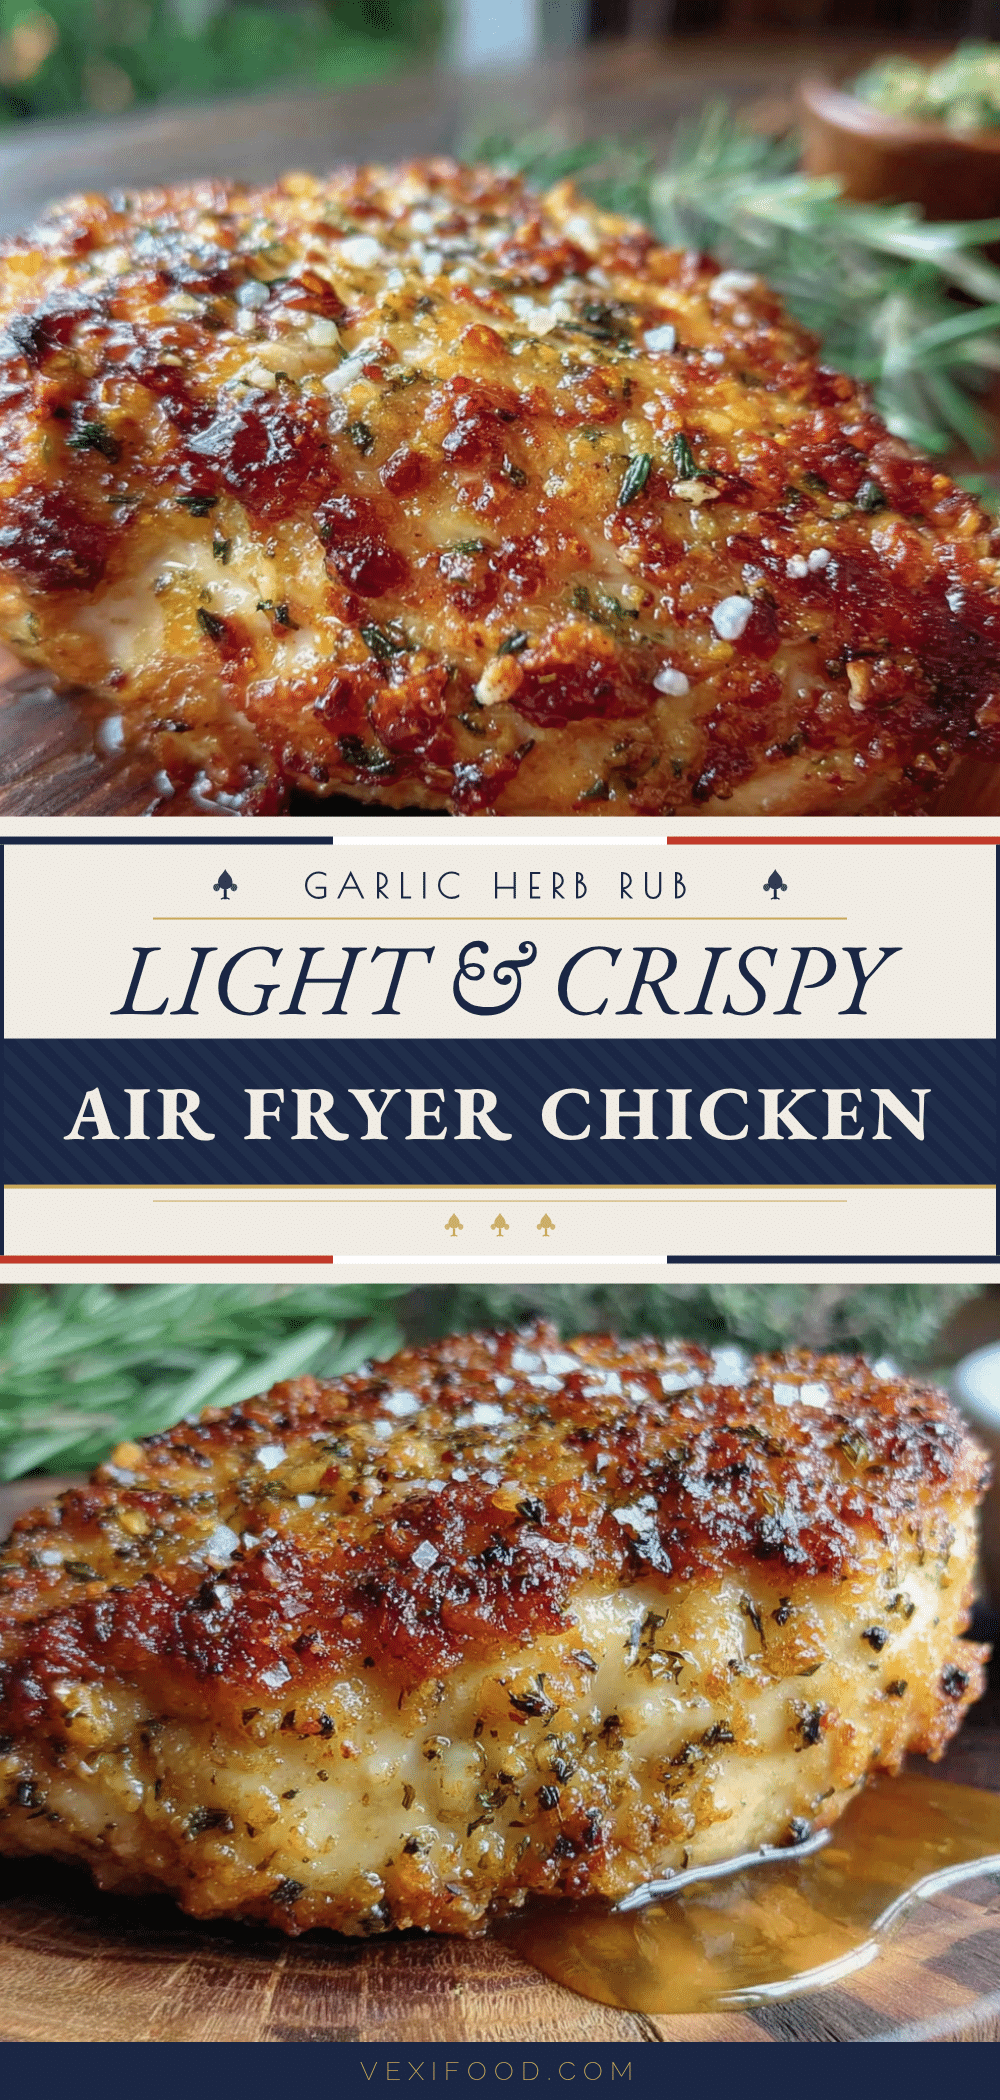
Light & Crispy Air Fryer Chicken Breast with Garlic Herb Rub
This air fryer chicken breast recipe features a fragrant garlic herb rub that creates an incredible crust while locking in moisture. Quick, easy, and perfect for busy weeknights, it delivers juicy, flavorful chicken in under 30 minutes.
- Prep Time: 15 minutes
- Cook Time: 12-15 minutes
- Total Time: 25-30 minutes
- Yield: 2 servings 1x
- Category: Main Course
- Cuisine: Mexican-inspired
Ingredients
- 2 tablespoons olive oil
- 4 cloves garlic, minced
- 1 teaspoon dried rosemary
- 1 teaspoon dried thyme
- 1 teaspoon dried oregano
- 1 teaspoon dried basil
- 1 teaspoon garlic powder
- ½ teaspoon onion powder
- 1 teaspoon salt
- ½ teaspoon black pepper
- ½ teaspoon smoked paprika (optional)
- 2 boneless, skinless chicken breasts (about 6–8 ounces each)
- Olive oil spray or cooking spray
Instructions
- Prep the chicken (5 minutes): Place chicken breasts on a cutting board. If uneven in thickness, place between two sheets of plastic wrap and gently pound to an even thickness of about ¾ inch. Pat completely dry with paper towels. Season both sides lightly with salt and pepper.
- Make the garlic herb rub (3 minutes): In a small bowl, combine olive oil, minced garlic, dried rosemary, thyme, oregano, basil, garlic powder, onion powder, salt, pepper, and smoked paprika if using. Mix until it forms a thick, fragrant paste. If too thick, add another teaspoon of olive oil.
- Apply the rub (5 minutes): Using your hands, rub the garlic herb mixture all over both chicken breasts, covering every surface. Let the chicken sit at room temperature for 10 minutes while preheating the air fryer.
- Preheat the air fryer (3 minutes): Set air fryer to 375°F (190°C) and preheat for 3 minutes. Spray the air fryer basket lightly with olive oil spray.
- Cook the chicken (12-15 minutes): Place chicken breasts in the air fryer basket in a single layer. Cook at 375°F for 6 minutes, then flip carefully using tongs. Cook for another 6-8 minutes, until an instant-read thermometer inserted into the thickest part reads 165°F (74°C).
- Rest the chicken (5 minutes): Transfer chicken to a cutting board and let rest for 5 minutes before slicing.
- Slice and serve: Slice against the grain into ½-inch thick pieces. The exterior should be golden brown and crispy, the inside white, juicy, and tender.
Notes
Don’t skip drying the chicken—wet chicken steams instead of crisping. Use a meat thermometer for best results; cook to exactly 165°F. Let the rub sit for 10 minutes to allow flavors to penetrate. Avoid overcrowding the air fryer basket. For best texture, serve within 15 minutes of cooking.
Nutrition
- Serving Size: 1 chicken breast wit
- Calories: 285
- Sodium: 620
- Fat: 12
- Saturated Fat: 2
- Carbohydrates: 3
- Fiber: 1
- Protein: 38
Keywords: air fryer chicken breast, garlic herb chicken, crispy chicken, healthy chicken recipe, quick chicken dinner, gluten-free chicken, low-carb chicken