Love this? Save it for later!
Share the inspiration with your friends
My sister asked why I couldn’t just use applesauce instead of oil in my pumpkin bars. I started to explain why that wouldn’t work—then stopped. Honestly, I had no good reason. I just assumed the texture would be rubbery and sad, like so many “healthy” baking experiments I’d suffered through. So I shrugged, handed her the measuring cup, and braced myself for disappointment.
Three winters ago, this moment happened in my tiny apartment kitchen on a rainy Tuesday. I was trying to develop a lighter version of my go-to fall dessert, and my sister—who has never once pretended to be a baker—casually suggested the swap. I had a cracked measuring cup in the sink and flour dust all over my favorite sweater. It was not a glamorous cooking moment, let me tell you.
The bars came out of the oven looking exactly right. Golden on top, springy to the touch, that familiar pumpkin spice smell filling every corner of the room. But the real shock came with the frosting. I’d browned butter and mixed it with cream cheese, expecting the usual heavy, sweet situation. Instead, it was nutty and rich without being cloying. The contrast with the tender, light pumpkin base was honestly perfect.
I took a bite and just stood there in my messy kitchen, genuinely surprised. My sister raised an eyebrow. “Told you,” she said. She was right. I mean, completely right. And I’ve been making these lighter pumpkin bars with brown butter frosting ever since. Maybe you’ve been there—that moment when someone who doesn’t cook much suggests something that feels wrong, but turns out to be exactly what you needed. This recipe is proof that lighter doesn’t mean less satisfying. It just means smarter.
Why You’ll Love This Recipe
These lighter pumpkin bars with brown butter frosting aren’t just another fall dessert you’ll forget about by November. They’re the kind of recipe that makes you rethink what “healthy baking” can actually taste like. I’ve tested this version at least a dozen times, tweaking the flour ratio and playing with the sweetener until everything clicked. Let me tell you what makes them special.
- Lighter but Not Sacrificing : By swapping oil for applesauce and cutting some sugar, each bar comes in around 180 calories instead of the usual 300-plus. But honestly? You won’t miss a thing. The texture stays moist and tender, not dense or heavy.
- Simple Ingredients : You probably already have canned pumpkin, flour, eggs, and butter in your kitchen. No weird protein powders or obscure sweeteners that require a specialty store trip. Just real food that works.
- Perfect for Fall Gatherings : Whether it’s a potluck, a Friendsgiving, or just a Tuesday that needs some pumpkin energy, these bars travel well and disappear fast. I brought them to a neighborhood dinner last month and three people asked for the recipe.
- That Brown Butter Frosting : This is the showstopper. Browning the butter adds a deep, nutty warmth that pairs perfectly with the pumpkin. And because we use less butter than traditional recipes, it feels indulgent without being overwhelming.
- Crowd-Pleaser for All Ages : Kids love the sweetness and the creamy frosting. Adults appreciate that it’s not a sugar bomb. It’s the rare dessert that makes everyone happy, including the person who brought it.
What makes this recipe different from the hundred other pumpkin bar recipes out there? It’s the balance. The applesauce trick keeps the bars light, the brown butter adds complexity, and the cream cheese frosting gets scaled back just enough that you taste the pumpkin, not just sugar. This isn’t just another version—it’s the version I keep coming back to year after year.
What Ingredients You Will Need
This recipe uses simple, wholesome ingredients that work together to create something genuinely delicious. Most of these are pantry staples, which makes these lighter pumpkin bars with brown butter frosting an easy last-minute dessert when fall cravings hit.
For the Pumpkin Bars
- Canned pumpkin puree (15 oz can) – Not pumpkin pie filling! Make sure you grab 100% pure pumpkin. I prefer Libby’s for consistent texture, but store brands work fine too.
- Unsweetened applesauce (1/2 cup) – This replaces most of the oil and keeps the bars incredibly moist. Use smooth applesauce, not chunky. Homemade works beautifully if you have it.
- Granulated sugar (3/4 cup) – We’re cutting back from the typical 1 cup or more. You can reduce to 1/2 cup if you prefer less sweetness, but don’t go lower or the texture suffers.
- Brown sugar (1/4 cup, packed) – Adds a hint of molasses depth that complements the pumpkin. Light or dark brown sugar both work here.
- Large eggs (2, at room temperature) – Room temperature eggs incorporate more easily into the batter. If you forgot to set them out, place them in warm water for 5 minutes.
- All-purpose flour (1 3/4 cups) – Spoon and level your flour for accurate measuring. Scooping directly from the bag packs in too much flour and makes bars dry.
- Baking powder (1 teaspoon) – Make sure it’s fresh. Test by dropping a bit into hot water—if it fizzes, you’re good.
- Baking soda (1/2 teaspoon) – Works with the acidity in the pumpkin for proper rise.
- Pumpkin pie spice (2 teaspoons) – I use McCormick, but you can make your own blend with cinnamon, nutmeg, ginger, and cloves. Store-bought is totally fine though.
- Cinnamon (1/2 teaspoon) – Extra warmth because more cinnamon is almost always the answer.
- Salt (1/4 teaspoon) – Balances the sweetness and enhances all the warm spices.
For the Brown Butter Cream Cheese Frosting
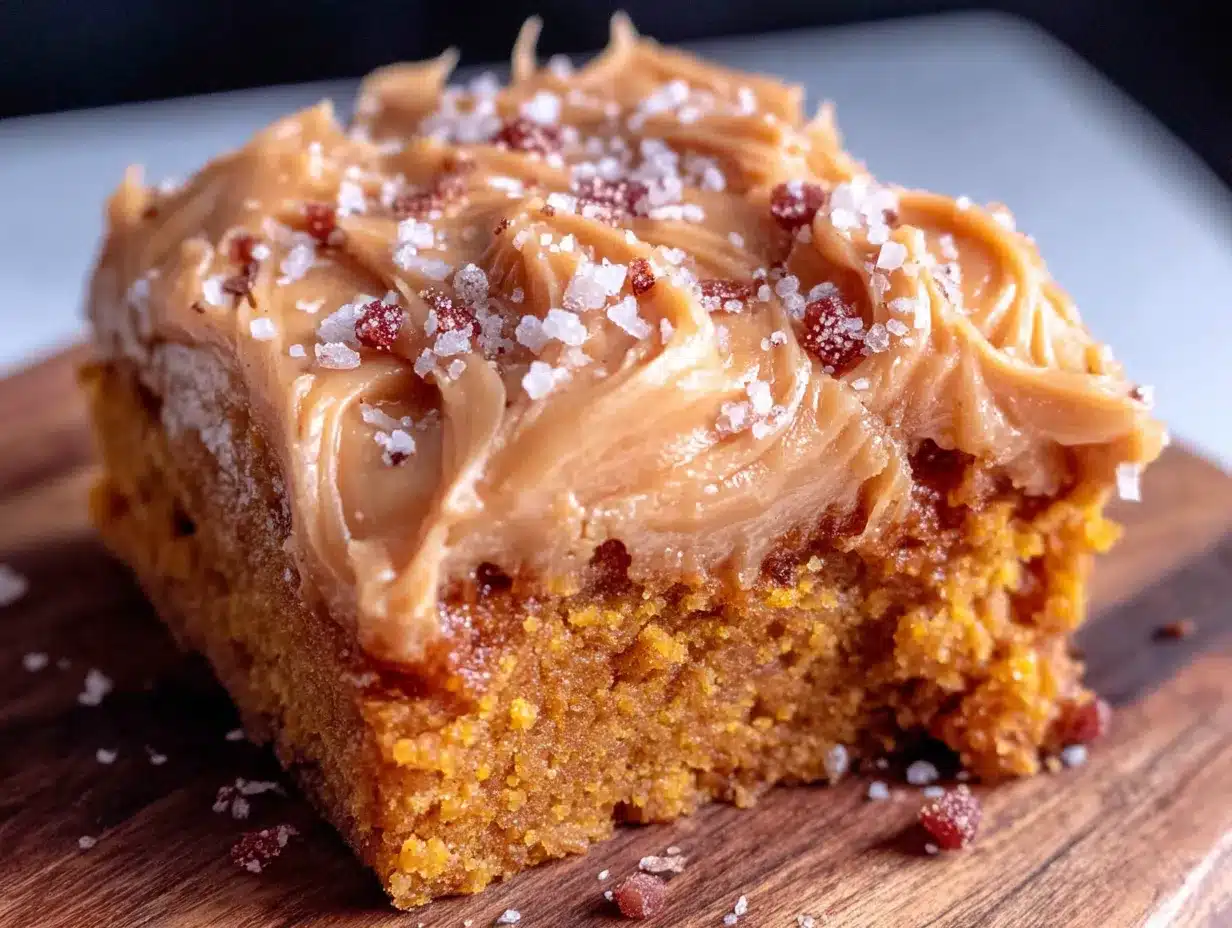
- Unsalted butter (1/4 cup, 4 tablespoons) – You’ll brown this first, which is easier than it sounds. Use a light-colored pan so you can see the color change.
- Cream cheese (4 oz, softened) – Full-fat is best here for texture. Low-fat cream cheese can make the frosting runny.
- Powdered sugar (1 cup) – Sift it if you want extra smooth frosting, but honestly, I rarely bother and it turns out fine.
- Vanilla extract (1/2 teaspoon) – Pure vanilla makes a difference here. Imitation will work, but the flavor won’t be as rich.
- Milk (1-2 tablespoons) – Only if needed to thin the frosting. Start with 1 tablespoon and add more slowly.
For substitutions, you can use a gluten-free all-purpose blend in place of regular flour. I’ve had good luck with Bob’s Red Mill 1-to-1 Baking Flour. For a dairy-free version, use plant-based butter and vegan cream cheese, though the brown butter flavor won’t be quite as pronounced. And if you’re out of applesauce, mashed banana works in a pinch—though it will add a subtle banana flavor that’s actually pretty nice with the pumpkin.
Equipment Needed
You don’t need a professional kitchen to make these lighter pumpkin bars with brown butter frosting. Here’s what you’ll actually use:
- 9×13-inch baking pan – Glass or metal both work. If using metal, consider lining with parchment paper for easier removal. I’ve used both and honestly prefer glass for even baking.
- Mixing bowls – One large for wet ingredients, one medium for dry. Nothing fancy needed.
- Whisk and spatula – A whisk for the dry ingredients and a rubber spatula for folding everything together without overmixing.
- Light-colored saucepan – This is crucial for browning butter. A dark pan makes it nearly impossible to see when the butter turns amber. I learned this the hard way and ended up with burnt butter and a smoky kitchen.
- Electric hand mixer or stand mixer – For the frosting. You can whisk by hand, but your arm will get tired and the texture won’t be as smooth. A hand mixer is perfect here.
- Cooling rack – Lets air circulate under the bars so they cool evenly. If you don’t have one, just let the bars cool completely in the pan—it takes longer but works.
Budget-friendly tip: If you don’t have a 9×13 pan, a 9×9 square pan works but you’ll need to bake about 10 minutes longer. Just keep an eye on it. And honestly, a cheap hand mixer from the grocery store does the same job as an expensive one for this recipe.
Preparation Method
Let’s walk through this step by step. I’ve made these lighter pumpkin bars with brown butter frosting enough times that I’ve got the rhythm down, and I’ll share all the little cues I’ve learned along the way.
- Preheat your oven to 350°F (175°C). Grease your 9×13 pan with butter or nonstick spray. If you’re using parchment paper, leave some overhang on the sides for easy lifting later. I always forget to do this and regret it when I’m wrestling bars out of the pan.
- In a large bowl, whisk together the pumpkin puree, applesauce, granulated sugar, brown sugar, and eggs. Whisk until everything is smooth and uniform. The mixture should look glossy and smell like fall already. Don’t worry if it seems thin—that’s normal.
- In a separate medium bowl, whisk together the flour, baking powder, baking soda, pumpkin pie spice, cinnamon, and salt. Whisking aerates the flour and distributes the leavening agents evenly. If you skip this step, you might end up with a pocket of baking soda in one bite—trust me, it’s not pleasant.
- Gradually add the dry ingredients to the wet ingredients, folding gently with a spatula. Stir just until no streaks of flour remain. A few small lumps are totally fine. Overmixing develops gluten and makes the bars tough, which is the opposite of what we want. Stop when it comes together—about 20 seconds of folding.
- Pour the batter into your prepared pan and spread it evenly. Use your spatula to reach the corners. The batter will be thick but spreadable. Give the pan a gentle tap on the counter to release any air bubbles.
- Bake for 22-26 minutes, or until a toothpick inserted in the center comes out clean or with just a few moist crumbs. Start checking at 22 minutes. The edges should be pulling away from the pan slightly, and the top should be golden and spring back when lightly touched. My oven runs hot, so I usually check at 20 minutes just to be safe.
- Let the bars cool completely in the pan on a wire rack. This takes about 1-2 hours. Do not frost while warm or the frosting will melt into a sad puddle. I once rushed this step because guests were arriving and ended up with pumpkin soup situation. Learn from my impatience.
- While the bars cool, make the brown butter frosting. In a light-colored saucepan over medium heat, melt the butter. Swirl the pan occasionally. The butter will foam, then turn from yellow to golden to amber. When you see brown specks forming at the bottom and smell a nutty aroma, remove it from heat immediately. This takes about 5-7 minutes. Pour the brown butter into a small bowl and let it cool for 10 minutes—it should be warm but not hot.
- In a medium bowl, beat the softened cream cheese with an electric mixer until smooth. Add the cooled brown butter and beat until combined. Gradually add the powdered sugar, beating on low speed to avoid a sugar cloud. Add vanilla extract and beat until fluffy. If the frosting seems too thick, add milk 1 teaspoon at a time until it reaches spreading consistency.
- Spread the frosting evenly over the completely cooled bars. Use an offset spatula if you have one, but a butter knife works fine. For clean cuts, refrigerate the frosted bars for 30 minutes before slicing. A plastic knife also helps prevent the frosting from dragging.
Cooking Tips & Techniques
After making these lighter pumpkin bars with brown butter frosting more times than I care to count, I’ve collected a few tricks that make the process smoother and the results more consistent.
Don’t skip the applesauce step. I know it sounds like a diet compromise, but it’s actually a texture upgrade. The applesauce keeps these bars incredibly moist without making them greasy. If you’re nervous, try replacing half the oil first. But honestly, go all in. You won’t regret it.
Brown butter is easier than you think. The first time I tried it, I stood over the pan like it was about to explode. But here’s the secret: just watch for the color change and trust your nose. When it smells like toasted nuts and looks like liquid amber, you’re done. Pour it into a cool bowl immediately to stop the cooking process. I burned my first batch because I walked away to answer the phone. Don’t do that.
Room temperature ingredients matter. Cold eggs and cold cream cheese don’t incorporate smoothly. You’ll end up with lumps in your batter and chunks in your frosting. Take everything out of the fridge 30 minutes before you start. If you forgot, place eggs in warm water for 5 minutes and microwave cream cheese in 10-second bursts until softened.
Check your oven temperature. Ovens lie. I learned this when my bars kept coming out dry despite following the recipe exactly. An inexpensive oven thermometer saved my baking. If your oven runs hot, reduce the temperature by 25°F and bake a few minutes longer.
Let the bars cool completely. I cannot stress this enough. Warm bars + cold frosting = melty disaster. Plus, the bars continue to set as they cool, developing a better texture. Patience is the hardest ingredient to master, but it’s worth it.
Variations & Adaptations
One of the best things about these lighter pumpkin bars with brown butter frosting is how adaptable they are. Here are some variations I’ve tried and loved.
Gluten-Free Version
Swap the all-purpose flour with a 1-to-1 gluten-free baking blend. I’ve used Bob’s Red Mill and King Arthur brands with great results. Add 1/4 teaspoon xanthan gum if your blend doesn’t already include it. The texture will be slightly more delicate, so handle the bars gently when cutting.
Dairy-Free Adaptation
Use plant-based butter for the brown butter (I like Miyoko’s for its rich flavor) and vegan cream cheese for the frosting. The brown butter flavor won’t be quite as intense, but it’s still delicious. Replace the milk with oat milk or almond milk. I tested this version for a friend with dairy sensitivity and she couldn’t tell the difference.
Pumpkin Chocolate Chip Bars
Fold 1/2 cup of dark chocolate chips into the batter before baking. The bitterness of dark chocolate balances the sweet pumpkin and nutty frosting beautifully. This is my personal favorite variation—I make it when I want something a little more indulgent.
Spice It Up
Add 1/4 teaspoon of cardamom or ginger to the spice blend for a more complex flavor profile. Cardamom adds an almost floral warmth that pairs surprisingly well with pumpkin. I discovered this combo by accident when I ran out of cinnamon and had to improvise.
Lower Sugar Option
Reduce the granulated sugar to 1/2 cup and skip the brown sugar entirely. The bars will be less sweet, but the pumpkin and spices will shine through more. For the frosting, use 3/4 cup powdered sugar instead of 1 cup. This version works well for breakfast or an afternoon snack.
Serving & Storage Suggestions
These lighter pumpkin bars with brown butter frosting are versatile enough for any occasion. Here’s how to serve and store them for the best experience.
Serving Temperature: I prefer these bars chilled straight from the fridge. The frosting firms up beautifully and the pumpkin flavor becomes more pronounced. But room temperature works too if you want a softer, more tender bite. Try both and see which you prefer—I change my mind depending on the day.
Presentation Ideas: Cut into squares and arrange on a simple white platter. A light dusting of cinnamon or a few toasted pumpkin seeds on top adds visual appeal without being fussy. For holiday gatherings, I sometimes drizzle a little extra brown butter over the top before serving.
Complementary Pairings: These bars go beautifully with a cup of hot coffee or spiced chai tea. For a dessert spread, serve alongside vanilla ice cream or a dollop of whipped cream. The creamy, cold contrast with the spiced bars is pure magic.
Storage Instructions: Store frosted bars in an airtight container in the refrigerator for up to 5 days. Place a layer of parchment paper between stacked bars to prevent sticking. If you’re storing unfrosted bars, they’ll keep at room temperature for 2-3 days in a sealed container.
Freezing Tips: These bars freeze beautifully. Freeze unfrosted bars in a single layer on a baking sheet, then transfer to a freezer-safe bag for up to 3 months. Frost them after thawing for the best texture. You can also freeze the frosting separately in a sealed container for up to 2 months—just thaw in the fridge and re-whip before using.
Flavor Development: Honestly, these bars taste even better the next day. The spices meld together and the pumpkin flavor deepens overnight. If you can resist eating them immediately, make them a day ahead for the best results.
Nutritional Information & Benefits
These lighter pumpkin bars with brown butter frosting offer a more balanced approach to fall dessert without sacrificing flavor. Here’s what you’re getting in each serving.
| Nutrient | Per Bar (1/16 of recipe) |
|---|---|
| Calories | ~180 |
| Total Fat | 8g |
| Saturated Fat | 4g |
| Carbohydrates | 26g |
| Sugar | 16g |
| Protein | 3g |
| Fiber | 2g |
| Sodium | 120mg |
Health Benefits: Pumpkin is packed with vitamin A, fiber, and antioxidants that support eye health and immunity. Applesauce adds natural sweetness and moisture without the saturated fat of oil. By reducing the butter and sugar compared to traditional recipes, each bar saves about 120 calories while still feeling indulgent.
Dietary Considerations: This recipe is vegetarian and can be made gluten-free and dairy-free with simple substitutions. It’s not vegan due to the eggs and cream cheese, but you could experiment with flax eggs and vegan alternatives. The bars are relatively low in saturated fat compared to most pumpkin desserts.
Allergen Notes: Contains wheat (gluten), dairy, and eggs. If you’re serving a crowd, consider making a note about these allergens on the serving platter. I always do this at potlucks and people appreciate it more than you’d think.
I’m not a nutritionist, but I do believe in eating desserts that make you feel good—not just in the moment, but afterward too. These bars hit that sweet spot where indulgence and nourishment meet.
Conclusion
These lighter pumpkin bars with brown butter frosting have become my go-to fall dessert for a reason. They’re the recipe that proved to me that “lighter” doesn’t have to mean “less satisfying.” The applesauce keeps everything tender and moist, the brown butter adds that nutty depth you didn’t know you needed, and the cream cheese frosting ties it all together without overwhelming the pumpkin.
What I love most about this recipe is how approachable it feels. You don’t need fancy equipment or professional baking skills. You just need a can of pumpkin, some pantry staples, and a little patience while the bars cool. And honestly, the fact that my sister was the one who suggested the applesauce swap still makes me smile every time I make them. Sometimes the best kitchen wisdom comes from the least expected places.
I’d love to hear how these turn out for you. Did you try any variations? Did the brown butter intimidate you at first? Drop a comment below and let me know. And if you’re looking for more fall baking inspiration, you might enjoy my pumpkin bread recipe or these healthy apple muffins that use the same applesauce trick. Happy baking, friends—your kitchen is about to smell incredible.
Frequently Asked Questions
Can I use fresh pumpkin instead of canned?
Yes, but you’ll need to roast and puree it first. Fresh pumpkin has more water content than canned, so you’ll need to drain the puree through a cheesecloth or paper towel for about 30 minutes to remove excess moisture. Otherwise, your bars might turn out too wet. Canned pumpkin is more consistent and honestly easier, so I usually stick with it.
Why did my brown butter burn?
Brown butter burns easily because it goes from perfect to burnt in seconds. Use a light-colored pan so you can see the color change clearly. Remove it from heat as soon as you see brown specks and smell a nutty aroma. Pour it into a cool bowl immediately to stop the cooking process. If it smells bitter or looks dark brown, start over.
Can I make these bars ahead of time?
Absolutely. These bars actually taste better the next day because the flavors have time to meld. You can bake the bars up to 2 days ahead and store them unfrosted in an airtight container at room temperature. Frost them the day you plan to serve. Or freeze the unfrosted bars for up to 3 months.
How do I get clean cuts when slicing?
For clean, bakery-style cuts, refrigerate the frosted bars for at least 30 minutes before slicing. Use a sharp knife and wipe it clean between each cut. A plastic knife also works great because the frosting doesn’t stick to it. If you’re serving a crowd, cut the bars while cold and let them come to room temperature before serving.
Can I reduce the sugar even more?
You can reduce the granulated sugar to 1/2 cup without affecting the texture too much, but the bars will be noticeably less sweet. I wouldn’t recommend reducing the brown sugar because it adds moisture as well as sweetness. For the frosting, you can cut the powdered sugar to 3/4 cup. The frosting will be less stiff but still delicious.
Pin This Recipe!
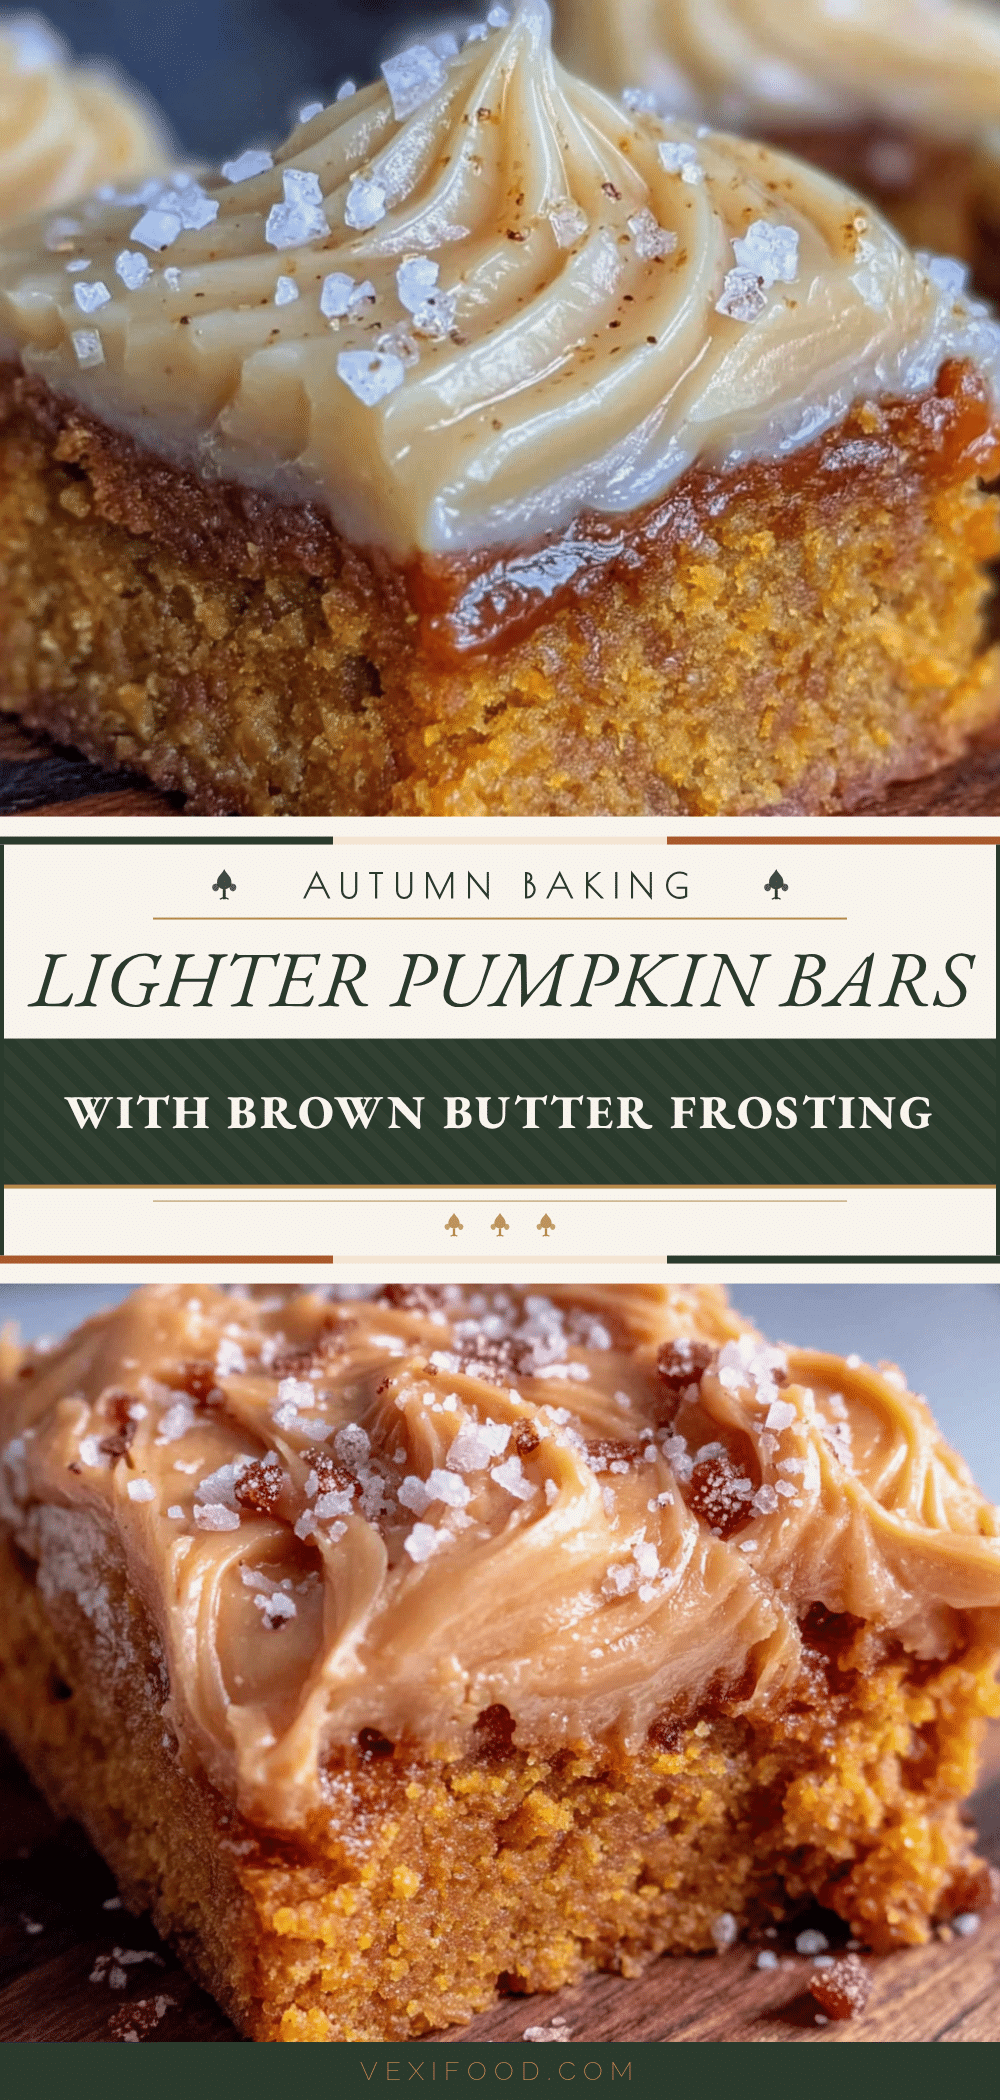
Lighter Pumpkin Bars with Brown Butter Frosting
These lighter pumpkin bars with brown butter frosting are moist, tender, and perfectly spiced, made healthier with applesauce instead of oil. The nutty brown butter cream cheese frosting adds rich flavor without being overly sweet.
- Prep Time: 15 minutes
- Cook Time: 25 minutes
- Total Time: 1 hour 40 minutes (includes cooling)
- Yield: 16 servings 1x
- Category: Dessert
- Cuisine: American
Ingredients
- 1 (15 oz) can pumpkin puree (not pumpkin pie filling)
- 1/2 cup unsweetened applesauce (smooth, not chunky)
- 3/4 cup granulated sugar
- 1/4 cup packed brown sugar (light or dark)
- 2 large eggs, at room temperature
- 1 3/4 cups all-purpose flour (spooned and leveled)
- 1 teaspoon baking powder
- 1/2 teaspoon baking soda
- 2 teaspoons pumpkin pie spice
- 1/2 teaspoon ground cinnamon
- 1/4 teaspoon salt
- 1/4 cup (4 tablespoons) unsalted butter (for browning)
- 4 oz cream cheese, softened
- 1 cup powdered sugar (sifted if desired)
- 1/2 teaspoon vanilla extract
- 1–2 tablespoons milk (only if needed to thin frosting)
Instructions
- Preheat oven to 350°F (175°C). Grease a 9×13-inch baking pan with butter or nonstick spray. Optionally line with parchment paper with overhang for easy removal.
- In a large bowl, whisk together pumpkin puree, applesauce, granulated sugar, brown sugar, and eggs until smooth and glossy.
- In a separate medium bowl, whisk together flour, baking powder, baking soda, pumpkin pie spice, cinnamon, and salt.
- Gradually add dry ingredients to wet ingredients, folding gently with a spatula just until no streaks of flour remain. Do not overmix.
- Pour batter into prepared pan and spread evenly. Tap pan gently on counter to release air bubbles.
- Bake for 22-26 minutes, or until a toothpick inserted in center comes out clean or with a few moist crumbs. Edges should pull away from pan slightly and top should be golden and spring back when touched.
- Let bars cool completely in pan on a wire rack, about 1-2 hours. Do not frost while warm.
- While bars cool, make brown butter frosting: In a light-colored saucepan over medium heat, melt butter. Swirl occasionally. Butter will foam, then turn from yellow to golden to amber. When brown specks form and you smell a nutty aroma (about 5-7 minutes), remove from heat immediately. Pour into a small bowl and let cool for 10 minutes (warm but not hot).
- In a medium bowl, beat softened cream cheese with an electric mixer until smooth. Add cooled brown butter and beat until combined. Gradually add powdered sugar, beating on low speed. Add vanilla and beat until fluffy. If too thick, add milk 1 teaspoon at a time until spreading consistency.
- Spread frosting evenly over completely cooled bars. For clean cuts, refrigerate frosted bars for 30 minutes before slicing. Use a sharp knife or plastic knife, wiping clean between cuts.
Notes
For gluten-free, use a 1-to-1 gluten-free baking blend (add 1/4 tsp xanthan gum if not included). For dairy-free, use plant-based butter and vegan cream cheese. Bars taste even better the next day. Store frosted bars in an airtight container in the refrigerator for up to 5 days. Freeze unfrosted bars for up to 3 months.
Nutrition
- Serving Size: 1 bar (1/16 of recip
- Calories: 180
- Sugar: 16
- Sodium: 120
- Fat: 8
- Saturated Fat: 4
- Carbohydrates: 26
- Fiber: 2
- Protein: 3
Keywords: pumpkin bars, brown butter frosting, healthy pumpkin dessert, applesauce pumpkin bars, fall dessert, lighter pumpkin bars