Love this? Save it for later!
Share the inspiration with your friends
I was standing at the checkout counter at the hardware store—of all places—holding a new showerhead and trying to remember if I needed lightbulbs. The woman behind me, maybe seventy years old with silver hair and a denim apron, glanced at my cart and laughed. “You’re not ready for Halloween yet,” she said, pointing at the complete lack of spooky decor. I admitted she was right. I was still figuring out what to serve at my kid’s costume party next weekend. She reached into her purse—I kid you not—pulled out a crumpled index card, and handed it to me. “Mummy stuffed pretzels,” she said. “My grandson won’t eat anything else on Halloween.” Her name was Margaret, and she’d been making these for thirty years. The card had grease stains and faded handwriting, and honestly, I almost lost it in the car on the way home. But I didn’t. And now, every October, I make a double batch because they disappear faster than candy. Maybe you’ve been there—staring at Pinterest at 10 PM the night before a party, wondering how to make something that looks impressive without spending three hours in the kitchen. This recipe is that answer. It came from a stranger in a hardware store, and it’s become my most-requested Halloween dish.
Why You’ll Love This Recipe
Let me be real with you—I’ve tested this recipe about seven times over the past two years. I’ve burned pretzels, overstuffed them, and once used string cheese that refused to melt right. But after all those trials, I can say this version is foolproof. It’s the one I bring to every Halloween party, and it never fails.
- Quick & Easy: From fridge to table in under 30 minutes. Seriously. You can make these while the kids are getting their costumes on.
- Simple Ingredients: You need refrigerated pizza dough, hot dogs or cheese sticks, and pretzel salt. That’s it. No weird specialty items.
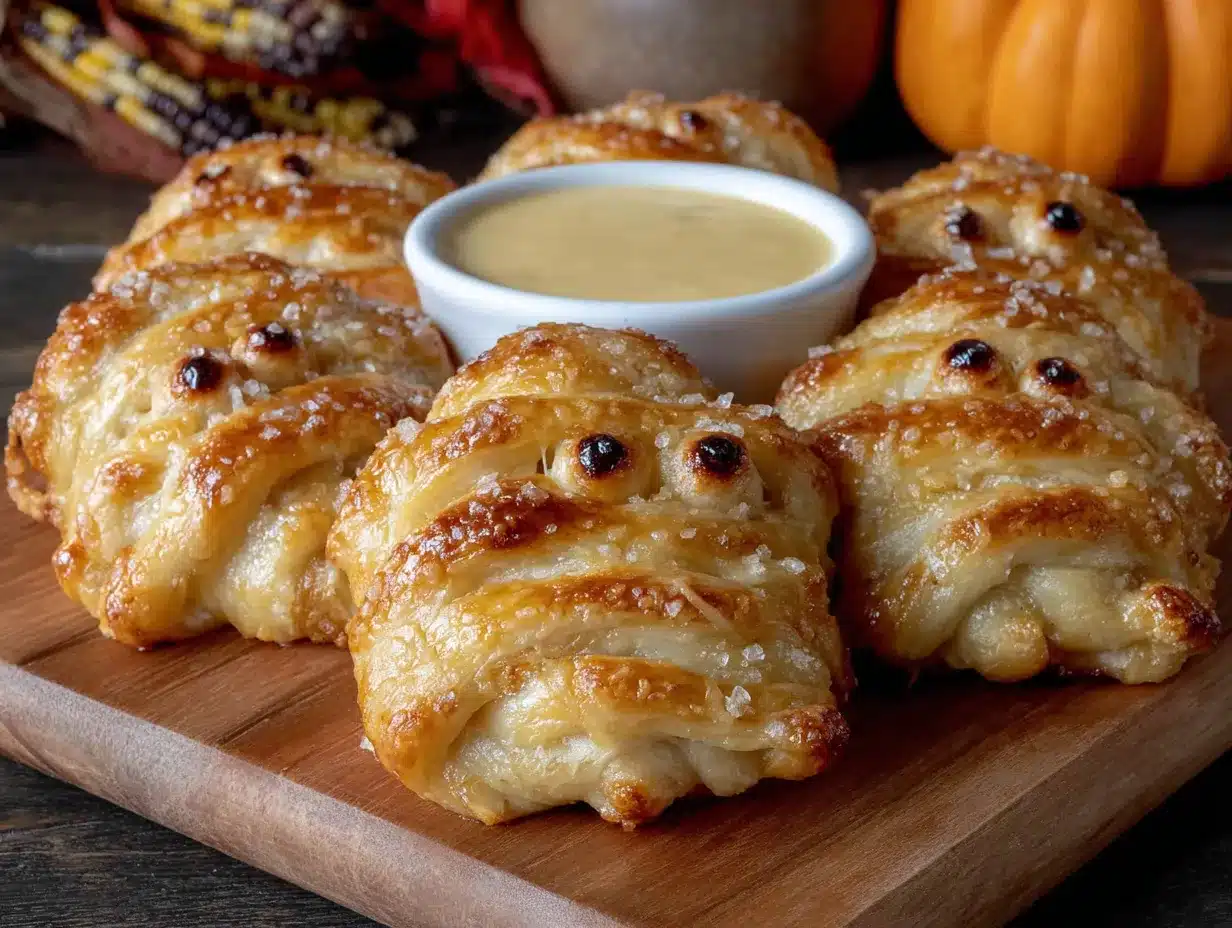
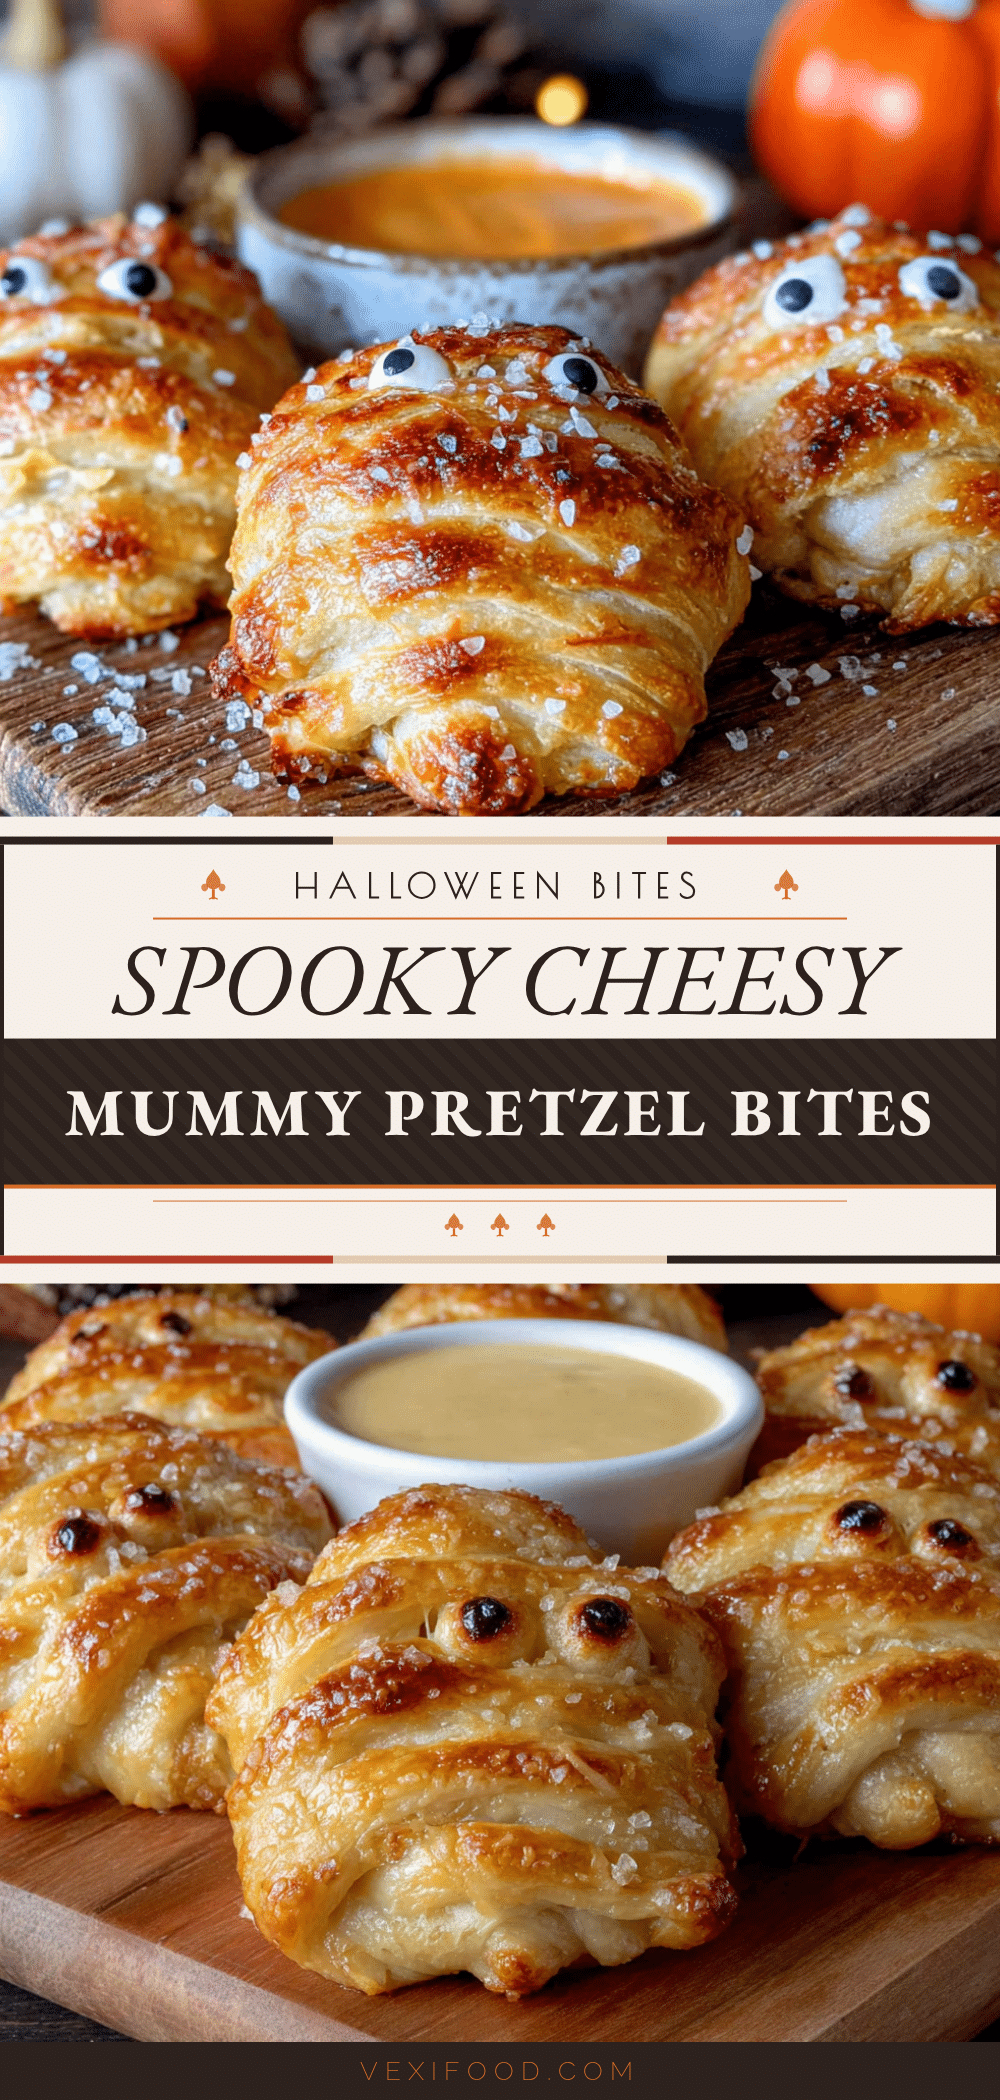
- Perfect for Halloween Parties: They look like little mummies wrapped in bandages. Kids go nuts for them, and adults sneak them when nobody’s looking.
- Crowd-Pleaser: I’ve served these at three different Halloween gatherings now. Every single time, someone asks for the recipe. Even my picky nephew ate four in one sitting.
- Unbelievably Delicious: The salty pretzel exterior, the gooey melted cheese or savory hot dog center, the slight chewiness of the dough—it’s comfort food in two bites.
What makes this different from other Halloween snacks? Most recipes use crescent rolls or puff pastry. But real pretzel dough gives you that authentic bakery taste with the signature golden-brown crust. Plus, the baking soda bath creates that chewy texture you can’t get any other way. This isn’t just another Pinterest fail—it’s the version I’ve perfected through trial and error. It’s the kind of appetizer that makes you close your eyes after the first bite. Honestly, it’s Halloween food that actually tastes good, not just looks cute.
What Ingredients You Will Need
This recipe uses simple, everyday ingredients to create something that looks way more complicated than it is. Most of these are probably already in your kitchen, which is exactly how I like it.
For the Pretzel Dough
- 1 can (16.3 oz) refrigerated pizza dough (I prefer Pillsbury or store brand—both work fine)
- 1 large egg, beaten (for egg wash, gives that shiny golden crust)
- Coarse sea salt or pretzel salt (for sprinkling on top)
For the Filling
- 8 hot dogs (beef or turkey, your choice—I like Hebrew National for flavor)
- or 8 mozzarella string cheese sticks (use these for a vegetarian version)
- or 8 smoked sausage links (for a heartier option)
For the Baking Soda Bath (This is the Secret)
- 4 cups water
- 2 tablespoons baking soda (this creates the pretzel texture)
For the Mummy Wraps (Decorations)
- 24 candy eyes (the little edible ones from the baking aisle)
- or 24 small dots of mustard or ketchup (if you don’t have candy eyes)
I recommend using the full-size hot dogs, not the little smokies, because they hold up better when wrapped. For the dough, look for the kind that comes in a tube—it’s easier to work with than homemade dough when you’re in a hurry. If you want to make this gluten-free, use a gluten-free pizza dough blend. I’ve tried it with against the grain brand and it worked surprisingly well. For a dairy-free option, skip the cheese sticks and use hot dogs or smoked sausages instead. The candy eyes are totally optional but they make the mummies look adorable. You can find them at most grocery stores near the cake decorating supplies.
Equipment Needed
You don’t need fancy kitchen gadgets for this recipe. That’s the beauty of it. Here’s what you’ll need:
- Large baking sheet (I use a 13×18 inch half-sheet pan)
- Parchment paper (trust me on this—don’t skip it)
- Sharp knife or pizza cutter (for cutting the dough strips)
- Pastry brush (for the egg wash—a silicone one works best)
- Large pot (for the baking soda bath)
- Slotted spoon (to transfer pretzels from the bath)
- Cutting board (for assembling everything)
- Small bowl (for the egg wash)
If you don’t have a pastry brush, use a clean paper towel to dab the egg wash on. It’s not as pretty but it works. I’ve done it that way when I forgot to pack my brush for a party. For the baking soda bath, any large pot will do—just make sure it’s big enough to fit one pretzel at a time without crowding. I use my old spaghetti pot and it’s perfect. If you don’t have a slotted spoon, tongs work too. Just be careful because the baking soda water gets hot.
Preparation Method
Alright, let’s get these mummies made. I’ve broken this down step by step so you don’t miss anything. Trust me, I’ve made every mistake possible so you don’t have to.
Step 1: Preheat and Prep
Preheat your oven to 400°F (200°C). Line your baking sheet with parchment paper. You don’t need to grease it—the parchment does the work. Set it aside for now.
Step 2: Prepare the Dough
Open the can of pizza dough and unroll it onto a lightly floured cutting board. Press it out into a rectangle about 12×8 inches. Using a sharp knife or pizza cutter, slice the dough lengthwise into 8 strips, each about 1 inch wide. You want them long and skinny—like bandages for your mummies. If the dough feels sticky, dust it with a little flour. I learned this the hard way after my first batch turned into a sticky mess.
Step 3: Wrap the Fillings
Take one hot dog (or cheese stick) and place it at one end of a dough strip. Wrap the dough around the filling, overlapping slightly as you go, like you’re wrapping a bandage. Leave a small gap near the top for the mummy’s face—about half an inch. Press the end of the dough gently to seal it. Repeat with all 8 fillings. Don’t wrap too tightly or the dough will tear during the baking soda bath. I speak from experience. Leave a little breathing room.
Step 4: The Baking Soda Bath
In a large pot, bring 4 cups of water to a boil. Carefully add 2 tablespoons of baking soda—it will bubble up, so don’t lean too close. Reduce the heat to a gentle simmer. Using a slotted spoon, lower one wrapped pretzel into the water. Let it simmer for 30 seconds, then flip it and simmer for another 30 seconds. This gives the pretzel that signature chewy crust. Remove it with the slotted spoon and place it on the parchment-lined baking sheet. Repeat with all 8 pretzels. Work in batches if needed—don’t overcrowd the pot. I usually do two at a time.
Step 5: Egg Wash and Salt
In a small bowl, beat the egg with 1 tablespoon of water. Brush each pretzel generously with the egg wash. This gives them that beautiful golden-brown color. Sprinkle coarse salt over the tops—don’t go crazy, just a light dusting. If you’re using candy eyes, now is the time to press them gently into the exposed dough at the top of each mummy. Press them in so they stick.
Step 6: Bake
Place the baking sheet in the preheated oven. Bake for 12-15 minutes, or until the pretzels are deep golden brown and the filling is hot. If you’re using cheese sticks, you might see a little cheese oozing out—that’s normal and actually looks kind of spooky. Let them cool on the baking sheet for 2-3 minutes before serving. They’ll be hot!
Step 7: Add the Eyes (If You Haven’t Already)
If you forgot to add the candy eyes before baking (I’ve done this), you can press them on right after they come out of the oven. The residual heat will soften them enough to stick. Or use a tiny dot of mustard or ketchup to glue them on. Honestly, I think the mustard eyes look even cuter.
Cooking Tips & Techniques
Here’s the stuff I wish someone had told me before my first attempt. These are the little tricks that make the difference between okay mummies and amazing mummies.
Don’t skip the baking soda bath. I know it seems fussy, but this is what gives pretzels their distinctive texture. Without it, you’re just making bread-wrapped hot dogs. The bath creates that chewy, slightly crispy exterior that makes pretzels so addictive. If you skip it, the dough stays soft and pale.
Watch your baking soda carefully. Too much and the pretzels get a weird metallic taste. Stick to the 2 tablespoons per 4 cups ratio. I once accidentally doubled it and the pretzels tasted like a swimming pool. Not good.
Don’t overwork the dough. When you’re cutting the strips, handle the dough as little as possible. The more you touch it, the tougher it gets. Use a sharp knife or pizza cutter and make clean cuts. If the dough starts to shrink back, let it rest for 5 minutes before continuing.
Space them out on the baking sheet. These pretzels expand as they bake. If they’re too close together, they’ll stick to each other and lose their mummy shape. Leave at least 2 inches between each one. I learned this after a batch came out looking like a pretzel blob.
Make ahead tip: You can assemble the mummies up to the baking soda bath step and refrigerate them for up to 4 hours. Just cover them with plastic wrap. When you’re ready to bake, do the bath and egg wash right before putting them in the oven. This is a lifesaver for party prep.
Variations & Adaptations
One of the best things about this recipe is how easy it is to switch things up. Here are some variations I’ve tried and loved:
Vegetarian Version
Swap the hot dogs for mozzarella string cheese sticks. They melt into gooey, stretchy goodness. Just make sure to wrap them tightly so the cheese doesn’t leak out completely. I’ve also used vegan cheese sticks from Daiya—they work but don’t melt as smoothly.
Spicy Mummies
Use spicy Italian sausages or jalapeño cheddar sausages instead of regular hot dogs. The heat pairs perfectly with the salty pretzel exterior. My husband requests these every time. Brush a little sriracha on the dough before wrapping for extra kick.
Breakfast Mummies
This sounds weird but trust me—use breakfast sausages instead of hot dogs. Serve them with maple syrup for dipping. I made these for a Halloween morning brunch and they were gone in minutes. The sweet and salty combo is incredible.
Gluten-Free Option
Use a gluten-free pizza dough blend. I’ve tried this with several brands and it works best with the ones that include xanthan gum. The texture won’t be exactly the same, but the flavor is still great. Just be extra gentle when transferring them to the baking soda bath—gluten-free dough is more fragile.
Air Fryer Method
If you want to skip the oven, these work beautifully in an air fryer. Preheat to 375°F (190°C), then cook for 8-10 minutes, flipping halfway through. They come out extra crispy. I use this method when I’m only making a few for myself.
Serving & Storage Suggestions
These mummies are best served warm, right out of the oven. The cheese should be gooey and the pretzel exterior should have that perfect chew. I like to arrange them on a platter with a bowl of mustard or marinara sauce for dipping. The yellow mustard looks especially Halloween-y against the golden pretzels.
For a full Halloween spread, pair these with some spider web dip and pumpkin-shaped cheese ball. They also go great with a bowl of Halloween punch for the kids. I’ve served them alongside mummy hot dogs for a double-dose of spooky snacks.
Storage: Leftover mummies (if you have any) can be stored in an airtight container in the refrigerator for up to 3 days. The texture changes a bit—they lose some of that crispiness—but they’re still tasty.
Reheating: The best way to reheat them is in the oven at 350°F (175°C) for 5-7 minutes. The microwave works in a pinch, but the pretzel gets soft and chewy. If you’re in a hurry, microwave them for 20-30 seconds, then pop them under the broiler for 1 minute to crisp up the outside.
Freezing: You can freeze these before or after baking. To freeze unbaked, assemble them through the wrapping step, then place on a baking sheet and freeze until solid. Transfer to a freezer bag. When ready to bake, do the baking soda bath and egg wash while still frozen, then add 3-5 minutes to the baking time. To freeze baked, let them cool completely, then wrap individually in plastic wrap and freeze. Reheat directly from frozen at 350°F for 10 minutes.
Nutritional Information & Benefits
I’m not a nutritionist, so take these numbers as rough estimates. But here’s the breakdown for one mummy pretzel made with a hot dog:
- Calories: Approximately 220-250
- Protein: 8-10 grams
- Carbohydrates: 22-25 grams
- Fat: 10-12 grams
- Sodium: 600-700 mg
These are definitely a treat, not an everyday snack. But they’re not terrible for a party appetizer. The hot dogs provide some protein, and the pizza dough gives you energy. If you’re watching your sodium, use low-sodium hot dogs and go light on the pretzel salt. The cheese stick version has slightly more calcium but similar calories. For a lighter option, use turkey hot dogs and whole wheat pizza dough. I’ve tried that combo and it’s surprisingly good—the whole wheat adds a nice nuttiness.
Potential allergens: wheat/gluten (from the dough), dairy (from the cheese sticks or egg wash), and eggs. If you’re serving a crowd with allergies, label them clearly or make a separate batch with allergen-free ingredients.
Frequently Asked Questions
Can I use crescent roll dough instead of pizza dough?
You can, but the texture won’t be the same. Crescent rolls are flakier and lighter, while pizza dough gives you that authentic pretzel chew. If you use crescent rolls, skip the baking soda bath and just brush with egg wash before baking. They’ll still taste good, just not like pretzels.
My dough keeps tearing when I wrap it. What am I doing wrong?
You’re probably stretching the dough too thin. The strips should be about 1 inch wide and 1/4 inch thick. If they’re too thin, they’ll tear. Also, make sure your dough is at room temperature—cold dough is less pliable. Let it sit out for 10 minutes before working with it.
Can I make these ahead of time for a party?
Absolutely. Assemble them up to the baking soda bath step, then cover and refrigerate for up to 4 hours. Do the bath and egg wash right before baking. You can also freeze them unbaked for up to a month—just add a few extra minutes to the baking time.
The candy eyes fell off during baking. How do I keep them on?
Press them into the dough firmly before baking. If they still fall off, you can add them after baking with a tiny dab of mustard or ketchup as glue. I actually prefer adding them after because they look brighter and more defined.
My pretzels came out pale and soft. What went wrong?
You probably skipped the baking soda bath or didn’t boil them long enough. The bath is essential for that golden-brown color and chewy texture. Also, make sure your oven is fully preheated to 400°F. An oven thermometer can help if yours runs cool.
Conclusion
I still think about Margaret sometimes—the woman in the hardware store who changed my Halloween game forever. She probably has no idea that her crumpled index card became a tradition in my house. But that’s the thing about good recipes. They travel. They find their way into kitchens where they’re needed, and they make holidays a little more special.
These mummy stuffed pretzels are worth making. Not because they’re fancy or complicated, but because they’re fun. They make people smile. Kids light up when they see those little candy eyes peeking out from the pretzel bandages. Adults can’t resist grabbing one as they walk by. And honestly, anything that gets people gathered around the kitchen counter on Halloween night is a win in my book.
So go ahead—make a batch. Or two. Customize them however you like. Add spicy sausage, swap in cheese, or go full breakfast mode. The recipe is forgiving and flexible. And if you come up with a variation I haven’t tried, drop a comment below. I’m always looking for new ideas. Happy Halloween, friends. May your pretzels be golden, your cheese be gooey, and your candy eyes stay put.
Pin This Recipe!
Mummy Stuffed Pretzels: Easy Halloween Appetizer Recipe
Quick and easy Halloween appetizer made with refrigerated pizza dough wrapped around hot dogs or cheese sticks, boiled in a baking soda bath, and baked until golden. Perfect for parties and guaranteed to disappear fast.
- Prep Time: 15 minutes
- Cook Time: 15 minutes
- Total Time: 30 minutes
- Yield: 8 servings 1x
- Category: Appetizer
- Cuisine: American
Ingredients
- 1 can (16.3 oz) refrigerated pizza dough
- 1 large egg, beaten
- Coarse sea salt or pretzel salt
- 8 hot dogs (beef or turkey) or 8 mozzarella string cheese sticks or 8 smoked sausage links
- 4 cups water
- 2 tablespoons baking soda
- 24 candy eyes (or 24 small dots of mustard or ketchup)
Instructions
- Preheat oven to 400°F (200°C). Line a baking sheet with parchment paper.
- Open the can of pizza dough and unroll onto a lightly floured cutting board. Press into a 12×8 inch rectangle. Slice lengthwise into 8 strips, each about 1 inch wide.
- Place one hot dog (or cheese stick) at one end of a dough strip. Wrap the dough around the filling, overlapping slightly, leaving a small gap near the top for the face. Press the end to seal. Repeat with all fillings.
- In a large pot, bring 4 cups of water to a boil. Add 2 tablespoons baking soda (it will bubble). Reduce heat to a gentle simmer. Using a slotted spoon, lower one wrapped pretzel into the water. Simmer for 30 seconds, flip, and simmer another 30 seconds. Remove and place on the prepared baking sheet. Repeat with all pretzels.
- In a small bowl, beat the egg with 1 tablespoon water. Brush each pretzel with egg wash. Sprinkle with coarse salt. If using candy eyes, press them gently into the exposed dough at the top of each mummy.
- Bake for 12-15 minutes, until deep golden brown and filling is hot. Let cool on the baking sheet for 2-3 minutes before serving.
- If you forgot to add candy eyes before baking, press them on after baking with a tiny dab of mustard or ketchup as glue.
Notes
Don’t skip the baking soda bath—it gives the pretzels their signature chewy texture. For make-ahead, assemble up to the baking soda bath step and refrigerate for up to 4 hours. For freezing, assemble through wrapping, freeze on a baking sheet, then transfer to a freezer bag. When ready to bake, do the bath and egg wash while still frozen, adding 3-5 minutes to baking time.
Nutrition
- Serving Size: 1 mummy pretzel
- Calories: 235
- Sugar: 3
- Sodium: 650
- Fat: 11
- Saturated Fat: 4
- Carbohydrates: 23
- Fiber: 1
- Protein: 9
Keywords: Halloween appetizer, mummy pretzels, stuffed pretzels, easy Halloween snack, hot dog pretzels, cheese pretzels, party food