Love this? Save it for later!
Share the inspiration with your friends
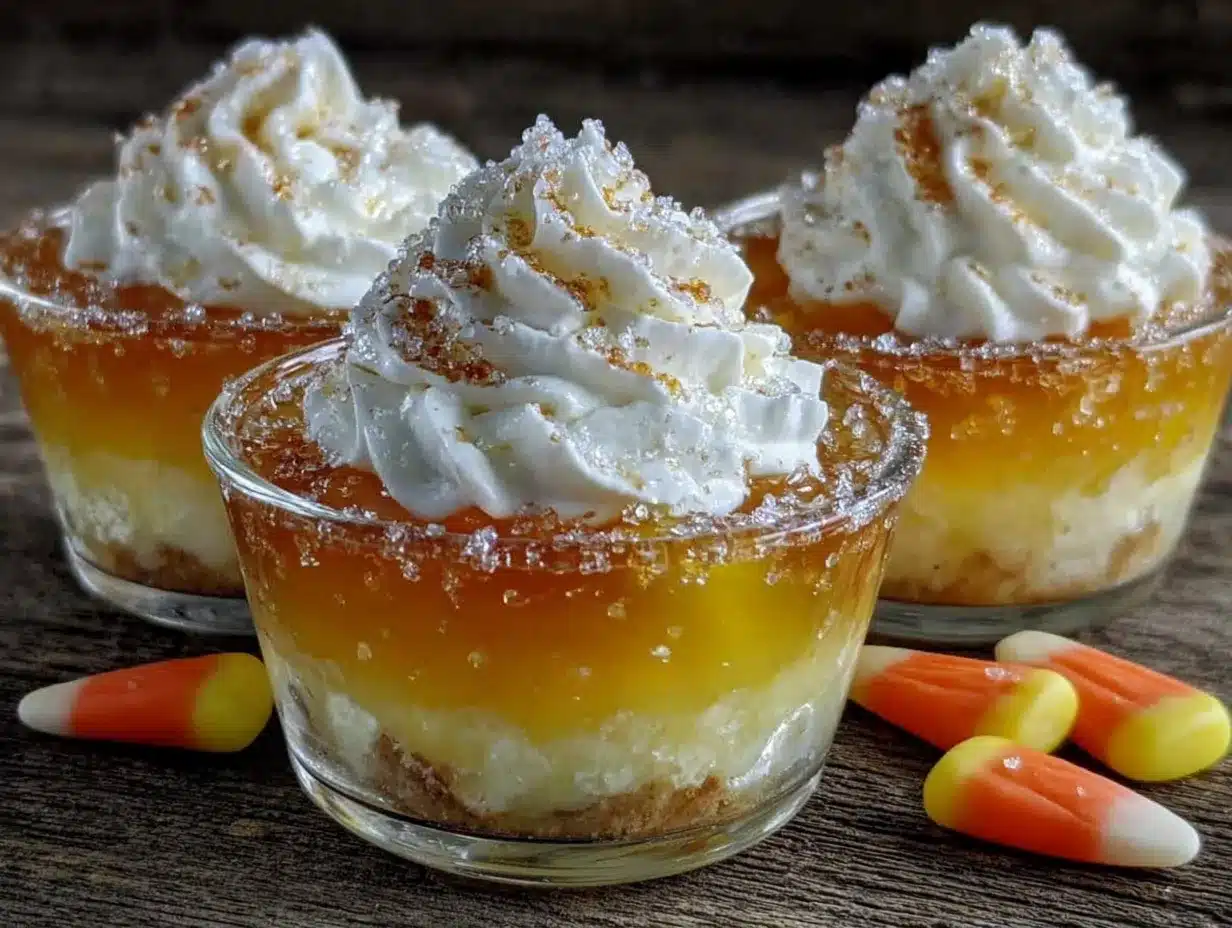
There used to be a tiny bakery on a quiet corner in Portland, Oregon—called Sugar & Spice—that made the most incredible layered jello cups. They weren’t just any jello cups, mind you. They looked exactly like candy corn, stacked in perfect little stripes of yellow, orange, and white. When they closed their doors three years ago, I honestly felt a little lost. That might sound dramatic, but let me tell you, those jello cups were the highlight of my fall visits. After about seven tries—and one particularly disastrous batch that turned into a sad, muddy brown mess—I finally cracked the code.
Someone asked me last week why I was so obsessed with recreating a jello dessert, of all things. But that’s the thing, isn’t it? Sometimes the simplest treats leave the biggest mark. I mean, who knew that a few layers of gelatin could bring back such a clear memory? The way the orange layer caught the afternoon light through the bakery window, the slight wobble when you picked up the cup—it was pure nostalgia in a plastic cup.
These Perfect Candy Corn Layered Jello Cups are my little victory lap. They’re not just a pretty face, either. They taste like fall in a way that’s hard to describe—sweet, creamy, and just a little bit magical. Maybe you’ve been there, chasing a flavor from a place that no longer exists. If so, you’re going to love this one. Let’s make some jello, shall we?
Why You’ll Love This Recipe
Honestly, I’ve tested this recipe more times than I care to admit. But every single batch taught me something, and the result is a dessert that’s foolproof, gorgeous, and genuinely fun to make. Here’s why you’ll want to add it to your fall baking list:
- Quick & Easy: Comes together in under 30 minutes of active prep time. The hardest part is waiting for each layer to set!
- Simple Ingredients: No fancy grocery trips needed. You probably have everything in your pantry right now.
- Perfect for Fall Gatherings: Great for Halloween parties, Thanksgiving dessert tables, or just a cozy afternoon treat.
- Crowd-Pleaser: Kids love the candy corn look, and adults appreciate the nostalgic, creamy sweetness.
- Unbelievably Delicious: The combination of fruity jello and sweetened condensed milk is next-level comfort food.
What makes this recipe different from the rest? It’s the technique. I figured out exactly how to keep those layers crisp and defined without them bleeding into each other. No muddy stripes here! Plus, using sweetened condensed milk in the creamy layer gives it a richness that plain jello just can’t match. It’s comfort food reimagined—faster, simpler, but with the same soul-soothing satisfaction. Perfect for impressing guests without stress, or turning a simple dessert into something memorable.
What Ingredients You Will Need
This recipe uses simple, pantry-friendly ingredients to deliver those iconic candy corn colors and creamy texture. Here’s everything you’ll need:
For the Yellow Layer (Bottom)
- 1 box (3 oz) lemon or pineapple jello (I prefer Jell-O brand for consistent results)
- 1 cup boiling water
- 1/2 cup cold water
For the Orange Layer (Middle)
- 1 box (3 oz) orange jello (or peach, if you want a slightly milder flavor)
- 1 cup boiling water
- 1/2 cup cold water
For the White Creamy Layer (Top)
- 1 box (3 oz) unflavored gelatin (like Knox)
- 1/4 cup cold water (for blooming the gelatin)
- 1 can (14 oz) sweetened condensed milk
- 1 cup boiling water
- 1 teaspoon vanilla extract
Ingredient Tips: I recommend using name-brand jello for the most vibrant colors. Store brands sometimes have a slightly duller shade, and we want those candy corn stripes to pop! For the creamy layer, sweetened condensed milk is non-negotiable—it gives that rich, silky texture. Don’t try to substitute with regular milk, or the layer won’t set properly.
Equipment Needed
You don’t need any fancy gadgets for this one. Here’s what you’ll need:
- 3 small mixing bowls (for preparing each jello flavor separately)
- 1 medium saucepan (for boiling water)
- 1 liquid measuring cup (I use a 2-cup Pyrex)
- 1 whisk or fork (for stirring gelatin)
- 8-10 clear plastic cups (4 oz size works perfectly, or use small glass jars)
- 1 baking sheet or tray (to hold the cups while they set in the fridge)
- 1 small offset spatula or spoon (for smoothing the creamy layer)
Personal Note: I’ve tried using both plastic cups and small mason jars. The plastic cups are easier to see through and give that classic candy corn look, but the glass jars feel a bit fancier for serving guests. Either works great! Just make sure they’re clear so the layers show through.
Preparation Method
Let’s walk through this step by step. Trust me, the key is patience between layers. Don’t rush it!
- Prepare the Yellow Layer: In a small bowl, empty the lemon or pineapple jello packet. Add 1 cup of boiling water and stir for 2 minutes until the powder is completely dissolved. Then, stir in 1/2 cup of cold water. Pour the mixture evenly into your clear cups, filling each about one-third of the way. Place the cups on a baking sheet and refrigerate for at least 45 minutes, or until the jello is fully set and firm to the touch.
- Prepare the Orange Layer: While the yellow layer sets, make the orange jello. In another bowl, empty the orange jello packet, add 1 cup boiling water, stir until dissolved, then add 1/2 cup cold water. Let it cool to room temperature—this is important so it doesn’t melt the yellow layer when you pour it. Once the yellow layer is firm, gently spoon the orange mixture on top. Refrigerate for another 45 minutes to 1 hour.
- Prepare the White Creamy Layer: In a third bowl, sprinkle the unflavored gelatin over 1/4 cup of cold water. Let it sit for 5 minutes to bloom—it will look like a thick, spongy paste. Then, add 1 cup of boiling water and stir until the gelatin is completely dissolved. Pour in the sweetened condensed milk and vanilla extract, and whisk until smooth. Let this mixture cool to room temperature as well.
- Assemble the Top Layer: Once the orange layer is fully set, carefully spoon the white creamy mixture over the top. Fill the cups to the brim. Use a small offset spatula or the back of a spoon to smooth the tops. Refrigerate for at least 4 hours, or overnight for best results.
- Serve and Enjoy: The jello cups should be firm and wobbly. You can serve them right in the cups, or if you’re feeling fancy, run a knife around the edge and invert them onto a plate. Garnish with a few candy corn pieces on top for extra flair!
Troubleshooting Tip: If your layers are bleeding into each other, it means you poured the next layer too soon or while it was still warm. Always let each layer cool to room temperature before pouring, and make sure the previous layer is completely set—no jiggle!
Cooking Tips & Techniques
I’ve made a few mistakes along the way, so you don’t have to. Here are my best tips for perfect layers every time:
- Patience is key: I know it’s tempting to rush, but each layer needs a full 45 minutes to set. If you’re short on time, you can pop the cups in the freezer for 15 minutes, but watch them carefully—jello can freeze and become grainy.
- Room temperature is your friend: Always let your jello mixtures cool to room temperature before pouring over a set layer. Hot liquid will melt the layer below and create a muddy mess. I learned this the hard way!
- Use a measuring cup for pouring: A spouted measuring cup gives you more control than a bowl. Pour slowly and steadily to avoid splashing.
- Chill your cups on a tray: This makes moving them in and out of the fridge much easier. Plus, if anything spills, it’s contained.
- Double-check the set: Before adding the next layer, gently touch the surface of the jello. It should be firm and not stick to your finger. If it’s still sticky, give it more time.
Variations & Adaptations
One of the best things about this recipe is how easy it is to customize. Here are a few fun twists I’ve tried:
- Low-Sugar Version: Use sugar-free jello packets and swap the sweetened condensed milk for a can of evaporated milk mixed with a sugar substitute like Stevia. The texture will be slightly less creamy, but still delicious.
- Vegan Option: Use agar-agar powder instead of gelatin (follow the package instructions for ratios). For the creamy layer, use full-fat coconut milk mixed with a bit of maple syrup. It sets beautifully and has a lovely tropical hint.
- Halloween Theme: Add a few drops of edible glitter to the white layer for a sparkly effect, or top each cup with a tiny plastic spider ring. My niece went crazy for these at her Halloween party!
- Different Flavors: Swap the lemon jello for pineapple or even mango for a tropical twist. The orange layer can be replaced with raspberry or strawberry for a more vibrant red-orange hue. Just make sure the colors still resemble candy corn!
Serving & Storage Suggestions
These jello cups are best served chilled, straight from the fridge. The texture is perfect when they’re cold and firm. If you’re serving them at a party, you can make them a day ahead—they actually taste better after sitting overnight because the flavors meld together.
For storage, keep the cups covered with plastic wrap or a lid in the refrigerator. They’ll stay fresh for up to 5 days. I don’t recommend freezing them, as the texture becomes watery and grainy upon thawing.
Reheating Note: You don’t need to reheat these at all! Just pull them out of the fridge about 10 minutes before serving to take the chill off. If you want to get fancy, serve them on a small plate with a dollop of whipped cream and a sprinkle of cinnamon.
Nutritional Information & Benefits
Here’s an approximate nutritional breakdown per serving (based on 8 servings):
- Calories: 210
- Fat: 5g
- Carbohydrates: 38g
- Protein: 5g
- Sugar: 34g
Health Benefits: While this is definitely a treat, there are a few bright spots. Gelatin is a good source of collagen, which supports joint health and skin elasticity. The sweetened condensed milk provides calcium and protein. Plus, if you use sugar-free jello, you can cut the sugar content significantly. As with any dessert, enjoy in moderation!
Conclusion
These Perfect Candy Corn Layered Jello Cups are more than just a pretty dessert—they’re a little piece of fall nostalgia that you can make right in your own kitchen. Whether you’re recreating a memory like I was, or just looking for a fun Halloween treat, this recipe delivers every time.
I’d love to hear how yours turn out! Leave a comment below and let me know if you tried any fun variations. Did you use different flavors? Did your kids help with the layers? Share your photos on social media and tag me—I can’t wait to see your candy corn creations. Happy fall, friends!
Frequently Asked Questions
Can I use sugar-free jello for this recipe?
Absolutely! Sugar-free jello works perfectly. Just follow the same instructions. The texture will be slightly less firm, but still delicious. I’ve made it with sugar-free lemon and orange jello, and it turned out great.
How long does each layer need to set?
Each layer needs at least 45 minutes to 1 hour in the refrigerator. The creamy top layer needs a bit longer—about 4 hours or overnight. Patience is your best friend here!
Can I make these jello cups ahead of time?
Yes! They actually taste better the next day. You can make them up to 3 days in advance. Just keep them covered in the fridge until you’re ready to serve.
Why did my layers bleed into each other?
This usually happens if you pour the next layer while it’s still warm, or if the previous layer wasn’t fully set. Always let your jello mixtures cool to room temperature, and make sure the layer below is completely firm before adding the next one.
Can I use a different type of milk for the creamy layer?
Sweetened condensed milk is best for the right texture and sweetness. You can try evaporated milk, but the layer won’t be as rich. For a dairy-free option, use full-fat coconut milk mixed with a bit of maple syrup.
Pin This Recipe!
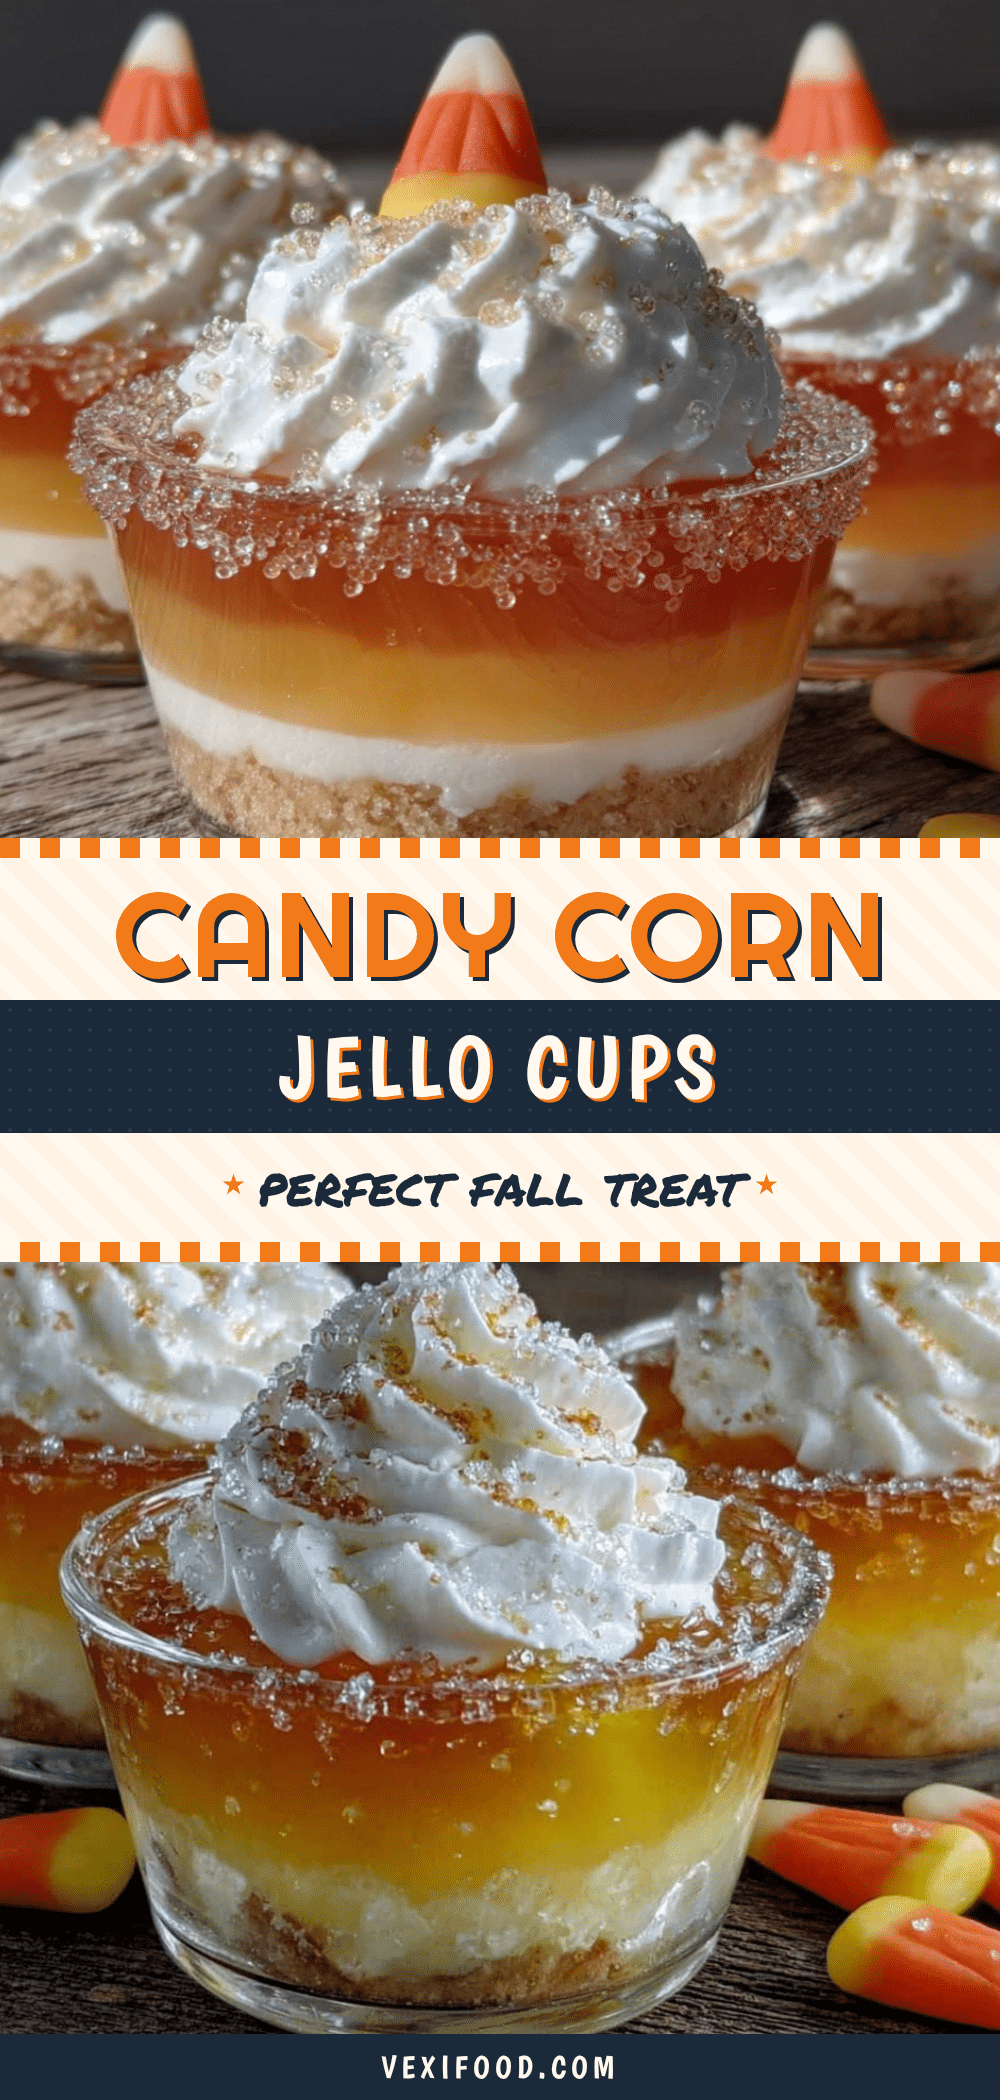
Perfect Candy Corn Layered Jello Cups: Easy Fall Dessert
These Perfect Candy Corn Layered Jello Cups are a nostalgic fall dessert that looks just like candy corn with vibrant yellow, orange, and white stripes. They’re quick to make, use simple ingredients, and are perfect for Halloween parties or Thanksgiving dessert tables.
- Prep Time: 30 minutes
- Cook Time: 0 minutes
- Total Time: 5 hours 30 minutes (includes chilling time)
- Yield: 8 servings 1x
- Category: Dessert
- Cuisine: American
Ingredients
- 1 box (3 oz) lemon or pineapple jello
- 1 cup boiling water
- 1/2 cup cold water
- 1 box (3 oz) orange jello
- 1 cup boiling water
- 1/2 cup cold water
- 1 box (3 oz) unflavored gelatin
- 1/4 cup cold water
- 1 can (14 oz) sweetened condensed milk
- 1 cup boiling water
- 1 teaspoon vanilla extract
Instructions
- Prepare the Yellow Layer: In a small bowl, empty the lemon or pineapple jello packet. Add 1 cup of boiling water and stir for 2 minutes until the powder is completely dissolved. Then, stir in 1/2 cup of cold water. Pour the mixture evenly into your clear cups, filling each about one-third of the way. Place the cups on a baking sheet and refrigerate for at least 45 minutes, or until the jello is fully set and firm to the touch.
- Prepare the Orange Layer: While the yellow layer sets, make the orange jello. In another bowl, empty the orange jello packet, add 1 cup boiling water, stir until dissolved, then add 1/2 cup cold water. Let it cool to room temperature. Once the yellow layer is firm, gently spoon the orange mixture on top. Refrigerate for another 45 minutes to 1 hour.
- Prepare the White Creamy Layer: In a third bowl, sprinkle the unflavored gelatin over 1/4 cup of cold water. Let it sit for 5 minutes to bloom. Then, add 1 cup of boiling water and stir until the gelatin is completely dissolved. Pour in the sweetened condensed milk and vanilla extract, and whisk until smooth. Let this mixture cool to room temperature.
- Assemble the Top Layer: Once the orange layer is fully set, carefully spoon the white creamy mixture over the top. Fill the cups to the brim. Use a small offset spatula or the back of a spoon to smooth the tops. Refrigerate for at least 4 hours, or overnight for best results.
- Serve and Enjoy: The jello cups should be firm and wobbly. You can serve them right in the cups, or run a knife around the edge and invert them onto a plate. Garnish with a few candy corn pieces on top for extra flair.
Notes
Patience is key between layers. Always let each jello mixture cool to room temperature before pouring over a set layer to prevent bleeding. For best results, refrigerate the top layer overnight. If layers bleed, it means the previous layer wasn’t fully set or the next layer was too warm.
Nutrition
- Serving Size: 1 jello cup
- Calories: 210
- Sugar: 34
- Sodium: 120
- Fat: 5
- Saturated Fat: 3
- Carbohydrates: 38
- Protein: 5
Keywords: candy corn jello cups, layered jello dessert, fall dessert, Halloween dessert, easy jello recipe, no-bake dessert