Love this? Save it for later!
Share the inspiration with your friends
I was standing in the frozen food aisle of our local grocery store last November—the Tuesday before Thanksgiving, to be exact—when a stranger’s shopping cart bumped into mine. She apologized, laughed, and said, “I’m just trying to grab everything for my Friendsgiving before the chaos really starts.” And that’s when the smell hit me. Not from the freezer section, of course, but from my own memory: the warm, buttery scent of toasted slider rolls mingling with tangy cranberry and rich, roasted turkey. Suddenly I was twenty-two, crammed into my friend Jenna’s tiny apartment kitchen, watching her pull a baking sheet of golden sliders out of the oven while someone’s cat tried to steal a napkin off the counter. That night, I bit into my first Friendsgiving turkey slider, and honestly? I’ve been chasing that exact moment ever since.
Jenna isn’t around for Friendsgiving anymore—she moved to Portland a few years back—but her sliders became my thing. I mean, I’ve made them every single year since, tweaking and testing until I got them just right. The cranberry aioli was my addition, born from a late-night kitchen experiment when I realized the sliders needed something creamy to balance all that savory goodness. Let me tell you, it was a game-changer. There’s something about that first bite—the soft roll, the juicy turkey, the pop of tart cranberry—that makes everyone at the table go quiet for a second. And if you’ve ever hosted a Friendsgiving, you know that quiet is the highest compliment.
Maybe you’ve been there, standing over a platter of sliders, watching your friends grab seconds before you’ve even sat down. That’s the magic of this recipe. It’s not fancy or complicated, but it has this way of making people feel taken care of. That’s why I keep making it, year after year, even when I’m tempted to try something new. Some recipes just earn their spot at the table.
Why You’ll Love This Recipe
Let’s be real for a second—Friendsgiving can be stressful. You’re trying to impress people who already know you, which somehow makes the pressure worse. These sliders? They’re your secret weapon. They look like you spent hours in the kitchen, but honestly, they come together in under 30 minutes. I’ve tested this recipe on picky eaters, foodie friends, and even my uncle who “doesn’t do leftovers,” and every single time, the baking sheet comes back empty.
- Quick & Easy: From start to finish, these sliders take about 25 minutes. Perfect for when your guests are arriving in an hour and you still haven’t figured out appetizers.
- Simple Ingredients: No hunting down obscure spices or speciality items. You can find everything at your regular grocery store, and most of it is probably already in your fridge.
- Perfect for Friendsgiving: These sliders are made for sharing. They’re portable, easy to eat standing up, and they feed a crowd without requiring plates or forks.
- Crowd-Pleaser: I’ve made these for groups of four and groups of twenty, and the reaction is always the same—people go back for thirds. Kids love them, adults love them, and they disappear faster than the main turkey.
- Unbelievably Delicious: The combination of savory turkey, tangy cranberry aioli, and melty cheese on a soft, buttery roll is pure comfort food magic. It’s the kind of thing that makes you close your eyes after the first bite.
What makes this recipe different from every other slider recipe out there? It’s the cranberry aioli. Most recipes just slap some cranberry sauce on there and call it a day, but this aioli is creamy, tangy, and slightly sweet—it ties everything together in a way that plain cranberry sauce just can’t. I’ve spent years perfecting the balance, and I promise, this is the version you’ll want to make every Friendsgiving from now on.
This isn’t just a recipe—it’s the one your friends will ask you to bring every year. It’s the appetizer that steals the show before the main course even hits the table. And honestly? It’s the kind of food that makes hosting feel less like work and more like fun.
What Ingredients You Will Need
This recipe uses simple, pantry-friendly ingredients to deliver big flavor without the fuss. Most of these are probably already in your kitchen, especially if you’ve been doing any Thanksgiving prep. Here’s what you’ll need:
For the Sliders
- 12 slider rolls (I recommend Hawaiian sweet rolls for that soft, buttery texture—they really make the sliders)
- 1 ½ pounds deli-sliced roasted turkey breast (look for oven-roasted or honey-roasted for the best flavor; avoid anything too smoky)
- 6 slices provolone cheese (you can also use Swiss or Havarti—both melt beautifully)
- 4 tablespoons unsalted butter, melted
- 1 tablespoon Dijon mustard
- 1 tablespoon poppy seeds (optional, but they add a nice crunch)
- 1 teaspoon garlic powder
- ½ teaspoon onion powder
- Salt and black pepper to taste
For the Cranberry Aioli
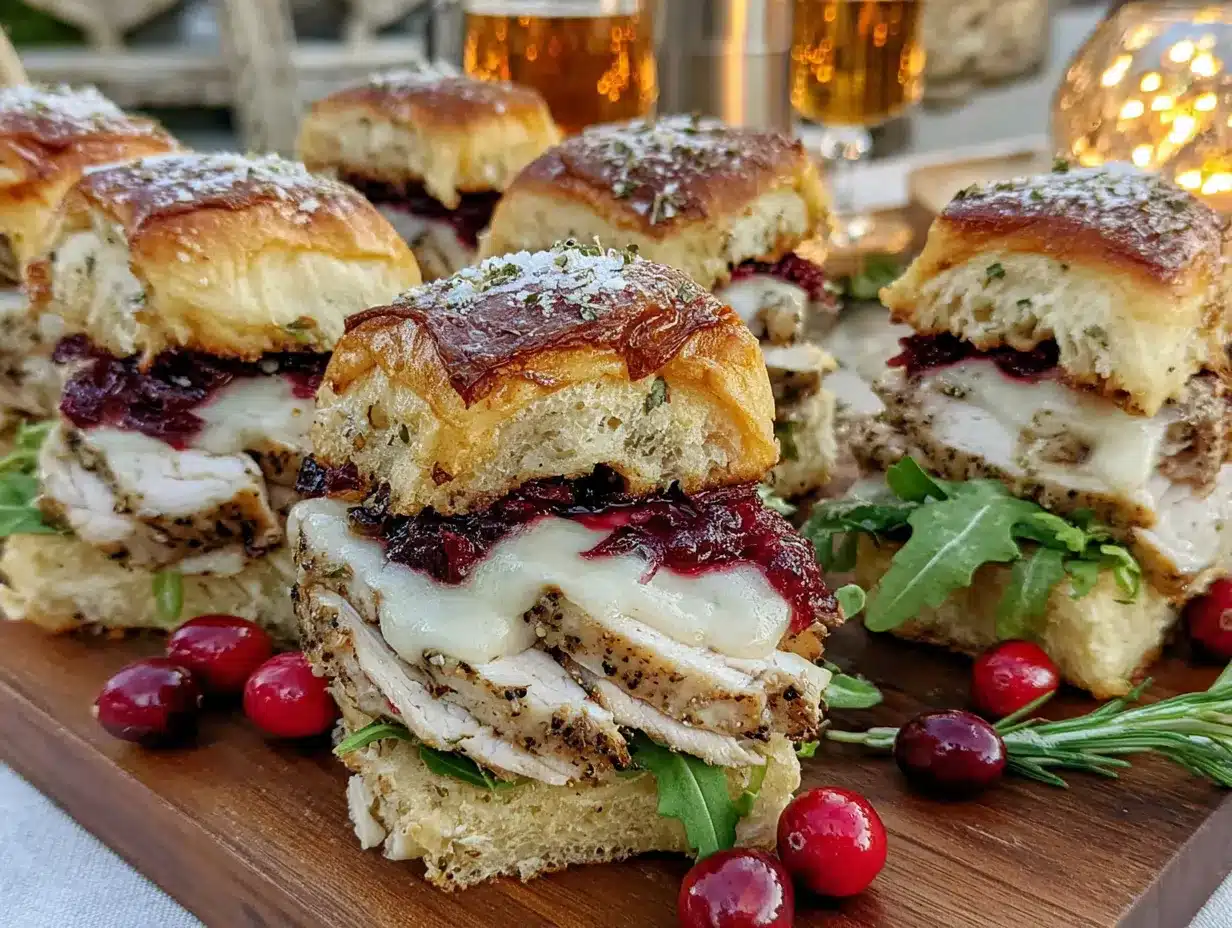
- ½ cup whole-berry cranberry sauce (homemade or canned—both work great, but I prefer the texture of whole berries)
- ¼ cup mayonnaise (I use Hellmann’s for its creaminess, but any good-quality mayo works)
- 1 tablespoon fresh lemon juice (about half a lemon—bottled works in a pinch, but fresh is brighter)
- 1 teaspoon honey (adds a touch of sweetness to balance the tartness)
- ¼ teaspoon salt
- ⅛ teaspoon cayenne pepper (optional, for a tiny kick—I love this addition)
A few ingredient notes from my kitchen to yours: For the turkey, I’ve tried both leftover roasted turkey from the big bird and deli-sliced, and honestly, deli-sliced is more consistent for sliders. It’s evenly sliced, easy to layer, and doesn’t dry out as quickly. If you’re using leftover Thanksgiving turkey, just make sure it’s not too dry—add a splash of turkey broth if needed.
For the cranberry sauce, I’ve made this with both homemade and canned, and both work beautifully. If you’re using canned, go for the whole-berry version rather than jellied—the texture holds up better in the aioli. And if you’re feeling fancy, you can even make the cranberry sauce from scratch a day ahead. It takes ten minutes and makes your kitchen smell amazing.
The cheese situation is flexible, too. Provolone is my go-to because it melts smoothly without getting greasy, but Swiss adds a nice nuttiness, and Havarti is extra creamy. I’ve even used mozzarella in a pinch, and it worked fine—just don’t use anything too sharp, as it can overpower the other flavors.
Equipment Needed
You don’t need a professional kitchen to make these sliders—just a few basic tools you probably already own. Here’s what you’ll need:
- Baking sheet: A standard 13×9-inch baking sheet works perfectly. If you don’t have one, a 9×13-inch casserole dish will do the job.
- Parchment paper or aluminum foil: For easy cleanup—trust me, you’ll thank yourself later.
- Small mixing bowl: For whisking together the cranberry aioli.
- Whisk or fork: To combine the aioli ingredients smoothly.
- Pastry brush: For brushing the butter mixture over the rolls. A silicone brush works best, but a regular one is fine.
- Sharp knife: To slice the rolls in half horizontally. A serrated bread knife works great for this.
- Cutting board: For assembling the sliders.
- Measuring cups and spoons: For accuracy—especially with the aioli ingredients.
If you don’t have a pastry brush, don’t worry. You can use a spoon to drizzle the butter mixture over the rolls, or even just pour it slowly and spread it with the back of the spoon. I’ve done it both ways, and while the brush gives a more even coating, the sliders turn out delicious either way.
One tip: if you’re making these for a big crowd, you might need two baking sheets. Don’t overcrowd the sliders—they need a little space to get those crispy edges.
Preparation Method
Alright, let’s get cooking! These sliders come together faster than you’d think, so I like to have everything prepped and ready before I start. Here’s the step-by-step:
- Preheat your oven to 350°F (175°C). Line your baking sheet with parchment paper or aluminum foil for easy cleanup. Trust me, you don’t want to be scrubbing melted cheese off a pan later.
- Make the cranberry aioli. In a small bowl, combine ½ cup cranberry sauce, ¼ cup mayonnaise, 1 tablespoon lemon juice, 1 teaspoon honey, ¼ teaspoon salt, and ⅛ teaspoon cayenne pepper (if using). Whisk until smooth and well combined. Taste it—you want a balance of tangy, sweet, and creamy. If it’s too tart, add a little more honey. Set aside.
- Prepare the rolls. Without separating them, slice the entire slab of 12 slider rolls in half horizontally. You should have one large top half and one large bottom half. Place the bottom half on your prepared baking sheet, cut side up.
- Spread the aioli. Using a spatula or the back of a spoon, spread about half of the cranberry aioli evenly over the cut side of the bottom rolls. Don’t skimp—this is where the flavor lives.
- Layer the turkey. Arrange the sliced turkey evenly over the aioli. I like to slightly overlap the slices so every bite gets plenty of turkey. Use about 1 ½ pounds—you want a generous layer, not skimpy.
- Add the cheese. Lay the provolone slices evenly over the turkey. If your cheese slices are small, you might need to tear them to cover the surface. That’s totally fine.
- Top it off. Place the top half of the rolls over the cheese, cut side down. Press down gently to make sure everything is even.
- Make the butter glaze. In a small bowl, mix 4 tablespoons melted butter, 1 tablespoon Dijon mustard, 1 tablespoon poppy seeds (if using), 1 teaspoon garlic powder, and ½ teaspoon onion powder. Stir until combined.
- Brush the tops. Using your pastry brush, generously brush the butter mixture over the tops of the rolls. Don’t be shy—this is what gives them that golden, crispy, irresistible crust. Make sure you get the edges, too.
- Bake. Place the baking sheet in the preheated oven and bake for 12-15 minutes, or until the cheese is melted and the tops are golden brown. If you want extra-crispy tops, switch the oven to broil for the last 1-2 minutes—but watch closely so they don’t burn.
- Rest and serve. Remove from the oven and let the sliders rest for 5 minutes. This is crucial—it lets the cheese set slightly so the sliders hold together when you cut them. Use a sharp knife to cut between the rolls, separating them into individual sliders.
- Serve with extra aioli. Drizzle the remaining cranberry aioli over the top or serve it on the side for dipping. I always serve extra because people can’t get enough of it.
A few sensory cues as you go: When you brush the butter glaze on, you should see the rolls glisten and absorb the mixture. During baking, your kitchen will start smelling like warm butter and toasted bread—that’s how you know it’s working. The tops should be deep golden brown, and the cheese should be visibly melted and slightly oozing at the edges. If you tap the top of a roll, it should feel firm but springy.
One thing I learned the hard way: don’t skip the resting step. I was impatient my first time and cut into them immediately, and the cheese just slid everywhere. It was still delicious, but it was a mess. Give them those five minutes—it makes a difference.
Cooking Tips & Techniques
After years of making these sliders (and a few spectacular failures), I’ve picked up some tricks that make the process smoother and the results better. Here’s what I wish someone had told me:
Don’t overbake. The biggest mistake I’ve made—more than once—is leaving the sliders in the oven too long. The cheese can go from perfectly melted to greasy and separated in about two minutes. Start checking at 12 minutes, and pull them out as soon as the tops are golden and the cheese is bubbly. If you’re using a glass dish instead of a metal baking sheet, it might take a minute or two longer.
Use room-temperature ingredients. If your butter is melted but your rolls are cold from the fridge, the glaze won’t soak in as well. Let the rolls sit out for about 15 minutes before you start assembling. Same goes for the turkey—cold turkey straight from the fridge can make the sliders cool down too quickly. Let it sit at room temperature for 10 minutes before layering.
Toast the rolls first (optional but amazing). For extra-crispy sliders, you can toast the bottom half of the rolls in the oven for 2-3 minutes before adding the aioli and toppings. This creates a barrier that keeps the bread from getting soggy. I do this when I’m making the sliders ahead of time or if I know they’ll sit out for a while.
Cut the rolls before baking. I know it sounds counterintuitive, but I like to score the tops of the rolls with a knife before baking—just barely cutting through the top layer. This makes it much easier to separate them after baking without tearing the bread. Plus, the butter glaze seeps into the cuts and creates extra-crispy edges.
Double the aioli. Seriously. The recipe makes about ¾ cup, which is enough for spreading and a little extra for serving. But I’ve learned that people want to dip their sliders in it, and they go through it fast. If you’re feeding a crowd, double the aioli recipe. You won’t regret it.
Prep ahead for parties. These sliders are perfect for entertaining because you can assemble them up to 24 hours in advance. Just cover the baking sheet with foil and refrigerate. When you’re ready to bake, add 5-7 minutes to the cooking time since they’ll be cold from the fridge. The butter glaze can be made ahead and stored in the fridge, too—just reheat it briefly to melt the butter again.
One failure I’ll never forget: I once tried to make these with gluten-free rolls, and they turned into a crumbly, dry mess. Not all gluten-free breads are created equal, so if you’re going that route, choose a sturdy, soft brand like Schär or Udi’s. And definitely don’t skip the butter glaze—it helps keep them moist.
Variations & Adaptations
One of the best things about this recipe is how flexible it is. I’ve tried all kinds of variations over the years, and while the original is my favorite, these adaptations are worth exploring:
Vegetarian version: Swap the turkey for roasted portobello mushrooms or thinly sliced roasted butternut squash. I made this for a vegetarian friend last year, and she said it was the best thing at the table. The earthy mushrooms pair beautifully with the tangy cranberry aioli. Just slice the mushrooms thickly and roast them at 400°F for 15 minutes before assembling.
Spicy cranberry aioli: If you like heat, add an extra ¼ teaspoon cayenne pepper or a tablespoon of sriracha to the aioli. I tried this on a whim one year, and it was a hit with the spice lovers in my group. The heat cuts through the richness of the cheese and butter beautifully.
Herb butter glaze: Add 1 tablespoon of fresh chopped rosemary or thyme to the butter glaze. It gives the sliders a more savory, Thanksgiving-y flavor. I did this when I had leftover herbs from stuffing, and it was a game-changer. Just make sure to chop the herbs finely so they don’t clump.
Different cheeses: Experiment with gouda, fontina, or even a sharp cheddar. Each cheese brings a different personality to the sliders. Gouda adds a smoky richness, fontina is ultra-creamy, and cheddar gives a sharp bite. I’ve even done a mix of provolone and cheddar for the best of both worlds.
Make it a meal: Add a layer of fresh baby spinach or arugula before the top roll goes on. The greens wilt slightly from the heat and add a fresh, peppery contrast. I also love adding thinly sliced apples—Granny Smith works great—for a sweet-tart crunch.
Dairy-free option: Use dairy-free butter and cheese alternatives. I’ve tested this with Miyoko’s vegan butter and Violife provolone-style slices, and while the texture is slightly different, the flavor is still fantastic. Just keep an eye on the baking time—vegan cheese melts differently and can burn faster.
Leftover turkey version: If you’re making these after Thanksgiving, use your leftover turkey. Just make sure it’s not too dry—if it is, warm it in a pan with a little turkey broth before assembling. This is honestly my favorite way to use up leftovers, and it feels like a whole new meal.
Serving & Storage Suggestions
These sliders are best served warm, straight from the oven, but they’re surprisingly good at room temperature, too—which makes them perfect for parties where people graze over a few hours. Here’s how to serve and store them:
Serving temperature: Serve the sliders warm, ideally within 10 minutes of coming out of the oven. If you’re hosting a party, you can keep them warm on a baking sheet in a 200°F oven for up to 30 minutes. Just cover them loosely with foil so the tops don’t dry out.
Presentation tips: Arrange the sliders on a large platter or wooden board. Drizzle the extra cranberry aioli over the top in a zigzag pattern, then sprinkle with fresh parsley or chives for color. I like to serve them with little cocktail picks so people can grab one easily without making a mess. If you’re feeling fancy, add a small bowl of extra aioli for dipping in the center of the platter.
What to serve alongside: These sliders are hearty enough to be a meal on their own, but they pair beautifully with a simple green salad, sweet potato fries, or a bowl of butternut squash soup. For a Friendsgiving spread, I serve them alongside a charcuterie board and some roasted vegetables. They also go great with a crisp apple cider or a light beer.
Storage instructions: Store leftover sliders in an airtight container in the refrigerator for up to 3 days. To reheat, place them on a baking sheet in a 350°F oven for 5-7 minutes, or until warmed through. The microwave works in a pinch, but the rolls will be softer—still delicious, just not as crispy.
Freezer instructions: You can freeze the assembled (but unbaked) sliders for up to 2 months. Wrap the entire baking sheet tightly in plastic wrap, then foil. When you’re ready to bake, thaw in the refrigerator overnight, then bake as directed, adding 5-7 minutes to the cooking time. I’ve done this for last-minute gatherings, and it’s a lifesaver.
Flavor development: Honestly, these sliders taste even better the next day. The flavors meld together overnight, and the cranberry aioli soaks into the bread just a little bit. I’ve been known to make a double batch just so I can have leftovers for lunch. They’re amazing cold, straight from the fridge—don’t knock it till you try it.
Nutritional Information & Benefits
While these sliders are definitely a treat, they’re not as indulgent as you might think. Here’s the estimated nutritional breakdown for one slider (based on 12 servings):
| Nutrient | Amount per Slider |
|---|---|
| Calories | 285 |
| Protein | 18g |
| Carbohydrates | 24g |
| Fat | 13g |
| Saturated Fat | 6g |
| Fiber | 1g |
| Sugar | 8g |
| Sodium | 520mg |
The turkey provides a solid dose of lean protein, which helps keep you full and satisfied. Cranberries are packed with antioxidants and vitamin C, and the honey in the aioli adds natural sweetness without refined sugar. The provolone cheese offers calcium and protein, while the butter—well, everything in moderation, right?
If you’re watching your sodium, you can use low-sodium turkey and reduce the salt in the aioli. For a lighter version, swap the mayonnaise for Greek yogurt in the aioli—it’s tangier but still creamy. I’ve tested this, and while the texture is slightly different, it’s still delicious.
These sliders are not gluten-free or dairy-free as written, but with the substitutions I mentioned in the variations section, you can easily adapt them. Just be mindful of the nutritional changes those substitutions bring.
Honestly, I don’t make these sliders for their health benefits—I make them because they make people happy. But it’s nice to know they’re not total junk food, right?
Conclusion
These Friendsgiving turkey sliders with cranberry aioli have become my signature dish, the one people request every year without fail. And honestly? I get it. There’s something about that combination of soft, buttery rolls, savory turkey, melty cheese, and tangy-sweet aioli that just hits different. It’s comfort food at its finest—the kind that makes you close your eyes and smile after the first bite.
I hope you make these sliders for your next Friendsgiving, potluck, or any gathering where you want to feed people something special without spending all day in the kitchen. Feel free to customize them—add your favorite cheese, throw in some extra herbs, or make the aioli as spicy as you like. That’s the beauty of this recipe: it’s a starting point, not a rulebook.
If you try these sliders, I’d love to hear how they turned out. Drop a comment below and let me know what variations you tried, or tag me in your photos if you share them online. There’s nothing I love more than seeing these sliders show up at tables all over the country. Happy Friendsgiving, friends—now go make some memories (and some sliders)!
Frequently Asked Questions
Can I make these sliders ahead of time?
Absolutely! You can assemble the sliders up to 24 hours in advance, cover them with foil, and refrigerate. When you’re ready to bake, just add 5-7 minutes to the cooking time since they’ll be cold from the fridge. The butter glaze can be made ahead and stored in the fridge, too—just reheat it briefly to melt the butter again before brushing.
Can I use leftover Thanksgiving turkey instead of deli-sliced?
Yes, and it’s actually a fantastic way to use up leftovers! Just make sure your leftover turkey isn’t too dry. If it is, warm it in a pan with a little turkey broth before assembling. Dark meat works especially well because it’s more moist and flavorful. Shred or slice it thinly so it layers evenly on the rolls.
What if I don’t have Hawaiian sweet rolls?
No problem at all! You can use any soft slider rolls or even dinner rolls. I’ve used brioche rolls, potato rolls, and even regular white dinner rolls—all work great. Just keep in mind that the sweetness of Hawaiian rolls adds a nice contrast to the tangy aioli, so if you use a less sweet roll, you might want to add a tiny bit more honey to the aioli to balance things out.
How do I keep the sliders from getting soggy?
The key is to toast the bottom half of the rolls for 2-3 minutes before adding the aioli and toppings. This creates a barrier that prevents the bread from absorbing too much moisture. Also, make sure you’re not overloading the sliders with wet ingredients—spread the aioli evenly rather than piling it on. And don’t skip the resting step after baking; it lets the steam escape so the bread stays firm.
Can I freeze these sliders?
Yes, you can freeze the assembled (but unbaked) sliders for up to 2 months. Wrap the entire baking sheet tightly in plastic wrap, then foil. When you’re ready to bake, thaw in the refrigerator overnight, then bake as directed, adding 5-7 minutes to the cooking time. I don’t recommend freezing baked sliders—the texture of the rolls changes too much upon reheating. But unbaked? They freeze like a dream!
Pin This Recipe!
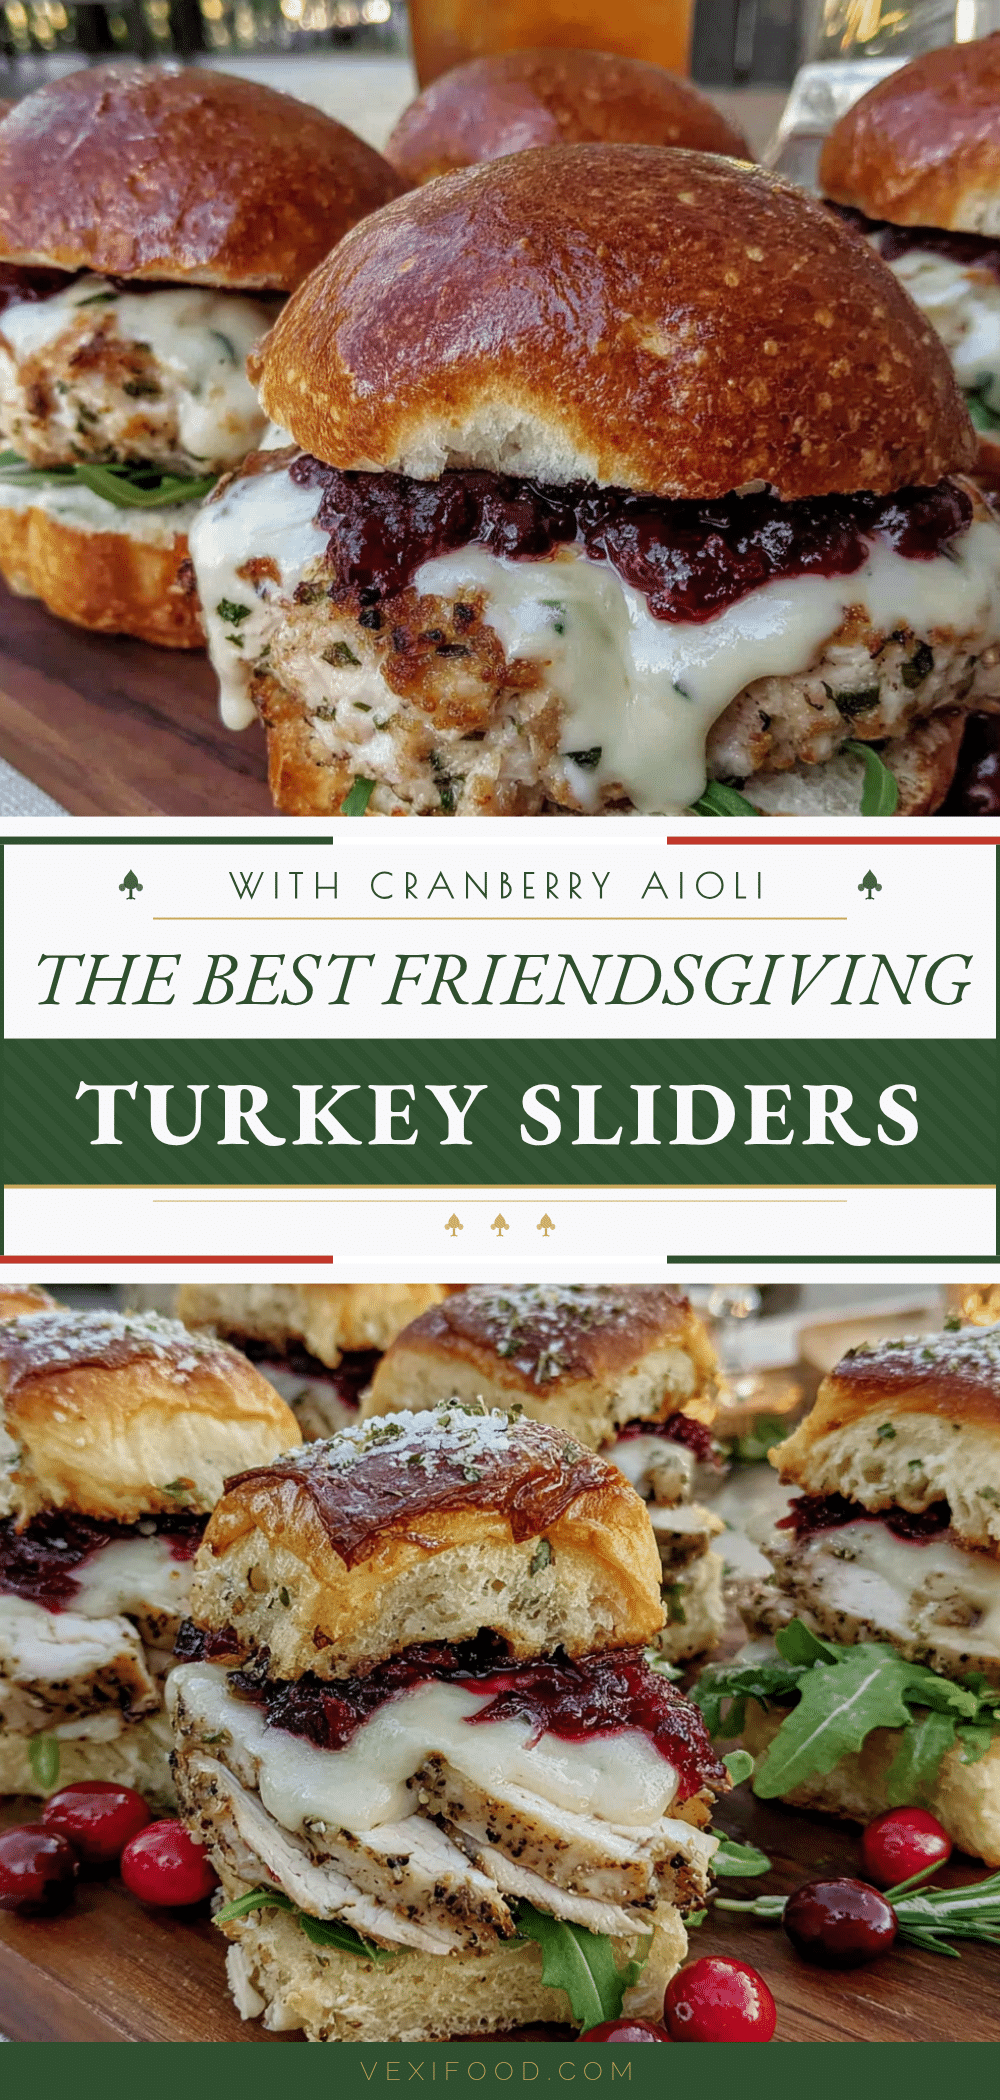
Best Friendsgiving Turkey Sliders with Cranberry Aioli

These Friendsgiving turkey sliders with cranberry aioli are the perfect appetizer for any gathering. Soft, buttery rolls are filled with savory turkey, melty cheese, and a tangy-sweet cranberry aioli, all baked to golden perfection in under 30 minutes.
- Prep Time: 10 minutes
- Cook Time: 15 minutes
- Total Time: 25 minutes
- Yield: 12 servings 1x
- Category: Appetizer
- Cuisine: American
Ingredients
- 12 slider rolls (Hawaiian sweet rolls recommended)
- 1 ½ pounds deli-sliced roasted turkey breast
- 6 slices provolone cheese
- 4 tablespoons unsalted butter, melted
- 1 tablespoon Dijon mustard
- 1 tablespoon poppy seeds (optional)
- 1 teaspoon garlic powder
- ½ teaspoon onion powder
- Salt and black pepper to taste
- ½ cup whole-berry cranberry sauce
- ¼ cup mayonnaise
- 1 tablespoon fresh lemon juice
- 1 teaspoon honey
- ¼ teaspoon salt
- ⅛ teaspoon cayenne pepper (optional)
Instructions
- Preheat your oven to 350°F (175°C). Line a baking sheet with parchment paper or aluminum foil.
- Make the cranberry aioli: In a small bowl, combine ½ cup cranberry sauce, ¼ cup mayonnaise, 1 tablespoon lemon juice, 1 teaspoon honey, ¼ teaspoon salt, and ⅛ teaspoon cayenne pepper (if using). Whisk until smooth and set aside.
- Without separating the rolls, slice the entire slab of 12 slider rolls in half horizontally. Place the bottom half on the prepared baking sheet, cut side up.
- Spread about half of the cranberry aioli evenly over the cut side of the bottom rolls.
- Arrange the sliced turkey evenly over the aioli, slightly overlapping the slices.
- Lay the provolone slices evenly over the turkey.
- Place the top half of the rolls over the cheese, cut side down. Press down gently.
- In a small bowl, mix 4 tablespoons melted butter, 1 tablespoon Dijon mustard, 1 tablespoon poppy seeds (if using), 1 teaspoon garlic powder, and ½ teaspoon onion powder. Stir until combined.
- Brush the butter mixture generously over the tops of the rolls, making sure to get the edges.
- Bake for 12-15 minutes, or until the cheese is melted and the tops are golden brown. For extra-crispy tops, broil for the last 1-2 minutes, watching closely.
- Remove from the oven and let the sliders rest for 5 minutes. Use a sharp knife to cut between the rolls, separating them into individual sliders.
- Drizzle the remaining cranberry aioli over the top or serve it on the side for dipping.
Notes
For extra-crispy sliders, toast the bottom half of the rolls for 2-3 minutes before adding the aioli and toppings. You can assemble the sliders up to 24 hours in advance and refrigerate; add 5-7 minutes to the baking time. Double the aioli recipe if serving a crowd, as people love to dip.
Nutrition
- Serving Size: 1 slider
- Calories: 285
- Sugar: 8
- Sodium: 520
- Fat: 13
- Saturated Fat: 6
- Carbohydrates: 24
- Fiber: 1
- Protein: 18
Keywords: Friendsgiving, turkey sliders, cranberry aioli, appetizer, party food, Thanksgiving leftovers