Love this? Save it for later!
Share the inspiration with your friends
I was halfway through a massive batch of brownies for a bake sale when the freezer door slammed shut—my own fault, really, for trying to hold it open with my hip. My neighbor, an older woman named Clara who grows the most incredible tomatoes in her backyard, peeked her head over the fence. She didn’t say anything at first, just watched me wrestling with a bag of frozen strawberries that had somehow become a solid brick. Then she disappeared back inside and came out with a tiny glass jar filled with what looked like black paste. “You’re making ice cream wrong,” she said, handing it over. “Use this.”
That jar was full of vanilla bean paste—real scraped seeds, not that imitation stuff. I had been planning to make a simple chocolate chip cookie ice cream for myself, but Clara’s gift changed everything. I mean, when someone hands you actual vanilla beans, you don’t argue. You make the creamiest, most ridiculously indulgent no-churn vanilla bean ice cream you can possibly manage. And honestly, that first batch was a total mess. I forgot to chill the bowl, the cream didn’t whip properly, and I ended up with something closer to vanilla soup than ice cream. But Clara just laughed and said, “Next time, keep everything cold.”
So I tried again. And again. And somewhere around batch four, something clicked. The texture was silky, the flavor was pure vanilla heaven, and I didn’t even need an ice cream maker. That’s the thing about this creamy no-churn vanilla bean ice cream recipe—it doesn’t require fancy equipment or a culinary degree. It just needs patience, cold ingredients, and maybe a neighbor who knows a thing or two about real vanilla. Maybe you’ve been there, staring at a pint of store-bought ice cream and wondering why it doesn’t taste like the real deal. This recipe fixes that. It’s the kind of dessert that makes you close your eyes after the first spoonful—and it stays with you long after the bowl is empty.
Why You’ll Love This Recipe
Let me tell you why this is the only vanilla bean ice cream recipe you’ll ever need. I’ve tested this at least a dozen times—sometimes on purpose, sometimes because I got distracted and had to start over. Each failure taught me something, and this version is the result of all those happy accidents.
- No Ice Cream Maker Required : You don’t need any special equipment. Just a mixer, a bowl, and a freezer. That’s it.
- Rich, Authentic Vanilla Flavor : Real vanilla beans make all the difference. The tiny black specks are a sign you’re getting the good stuff.
- Incredibly Creamy Texture : The secret is whipped heavy cream folded into sweetened condensed milk. It creates a silky, scoopable texture without ice crystals.
- Simple Ingredients : You probably have everything except the vanilla beans in your pantry right now. No fancy grocery trips required.
- Perfect for Any Occasion : Birthday parties, summer barbecues, cozy winter nights by the fire—this ice cream fits everywhere.
- Customizable Base : Once you master the vanilla base, you can add chocolate chips, crushed cookies, fresh fruit, or caramel swirls. The possibilities are endless.
What makes this recipe different from the rest? It’s the technique. Most no-churn recipes skip the vanilla bean and rely on extract alone. But using real vanilla beans—or high-quality vanilla bean paste—gives you that deep, floral, almost honey-like flavor that extract can’t replicate. Plus, the method of whipping the cream to stiff peaks before folding it into the condensed milk ensures maximum air incorporation, which means a lighter, creamier final texture. This isn’t just another vanilla ice cream. It’s the one you’ll make for your mom on her birthday, the one you’ll bring to potlucks, the one your kids will beg for every weekend.
This recipe is comfort food reimagined—simpler, faster, and without sacrificing any of the soul-soothing satisfaction. It’s the kind of dessert that makes you feel like you’ve done something special, even though it took you ten minutes of active work.
What Ingredients You Will Need
This creamy no-churn vanilla bean ice cream uses a short list of simple ingredients, but each one plays a critical role. Let me walk you through them so you know exactly what to look for.
For the Ice Cream Base
- 2 cups (480 ml) heavy whipping cream : This is the backbone of the texture. Look for cream with at least 36% milk fat for the best results. I personally prefer Horizon Organic or Organic Valley—they whip up beautifully and taste clean. (Pro tip: Chill the cream for at least 2 hours before whipping. Cold cream whips faster and holds its shape better.)
- 1 can (14 ounces / 397 g) sweetened condensed milk : This replaces the sugar and helps prevent ice crystals from forming. It also adds that luscious, thick texture. I use Eagle Brand or Nestlé La Lechera. Both work perfectly. (If you’re dairy-free, look for a coconut-based sweetened condensed milk—it works, though the texture will be slightly different.)
- 2 vanilla beans : This is where the magic happens. Look for plump, moist vanilla beans from Madagascar or Tahiti. Madagascar beans have that classic, bold vanilla flavor, while Tahitian beans are more floral and fruity. I usually go with Madagascar for this recipe. (If you can’t find whole beans, use 2 tablespoons of vanilla bean paste instead—Nielsen-Massey makes an excellent one.)
- 1 tablespoon (15 ml) pure vanilla extract : Yes, both beans and extract. The extract reinforces the vanilla flavor and adds depth. Use pure vanilla extract, not imitation vanilla flavoring. Imitation has a harsh, artificial taste that ruins the delicate balance.
- ¼ teaspoon fine sea salt : Salt might seem odd in a sweet dessert, but it balances the sweetness and enhances the vanilla flavor. Don’t skip it. I use fine sea salt because it dissolves more easily than kosher salt.
Optional Add-Ins
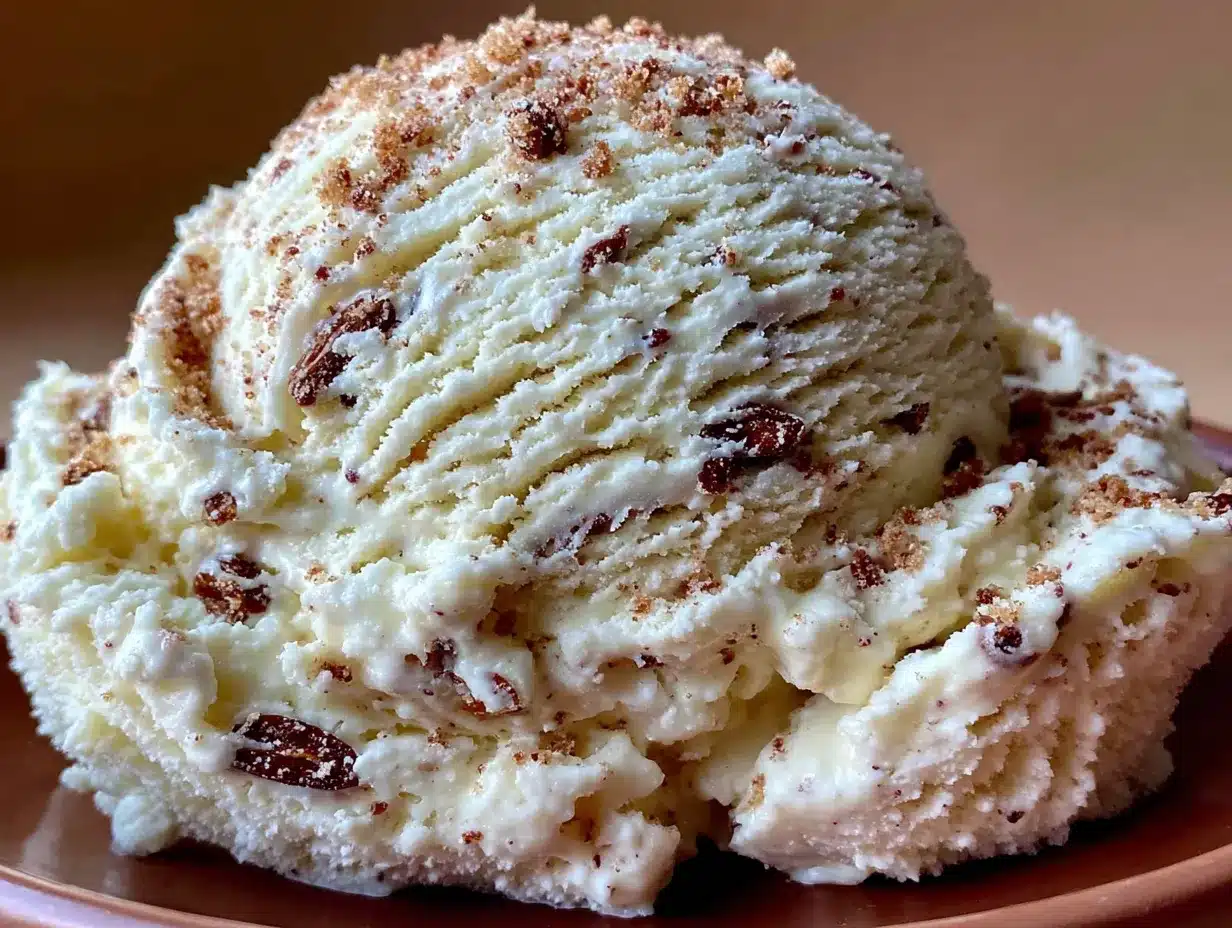
- 1 vanilla bean pod (scraped seeds only) : If you want even more vanilla intensity, add an extra bean. I’ve done this for special occasions, and it’s glorious.
- 1 tablespoon vodka or bourbon : A tiny splash of alcohol lowers the freezing point of the ice cream, making it softer and easier to scoop straight from the freezer. It won’t affect the flavor if you use vodka. Bourbon adds a subtle warmth that pairs beautifully with vanilla. (This is completely optional—the ice cream works fine without it.)
Ingredient Selection Tips
When choosing vanilla beans, look for ones that are flexible and slightly oily to the touch. Dry, brittle beans are old and won’t have as much flavor. Store them in an airtight container in a cool, dark place—they’ll last for months. As for the heavy cream, avoid ultra-pasteurized cream if you can. It whips fine, but it has a slightly cooked flavor that can come through in the final ice cream. Pasteurized cream is better, though harder to find. If you can only find ultra-pasteurized, don’t worry—it still works.
Equipment Needed
The beauty of this creamy no-churn vanilla bean ice cream is that you don’t need an ice cream maker. But there are a few tools that will make your life much easier.
- Stand mixer or hand mixer : Whipping cream by hand is possible, but it takes forever and your arm will hate you. A stand mixer with the whisk attachment is my go-to. If you’re using a hand mixer, use a deep metal or glass bowl—plastic bowls can retain grease and prevent the cream from whipping properly.
- Large mixing bowl : You’ll need one bowl for whipping the cream and another for mixing the final base. Metal bowls are best because they stay cold longer.
- Sharp paring knife : To split the vanilla beans lengthwise and scrape out the seeds. A dull knife will crush the pod instead of cutting cleanly.
- Rubber spatula : For folding the whipped cream into the condensed milk mixture. A flexible spatula helps you incorporate everything without deflating the cream.
- 9×5-inch loaf pan or freezer-safe container : This is what you’ll freeze the ice cream in. A metal loaf pan works best because it conducts cold more efficiently, helping the ice cream freeze faster. Glass or ceramic also works, but it takes longer.
- Parchment paper or plastic wrap : To press directly onto the surface of the ice cream before freezing. This prevents ice crystals from forming on top.
- Instant-read thermometer (optional but helpful) : If you want to be precise about the temperature of your cream, this can help. But honestly, I just stick my finger in—if it feels really cold, it’s ready.
I’ve made this recipe with a $20 hand mixer from a discount store, and it worked perfectly. Don’t feel like you need expensive equipment. The only thing I wouldn’t skip is a good rubber spatula—it makes folding so much easier and prevents you from overmixing.
Preparation Method
Let’s get to the fun part. Follow these steps carefully, and you’ll have the creamiest no-churn vanilla bean ice cream you’ve ever tasted.
- Chill your equipment : Place your large mixing bowl and the whisk attachment (or beaters) in the freezer for at least 15 minutes. Cold equipment helps the cream whip faster and hold its shape. While you’re at it, put your loaf pan in the freezer too. (I learned this the hard way after my first batch turned into a soupy mess—cold bowls are non-negotiable.)
- Prepare the vanilla beans : Lay one vanilla bean on a cutting board. Using a sharp paring knife, slice it lengthwise down the center, cutting through one side but not all the way through. Open the pod like a book. Then, using the back of the knife, scrape out the tiny black seeds. You should see a sticky, oily paste. Repeat with the second bean. Don’t throw away the empty pods—you can stick them in a jar of sugar to make vanilla sugar later.
- Mix the base : In a medium bowl, combine the sweetened condensed milk, the scraped vanilla bean seeds, the vanilla extract, and the salt. Whisk until everything is well combined. The mixture will look speckled with those beautiful black vanilla seeds. Set it aside while you whip the cream.
- Whip the cream : Remove the chilled bowl and whisk attachment from the freezer. Pour the cold heavy cream into the bowl. Start mixing on low speed to avoid splashing, then gradually increase to medium-high speed. Whip until stiff peaks form—this means when you lift the whisk, the cream stands up straight without drooping. This usually takes 3 to 5 minutes with a stand mixer, or 5 to 7 minutes with a hand mixer. Be careful not to overwhip, or you’ll end up with butter. (You’ll know it’s ready when the cream looks thick and holds its shape. If you’re unsure, stop and check early—better to underwhip than overwhip.)
- Fold the cream into the base : Take about one-third of the whipped cream and add it to the condensed milk mixture. Use your rubber spatula to gently fold it in—cut down through the center, scrape along the bottom, and bring it up and over. Rotate the bowl as you go. Once it’s mostly incorporated, add the remaining whipped cream and continue folding until no white streaks remain. The mixture should be light, airy, and uniform in color. Don’t overmix, or you’ll deflate the cream and end up with dense ice cream.
- Transfer to the pan : Pour the mixture into your chilled loaf pan. Smooth the top with your spatula. If you’re adding any mix-ins like chocolate chips or crushed cookies, gently fold them in at this point, or layer them in the pan for a swirled effect.
- Cover and freeze : Press a piece of parchment paper or plastic wrap directly onto the surface of the ice cream mixture. This prevents ice crystals from forming. Then cover the pan with aluminum foil or a tight-fitting lid. Place it in the freezer for at least 6 hours, but preferably overnight. The longer it freezes, the firmer and creamier it gets.
- Let it soften before serving : When you’re ready to serve, remove the ice cream from the freezer and let it sit at room temperature for 5 to 10 minutes. This softens it just enough to scoop easily. Use a warm ice cream scoop for clean, perfect scoops. (Run the scoop under hot water for a few seconds, then dry it off—works like a charm.)
Cooking Tips & Techniques
I’ve made this creamy no-churn vanilla bean ice cream more times than I can count, and I’ve messed up plenty. Here’s what I’ve learned so you don’t have to repeat my mistakes.
Keep everything cold : This is the single most important tip. Cold cream whips better. Cold bowls hold the structure longer. A cold pan helps the ice cream freeze faster, which means smaller ice crystals and a smoother texture. I even chill the sweetened condensed milk in the fridge for 30 minutes before mixing. Every degree matters.
Don’t skip the salt : I know it seems weird, but salt is a flavor enhancer. It doesn’t make the ice cream salty—it makes the vanilla taste more like vanilla. Without it, the ice cream can taste flat and one-dimensional. Trust me on this one.
Watch your whipping time : Overwhipped cream turns into butter. Underwhipped cream won’t hold enough air, and your ice cream will be dense and icy. Aim for stiff peaks—the cream should hold its shape when you lift the whisk, but it should still look smooth and creamy, not grainy. If you see yellow specks forming, you’ve gone too far.
Use a gentle hand when folding : Folding is not mixing. You want to incorporate the whipped cream into the condensed milk without knocking out all the air you just whipped in. Use a slow, deliberate motion—cut down, scrape the bottom, fold over. Rotate the bowl a quarter turn with each fold. Stop as soon as the mixture looks uniform.
Patience is a virtue : The hardest part of this recipe is waiting for it to freeze. I’ve peeked at it after three hours and tried to scoop it—bad idea. It was still soft and icy. Give it the full overnight freeze. The texture will be dramatically better. If you’re in a hurry, spread the mixture in a shallow metal pan instead of a deep loaf pan—it freezes faster.
One more thing : If your ice cream comes out too hard to scoop, you probably need to add that splash of alcohol I mentioned earlier. Vodka or bourbon lowers the freezing point, keeping the ice cream scoopable even after days in the freezer. I add it to every batch now.
Variations & Adaptations
Once you’ve mastered the basic creamy no-churn vanilla bean ice cream, the fun really begins. Here are some of my favorite variations.
Chocolate Chip Vanilla Bean
After folding the cream into the base, gently stir in ¾ cup of mini chocolate chips. Mini chips distribute more evenly than regular-sized ones and don’t sink to the bottom. I use Guittard or Ghirardelli for the best flavor. This is my go-to variation—it’s simple but always a crowd-pleaser.
Strawberry Vanilla Swirl
Puree 1 cup of fresh or frozen strawberries with 2 tablespoons of sugar and a squeeze of lemon juice. Simmer in a small saucepan until thickened, about 10 minutes. Let it cool completely, then swirl it into the ice cream mixture before freezing. The tartness of the strawberries cuts through the richness of the vanilla beautifully. I made this last summer with berries from Clara’s garden, and it was unforgettable.
Vegan Coconut Vanilla Bean
Replace the heavy cream with two cans of full-fat coconut cream (chilled overnight) and use a dairy-free sweetened condensed coconut milk. Whip the coconut cream the same way you would dairy cream—it works, though it’s a bit more delicate. The coconut flavor pairs wonderfully with vanilla. Just be aware that the texture will be slightly less creamy and more icy than the dairy version. It’s still delicious, just different.
Cookies and Cream
Crush about 15 chocolate sandwich cookies (like Oreos) into coarse pieces. Fold them into the ice cream base after the cream is incorporated. The cookies soften slightly as the ice cream freezes, creating little pockets of chocolatey goodness. I recommend using double-stuffed cookies for extra creaminess.
Espresso Vanilla Bean
Dissolve 2 tablespoons of instant espresso powder in 1 tablespoon of hot water. Let it cool, then mix it into the condensed milk base before adding the whipped cream. The coffee enhances the vanilla flavor and adds a grown-up twist. This is my husband’s favorite version—he says it tastes like a vanilla latte in ice cream form.
Serving & Storage Suggestions
This creamy no-churn vanilla bean ice cream is best served within the first week, but it’ll keep for up to a month if stored properly. Here’s how to make the most of it.
Serving temperature : Take the ice cream out of the freezer 5 to 10 minutes before scooping. This softens it just enough to make scooping easy without turning it into soup. For the perfect scoop, run your ice cream scoop under hot water, dry it off, then scoop. The warmth helps the scoop glide through the frozen ice cream.
Presentation ideas : Serve it in chilled bowls or glasses for a touch of elegance. Top with fresh berries, a drizzle of honey or caramel sauce, a sprinkle of flaky sea salt, or a few chocolate shavings. For a classic sundae, add hot fudge, whipped cream, and a cherry on top. The vanilla flavor is versatile enough to pair with almost anything.
Complementary dishes : This ice cream is amazing alongside a warm brownie, a slice of apple pie, or a piece of pound cake. It also makes a fantastic base for affogato—just pour a shot of hot espresso over a scoop of ice cream and watch it melt into creamy deliciousness.
Storage instructions : Keep the ice cream in an airtight container with a piece of parchment paper pressed directly onto the surface. This prevents ice crystals from forming. Store it in the back of the freezer, not in the door, where temperatures fluctuate. If you’ve added alcohol, the ice cream will stay scoopable for longer. Without it, it may become very hard after a few days—just let it sit at room temperature for 10 to 15 minutes before scooping.
Flavor development : Interestingly, the vanilla flavor intensifies after a day or two in the freezer. The flavors meld together, and the ice cream becomes smoother. So if you can resist eating it immediately, you’ll be rewarded with an even better experience. I’ve never managed to wait more than 24 hours, but I’ve heard it’s worth it.
Nutritional Information & Benefits
Let’s be honest—this is a treat, not a health food. But knowing what’s in it can help you enjoy it mindfully.
Estimated nutritional values per serving (⅛ of the recipe) :
- Calories: 380
- Total Fat: 24g
- Saturated Fat: 15g
- Cholesterol: 85mg
- Sodium: 150mg
- Total Carbohydrates: 38g
- Sugars: 35g
- Protein: 5g
- Calcium: 150mg
Health benefits of key ingredients : Vanilla beans contain small amounts of vanillin, which has antioxidant properties. Heavy cream provides fat-soluble vitamins A, D, E, and K, though it’s also high in saturated fat. Sweetened condensed milk adds calcium and protein, but also a significant amount of sugar. This is definitely a “sometimes” food, not an everyday indulgence.
Dietary considerations : This recipe is vegetarian and can be made gluten-free by ensuring your add-ins are gluten-free. It is not dairy-free, vegan, or low-sugar. For a lighter version, you can use half-and-half instead of heavy cream, but the texture will be noticeably less creamy and more icy. I don’t recommend it—this is one recipe where going full-fat is worth it.
Potential allergens : Dairy (milk, cream). If you’re lactose intolerant, try the vegan coconut variation mentioned above. Always check labels on vanilla beans and extract to ensure they don’t contain hidden allergens.
My personal perspective? I believe in enjoying food without guilt. This ice cream is a celebration of simple, real ingredients. One scoop is plenty—it’s so rich and flavorful that you don’t need a mountain of it to feel satisfied. That’s the beauty of making it from scratch.
Conclusion
This creamy no-churn vanilla bean ice cream is more than just a dessert—it’s a little act of love. It’s the kind of thing you make when you want to show someone you care, or when you need a moment of pure, uncomplicated joy. The process is simple, the ingredients are honest, and the result is nothing short of spectacular.
I hope you give this recipe a try. Don’t be afraid to make it your own—add your favorite mix-ins, experiment with different vanilla beans, or serve it in a way that feels special to you. That’s the beauty of cooking (and eating): there are no rules, only delicious possibilities.
If you make this ice cream, I’d love to hear about it. Drop a comment below and tell me how it turned out, what variations you tried, or if you had any happy accidents along the way. Share a photo on Pinterest and tag me—I love seeing your creations. And if you want more no-churn recipes, check out my no-churn chocolate ice cream or my strawberry basil sorbet for more frozen treats.
Until next time, keep your cream cold and your heart full. Happy scooping!
Frequently Asked Questions
Can I use vanilla extract instead of vanilla beans?
Yes, absolutely. If you don’t have vanilla beans, use 2 tablespoons of pure vanilla extract instead. The flavor won’t be as complex, and you’ll miss those beautiful black specks, but it will still be delicious. For the best results, use a high-quality vanilla extract like Nielsen-Massey or Simply Organic.
Why did my ice cream turn out icy instead of creamy?
Icy texture usually means the cream wasn’t whipped enough, or the mixture wasn’t frozen quickly enough. Make sure your cream is whipped to stiff peaks, and use a chilled pan to speed up the freezing process. Also, pressing plastic wrap directly onto the surface prevents ice crystals from forming on top.
How long does this ice cream last in the freezer?
Stored properly in an airtight container, this ice cream will keep for up to a month. However, the texture is best within the first week. After that, it may become slightly harder and more icy. If it gets too hard, let it sit at room temperature for 10 to 15 minutes before scooping.
Can I make this recipe dairy-free?
Yes! Replace the heavy cream with two cans of full-fat coconut cream (chilled overnight) and use a dairy-free sweetened condensed coconut milk. The texture will be slightly different—a bit more icy and less creamy—but it’s still delicious. Just be sure to whip the coconut cream until stiff peaks form, which can take a bit longer than dairy cream.
Do I need to add alcohol to the recipe?
No, the alcohol is completely optional. It helps keep the ice cream softer and easier to scoop straight from the freezer, but the recipe works perfectly fine without it. If you skip the alcohol, just let the ice cream sit at room temperature for 5 to 10 minutes before scooping to soften it up.
Pin This Recipe!
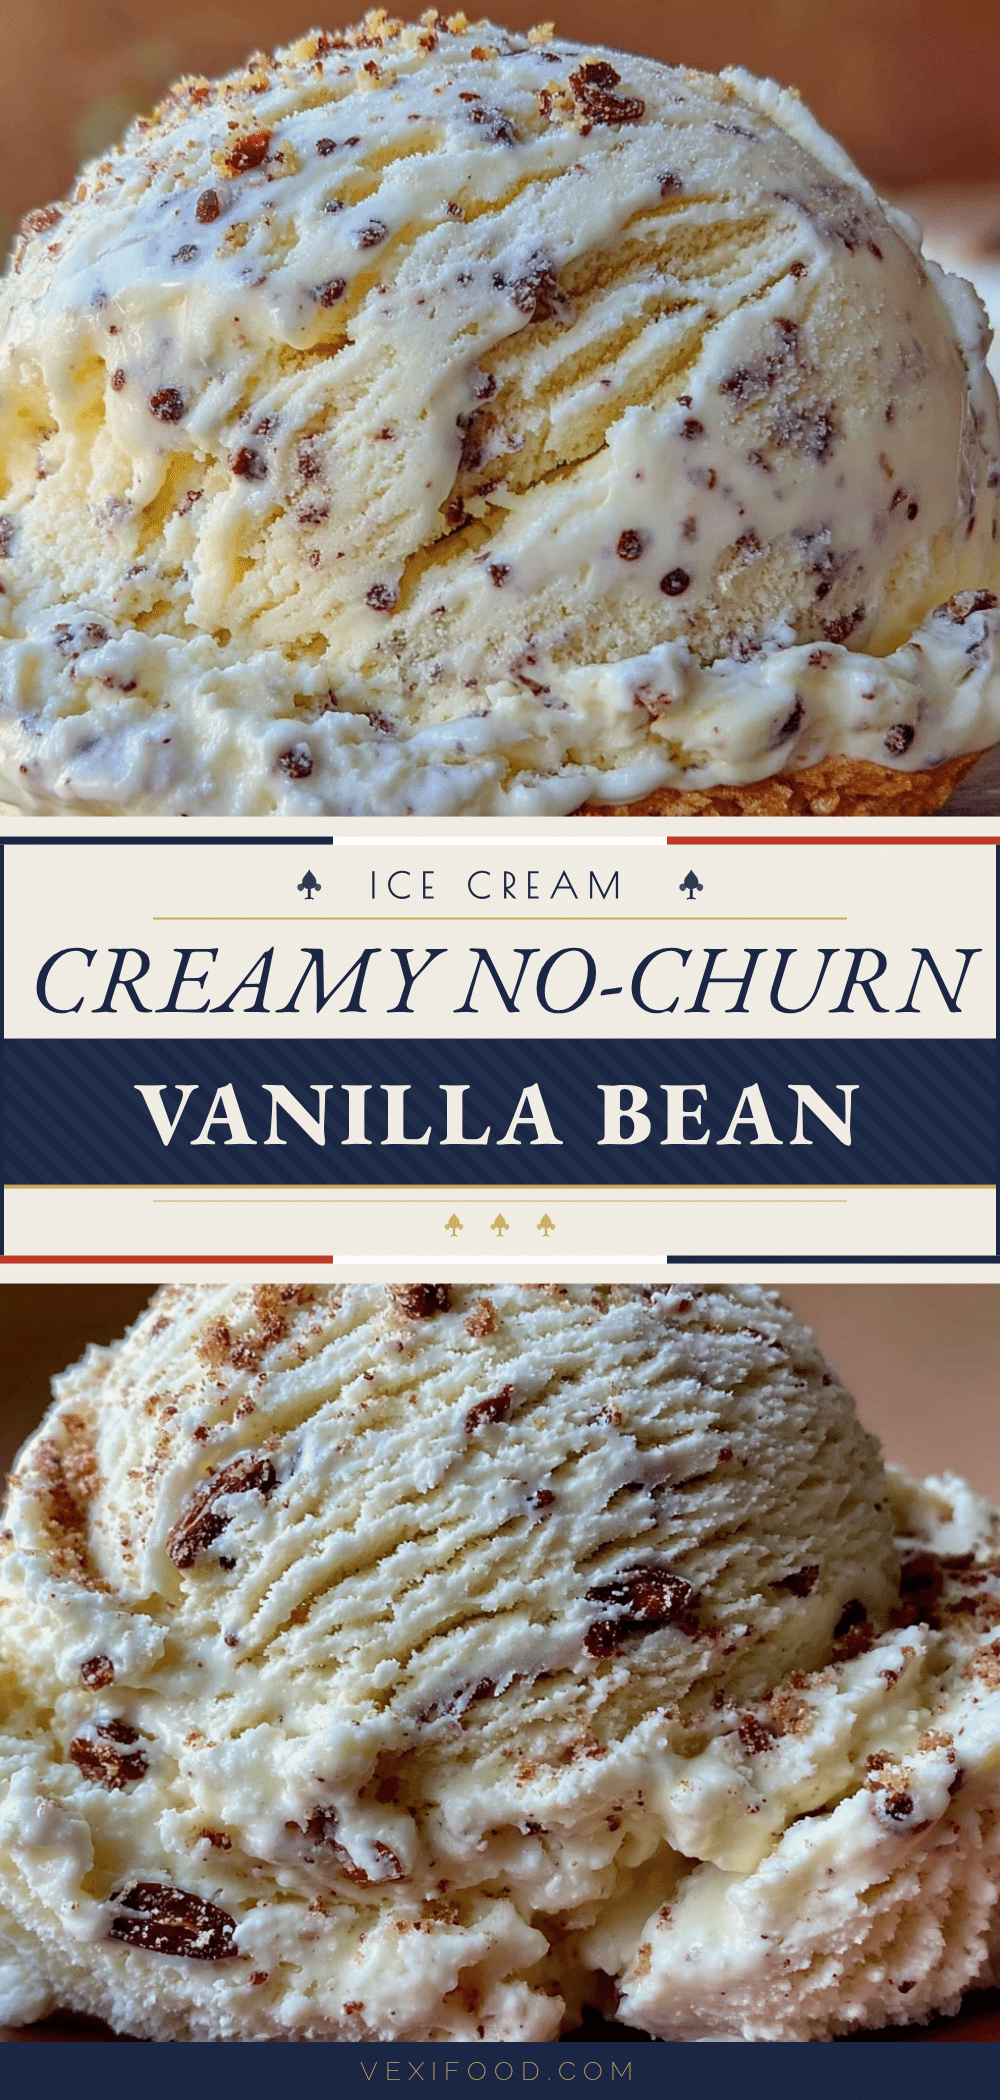
Best Homemade No-Churn Vanilla Bean Ice Cream Recipe
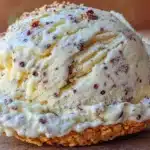
This creamy no-churn vanilla bean ice cream requires no ice cream maker and uses real vanilla beans for an incredibly rich, authentic flavor. It’s a simple, indulgent dessert that’s perfect for any occasion.
- Prep Time: 15 minutes
- Cook Time: 0 minutes
- Total Time: 6 hours 15 minutes (includes freezing time)
- Yield: 8 servings 1x
- Category: Dessert
- Cuisine: American
Ingredients
- 2 cups (480 ml) heavy whipping cream
- 1 can (14 ounces / 397 g) sweetened condensed milk
- 2 vanilla beans
- 1 tablespoon (15 ml) pure vanilla extract
- ¼ teaspoon fine sea salt
- 1 vanilla bean pod (scraped seeds only, optional)
- 1 tablespoon vodka or bourbon (optional)
Instructions
- Chill your equipment: Place your large mixing bowl and the whisk attachment (or beaters) in the freezer for at least 15 minutes. Put your loaf pan in the freezer too.
- Prepare the vanilla beans: Lay one vanilla bean on a cutting board. Using a sharp paring knife, slice it lengthwise down the center, cutting through one side but not all the way through. Open the pod like a book. Then, using the back of the knife, scrape out the tiny black seeds. Repeat with the second bean.
- Mix the base: In a medium bowl, combine the sweetened condensed milk, the scraped vanilla bean seeds, the vanilla extract, and the salt. Whisk until everything is well combined.
- Whip the cream: Remove the chilled bowl and whisk attachment from the freezer. Pour the cold heavy cream into the bowl. Start mixing on low speed, then gradually increase to medium-high speed. Whip until stiff peaks form, about 3 to 5 minutes with a stand mixer or 5 to 7 minutes with a hand mixer.
- Fold the cream into the base: Take about one-third of the whipped cream and add it to the condensed milk mixture. Gently fold it in with a rubber spatula. Once mostly incorporated, add the remaining whipped cream and continue folding until no white streaks remain.
- Transfer to the pan: Pour the mixture into your chilled loaf pan. Smooth the top with your spatula. If adding mix-ins, gently fold them in at this point or layer them in the pan.
- Cover and freeze: Press a piece of parchment paper or plastic wrap directly onto the surface of the ice cream mixture. Then cover the pan with aluminum foil or a tight-fitting lid. Freeze for at least 6 hours, but preferably overnight.
- Let it soften before serving: When ready to serve, remove the ice cream from the freezer and let it sit at room temperature for 5 to 10 minutes. Use a warm ice cream scoop for clean, perfect scoops.
Notes
Keep everything cold for best results. Don’t skip the salt—it enhances the vanilla flavor. Be careful not to overwhip the cream. Use a gentle hand when folding to retain air. Patience is key; freeze overnight for best texture. If ice cream is too hard, add a splash of vodka or bourbon to keep it scoopable.
Nutrition
- Serving Size: ⅛ of recipe
- Calories: 380
- Sugar: 35
- Sodium: 150
- Fat: 24
- Saturated Fat: 15
- Carbohydrates: 38
- Protein: 5
Keywords: no-churn ice cream, vanilla bean ice cream, homemade ice cream, easy ice cream, no ice cream maker