Best Homemade No-Churn Vanilla Bean Ice Cream Recipe
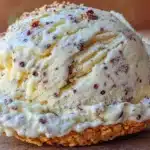
This creamy no-churn vanilla bean ice cream requires no ice cream maker and uses real vanilla beans for an incredibly rich, authentic flavor. It’s a simple, indulgent dessert that’s perfect for any occasion.
- Prep Time: 15 minutes
- Cook Time: 0 minutes
- Total Time: 6 hours 15 minutes (includes freezing time)
- Yield: 8 servings 1x
- Category: Dessert
- Cuisine: American
Ingredients
Scale
- 2 cups (480 ml) heavy whipping cream
- 1 can (14 ounces / 397 g) sweetened condensed milk
- 2 vanilla beans
- 1 tablespoon (15 ml) pure vanilla extract
- ¼ teaspoon fine sea salt
- 1 vanilla bean pod (scraped seeds only, optional)
- 1 tablespoon vodka or bourbon (optional)
Instructions
- Chill your equipment: Place your large mixing bowl and the whisk attachment (or beaters) in the freezer for at least 15 minutes. Put your loaf pan in the freezer too.
- Prepare the vanilla beans: Lay one vanilla bean on a cutting board. Using a sharp paring knife, slice it lengthwise down the center, cutting through one side but not all the way through. Open the pod like a book. Then, using the back of the knife, scrape out the tiny black seeds. Repeat with the second bean.
- Mix the base: In a medium bowl, combine the sweetened condensed milk, the scraped vanilla bean seeds, the vanilla extract, and the salt. Whisk until everything is well combined.
- Whip the cream: Remove the chilled bowl and whisk attachment from the freezer. Pour the cold heavy cream into the bowl. Start mixing on low speed, then gradually increase to medium-high speed. Whip until stiff peaks form, about 3 to 5 minutes with a stand mixer or 5 to 7 minutes with a hand mixer.
- Fold the cream into the base: Take about one-third of the whipped cream and add it to the condensed milk mixture. Gently fold it in with a rubber spatula. Once mostly incorporated, add the remaining whipped cream and continue folding until no white streaks remain.
- Transfer to the pan: Pour the mixture into your chilled loaf pan. Smooth the top with your spatula. If adding mix-ins, gently fold them in at this point or layer them in the pan.
- Cover and freeze: Press a piece of parchment paper or plastic wrap directly onto the surface of the ice cream mixture. Then cover the pan with aluminum foil or a tight-fitting lid. Freeze for at least 6 hours, but preferably overnight.
- Let it soften before serving: When ready to serve, remove the ice cream from the freezer and let it sit at room temperature for 5 to 10 minutes. Use a warm ice cream scoop for clean, perfect scoops.
Notes
Keep everything cold for best results. Don’t skip the salt—it enhances the vanilla flavor. Be careful not to overwhip the cream. Use a gentle hand when folding to retain air. Patience is key; freeze overnight for best texture. If ice cream is too hard, add a splash of vodka or bourbon to keep it scoopable.
Nutrition
- Serving Size: ⅛ of recipe
- Calories: 380
- Sugar: 35
- Sodium: 150
- Fat: 24
- Saturated Fat: 15
- Carbohydrates: 38
- Protein: 5
Keywords: no-churn ice cream, vanilla bean ice cream, homemade ice cream, easy ice cream, no ice cream maker