Love this? Save it for later!
Share the inspiration with your friends
I was standing in the frozen food aisle last Tuesday—honestly, I don’t even remember how I got there—when the smell of a fast food playground hit me. That weird mix of recycled grease, industrial cleaner, and slightly sad plastic. And suddenly I was nine years old, sitting cross-legged on the cracked linoleum floor of my aunt Rita’s kitchen, watching her pull a baking sheet of homemade nuggets from the oven. She never used a recipe. She just… knew. A little shake of paprika here, a splash of buttermilk there, and somehow they came out perfect every single time. I’ve been chasing that exact crunch for twenty years, and let me tell you, I’ve made some disasters along the way. Burnt ones. Soggy ones. Ones that tasted like cardboard pretending to be chicken. But this version? This is the one that finally made me stop searching.
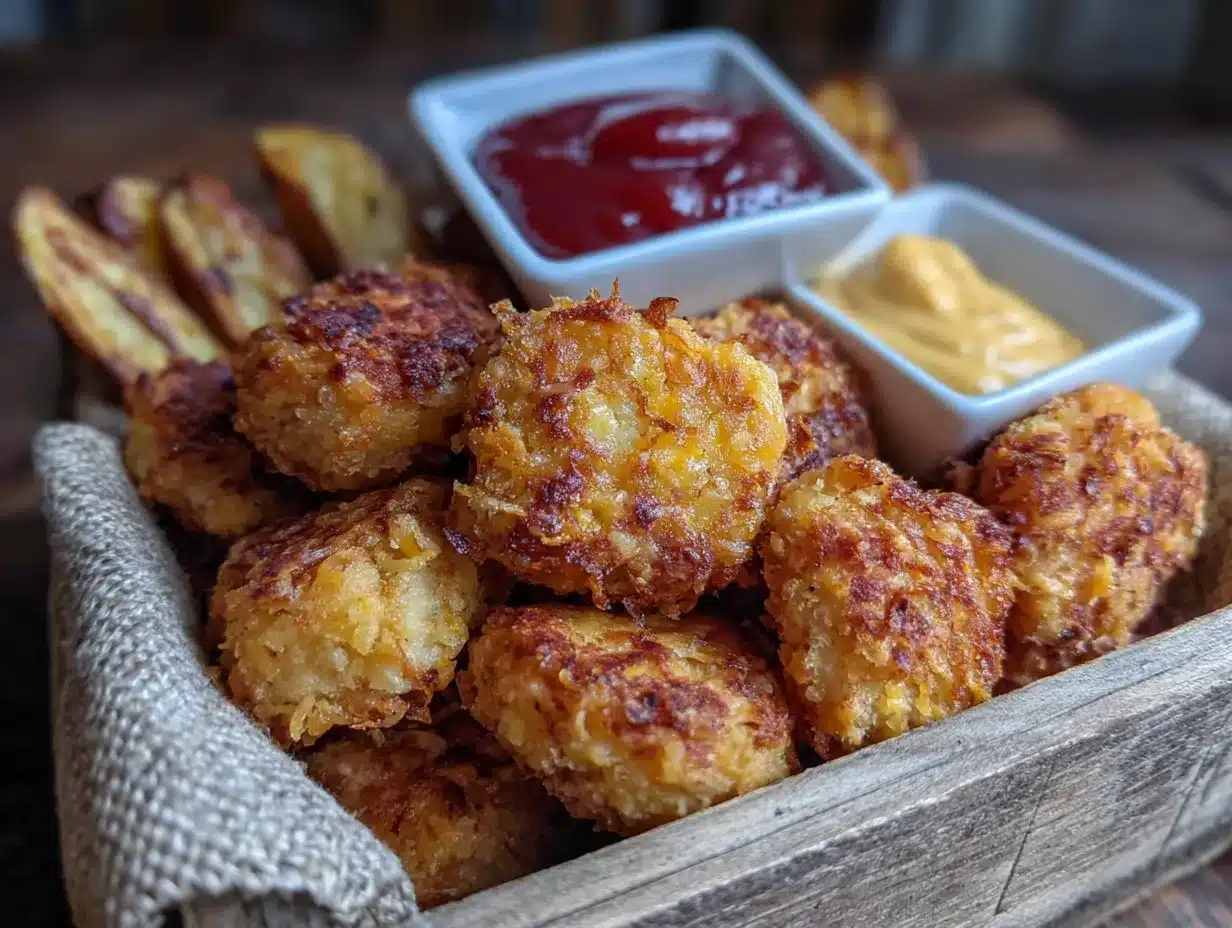
These crispy air fryer chicken nuggets lunch box style nuggets aren’t just another weeknight dinner. They’re the kind of thing that makes you feel like you’ve cracked some secret code, you know? The air fryer does the heavy lifting, but the real magic is in the coating—a smart little trick I picked up after ruining three batches of panko in a row. I wanted something that would stay crunchy even after sitting in a lunch box next to an apple slice and a yogurt tube. Something that would survive the morning commute and still taste like it just came out of the fryer. And after more tests than I care to admit, I finally got there.
Maybe you’ve been there too, standing in that same frozen aisle, staring at bags of pre-made nuggets and wondering if there’s a better way. There is. And it starts with a bag of chicken, a few pantry staples, and a little bit of patience. I keep making these because they remind me that good food doesn’t have to be complicated. It just has to be made with intention—and maybe a little bit of paprika.
Why You’ll Love This Recipe
Let’s be real for a second. Store-bought frozen nuggets are fine in a pinch, but they’re never quite right. Too salty. Too bread-y. That weird texture that makes you question what part of the chicken you’re actually eating. These homemade air fryer nuggets solve all of that. They’re crispy, juicy, and made with ingredients you can actually pronounce.
- Quick & Easy: From start to finish, these come together in about 25 minutes. That’s faster than takeout and way more satisfying.
- Simple Ingredients: You probably have everything in your kitchen right now. No weird processed stuff, no preservatives, no fillers.
- Perfect for Lunch Boxes: These hold up incredibly well. They stay crispy for hours, which is honestly a game-changer for packed lunches.
- Crowd-Pleaser: Kids devour them. Adults sneak them straight from the air fryer basket. I’ve seen it happen.
- Unbelievably Crispy: The secret is a double-coating technique that creates layers of crunch. No sad, soggy nuggets here.
What makes this recipe different from the dozens of other air fryer nugget recipes out there? It’s the method. I spent weeks testing different ratios of breadcrumbs to seasoning, different resting times, different cooking temperatures. I wanted a nugget that was crispy on the outside, tender on the inside, and sturdy enough to survive a lunch box without turning into a sad, steamy mess. This is that recipe. It’s not just another version—it’s the version I’d serve to my aunt Rita without apologizing.
There’s something about biting into a perfectly crispy nugget that just hits different. It’s comfort food at its most honest. No fancy plating, no pretentious ingredients, just good food that makes you close your eyes for a second and enjoy the moment. Whether you’re packing lunches for the week or just need a quick dinner that won’t disappoint, these nuggets deliver every single time.
What Ingredients You Will Need
This recipe keeps things refreshingly simple. You don’t need a specialty grocery store or a dozen exotic spices. Just good, honest ingredients that work together to create something special. Here’s what you’ll need:
For the Chicken
- 1½ pounds boneless, skinless chicken breasts (about 3 medium breasts) — Look for even-sized breasts so they cook uniformly. I prefer organic when I can find it, but conventional works perfectly fine.
- 1 cup buttermilk — This is the secret to tender, juicy nuggets. The acid in buttermilk breaks down the proteins just enough to keep the chicken from drying out. No buttermilk? Use 1 cup regular milk mixed with 1 tablespoon lemon juice, let it sit 5 minutes.
- 1 teaspoon salt — I use fine sea salt. Table salt works too, just use a little less.
- ½ teaspoon black pepper — Freshly ground if you have it, pre-ground is fine.
For the Coating
- 1½ cups panko breadcrumbs — Regular breadcrumbs won’t give you the same crunch. Panko is non-negotiable here, trust me. I’ve tried both.
- ½ cup finely grated Parmesan cheese — The kind in the green can works, but freshly grated is noticeably better. It melts into the coating and adds this savory depth that’s impossible to replicate.
- 1 teaspoon garlic powder — Not garlic salt. Big difference.
- 1 teaspoon paprika — Smoked paprika adds a lovely warmth, but regular works great too.
- ½ teaspoon onion powder — Adds that savory backbone.
- ¼ teaspoon cayenne pepper — Optional, but I love the tiny kick. Leave it out for kids or sensitive palates.
- 2 tablespoons olive oil or avocado oil spray — This is crucial for getting that golden, crispy exterior in the air fryer. Don’t skip it.
Optional Dipping Sauce
- ½ cup plain Greek yogurt — Full-fat works best for dipping.
- 2 tablespoons honey — Adds sweetness to balance the tang.
- 1 tablespoon Dijon mustard — Whole grain works too, just adds a different texture.
- Squeeze of lemon juice — Brightens everything up.
A quick note on ingredients: I’ve tested this with gluten-free panko and it works beautifully. Just check the texture—some brands are finer than others and may need a touch more oil to crisp up. For a dairy-free version, use coconut milk yogurt in the marinade and skip the Parmesan. The texture will be slightly different, but still delicious. I’ve made it both ways and honestly, I’d eat either version without complaint.
Equipment Needed
Nothing fancy here. Here’s what you’ll need to pull these off:
- Air fryer — Any brand works. I use a 5.8-quart basket-style model, but I’ve made these in smaller ones too. Just work in batches if needed.
- Cutting board — Wood or plastic, doesn’t matter. Just make sure it’s stable.
- Sharp knife — A dull knife will crush the chicken instead of cutting it. Trust me on this one.
- Two shallow bowls — For the buttermilk mixture and the coating. Pie plates work great.
- Tongs — Keeps your hands clean during the breading process.
- Baking sheet or large plate — For holding the breaded nuggets before they go in the air fryer.
- Meat thermometer — Not strictly necessary, but it takes the guesswork out of doneness. I use a simple instant-read one.
If you don’t have an air fryer yet, don’t worry. I tested these in a convection oven too, and they came out almost as crispy. Just spread them on a wire rack set over a baking sheet and bake at 400°F for about 15 minutes, flipping halfway. The texture won’t be quite as airy, but it’s a solid backup. I actually prefer the air fryer version, but I’ve made these in a pinch when mine was broken and they still disappeared in minutes.
Preparation Method
Alright, let’s get cooking. I’ve broken this down into clear steps so nothing gets missed. Take your time with the breading—it’s worth it.
- Prep the chicken (5 minutes): Place your chicken breasts on the cutting board. Pat them dry with paper towels—this helps the buttermilk stick better. Cut them into nugget-sized pieces, about 1½ inches each. I aim for uniform sizes so they cook evenly. You’ll get about 20-24 nuggets from 1½ pounds of chicken.
- Marinate (10 minutes minimum, 2 hours max): In a medium bowl, whisk together the buttermilk, salt, and pepper. Add the chicken pieces and toss to coat. Let them sit for at least 10 minutes while you prepare the coating. If you have time, let them marinate in the fridge for up to 2 hours. The longer they sit, the more tender they get. I’ve forgotten them overnight once and they were still fine, just slightly more tangy.
- Make the coating (5 minutes): In a shallow bowl, combine the panko, Parmesan, garlic powder, paprika, onion powder, and cayenne if using. Mix with a fork until everything is evenly distributed. The Parmesan should be well incorporated, not clumped together.
- Set up your breading station (2 minutes): Line up your bowls: buttermilk mixture on the left, coating in the middle, and a clean baking sheet on the right. This assembly line makes the process so much smoother. I learned this the hard way after dripping buttermilk all over my counter.
- Bread the nuggets (10 minutes): Working with one piece at a time, lift a chicken piece from the buttermilk, letting excess drip off. Drop it into the coating mixture. Use your fingers to press the coating firmly onto all sides. I mean really press it in—this is what creates that thick, crunchy crust. Place the breaded nugget on the clean baking sheet. Repeat with remaining chicken. Wash your hands after every few pieces to keep the coating from getting clumpy.
- Rest the nuggets (10 minutes): This step is non-negotiable. Let the breaded nuggets sit at room temperature for 10 minutes. This helps the coating adhere better and prevents it from sliding off during cooking. I’ve skipped this step before and ended up with naked chicken and a pile of breadcrumbs at the bottom of the air fryer. Learn from my mistakes.
- Preheat the air fryer (3 minutes): Set your air fryer to 400°F (200°C) and let it preheat for 3 minutes. Some models don’t require preheating, but I find it gives a more consistent result.
- Prepare for cooking (2 minutes): Lightly spray the air fryer basket with oil. Arrange the nuggets in a single layer, leaving space between each piece. They need room for the hot air to circulate. Depending on your air fryer size, you’ll need to cook in 2-3 batches. Crowding the basket leads to soggy nuggets, and nobody wants that.
- Cook (10-12 minutes): Lightly spray the tops of the nuggets with oil. This is what gives them that golden, crispy finish. Air fry at 400°F for 10-12 minutes, flipping halfway through at the 6-minute mark. The nuggets should be deep golden brown and feel firm to the touch. For extra crispy nuggets, add 1-2 minutes, but watch them closely—they can go from golden to burnt quickly.
- Check doneness (1 minute): If you’re using a meat thermometer, the internal temperature should read 165°F (74°C). Cut one open to check—the juices should run clear, and the meat should be white all the way through, no pink.
- Rest and serve (3 minutes): Let the nuggets rest on a wire rack for 2-3 minutes before serving. This keeps them crispy instead of steaming on a plate. Serve immediately with your favorite dipping sauce, or let them cool completely for lunch boxes.
A quick sensory note: you’ll know the nuggets are ready when the kitchen smells like a combination of toasted Parmesan and paprika. The sound when you tap one with a fork should be sharp and crisp, not dull. And when you bite into one, you should hear that satisfying crunch before you feel the tender chicken inside. That’s the moment it all comes together.
Cooking Tips & Techniques
I’ve made more batches of these nuggets than I can count, and I’ve collected a few hard-won lessons along the way. Here are the tips that actually make a difference:
Don’t skip the buttermilk soak. I know it’s tempting to save time, but that buttermilk does two things: it tenderizes the chicken and helps the coating stick. I tried a batch with just egg wash once, and the coating slid right off during cooking. Never again.
Press the coating in firmly. This is the number one mistake I see people make. You’re not just dusting the chicken with breadcrumbs—you’re building a crust. Use your fingers to really press that panko mixture into every surface. The nuggets should look almost shaggy with coating.
Let them rest after breading. I cannot stress this enough. Those 10 minutes allow the coating to hydrate slightly and adhere to the chicken. If you skip this, you’ll end up with bare spots and a pile of loose breadcrumbs in your air fryer basket. I learned this the hard way during a particularly stressful dinner prep.
Work in batches. Your air fryer needs room to circulate hot air. If you overcrowd the basket, the nuggets will steam instead of crisp. I know it’s annoying to cook in batches, but the results are worth it. Keep the cooked nuggets warm on a wire rack in a 200°F oven while you finish the rest.
Flip halfway through. This ensures even browning on both sides. I use tongs and work quickly to minimize heat loss. If you forget to flip, the bottom side will be pale and less crispy. Ask me how I know.
Use oil spray, not oil drizzled. A light, even spray coats the nuggets without making them greasy. If you drizzle oil, it tends to pool in the basket and create soggy spots. I use a simple pump spray bottle filled with avocado oil. It gives me better control than aerosol cans.
Check one early. Around the 8-minute mark, I always pull one nugget out and cut it open. This tells me exactly how things are progressing. Chicken sizes vary, and different air fryer models run at slightly different temperatures. Trust your eyes and your thermometer more than the timer.
Variations & Adaptations
One of the best things about this recipe is how adaptable it is. Here are some variations I’ve tested and loved:
Spicy Buffalo Nuggets: Add 2 tablespoons of buffalo sauce to the buttermilk marinade and increase the cayenne to ½ teaspoon. Serve with blue cheese or ranch dressing. I made these for a game day party and they disappeared before the wings did.
Parmesan Herb Nuggets: Add 1 tablespoon of dried Italian seasoning and 2 tablespoons of fresh chopped parsley to the coating. The herbs add a fresh, aromatic quality that pairs beautifully with the Parmesan. Great for when you want something a little more grown-up.
Gluten-Free Version: Use gluten-free panko (I like Ian’s brand) and ensure your Parmesan is labeled gluten-free. The texture is slightly less airy, but still wonderfully crispy. My gluten-sensitive friend couldn’t tell the difference.
Lemon Pepper Nuggets: Add 1 tablespoon of lemon zest and 1 teaspoon of cracked black pepper to the coating. Omit the cayenne. This version is bright and zesty, perfect for spring lunches.
Air Fryer vs. Oven Method: If you don’t have an air fryer, bake these on a wire rack set over a baking sheet at 400°F for 15-18 minutes, flipping halfway. The texture won’t be quite as crispy, but they’re still delicious. I’ve also made them in a deep fryer at 350°F for 4-5 minutes, and honestly, they’re incredible—just much greasier.
Chicken Thigh Version: Swap chicken breasts for boneless, skinless thighs. The nuggets will be juicier and more flavorful, but they need an extra 2-3 minutes of cooking time. I actually prefer thighs for meal prep because they stay moister after reheating.
I once experimented with adding crushed potato chips to the coating. It was… interesting. The texture was great, but the flavor was overwhelmingly salty. Stick with the panko, friends. Some experiments are better left in the kitchen.
Serving & Storage Suggestions
These nuggets are incredibly versatile when it comes to serving. Here’s how I like to enjoy them:
Serving Temperature: Serve them hot and fresh for maximum crispiness. They’re also surprisingly good at room temperature, which makes them perfect for lunch boxes. I’ve even eaten them cold straight from the fridge and still enjoyed them—they lose some crunch but gain a nice, dense texture.
Presentation Ideas: For lunch boxes, I pack the nuggets in a separate container from any sauce to keep them crispy. A small silicone cup of honey mustard or ranch on the side works perfectly. For dinner, I serve them on a platter with lemon wedges, a sprinkle of fresh parsley, and dipping sauces in small bowls.
Complementary Dishes: These pair beautifully with sweet potato fries, a simple green salad, roasted vegetables, or mac and cheese. For a complete lunch box, add apple slices, baby carrots, and a yogurt tube. The nuggets hold up well next to fruit without making everything taste like chicken.
Storage: Store cooled nuggets in an airtight container in the refrigerator for up to 4 days. Layer them with paper towels to absorb any excess moisture. I don’t recommend storing them with sauce—it makes them soggy.
Freezing: These freeze beautifully. Arrange cooled nuggets in a single layer on a baking sheet and freeze for 2 hours, then transfer to a freezer bag. They’ll keep for up to 3 months. To reheat, air fry at 375°F for 5-7 minutes straight from frozen—no thawing needed. They come out almost as crispy as fresh.
Reheating: The air fryer is your best friend here. Reheat at 375°F for 3-4 minutes. A microwave will make them soggy, and an oven takes too long. If you’re packing these for lunch, I actually prefer them cold or at room temperature over reheated in a microwave. The texture just isn’t the same.
One thing I’ve noticed: the flavors actually develop overnight. The second day, the seasoning seems more integrated and mellow. I’ve been known to make a double batch just so I can have leftovers for lunch the next day.
Nutritional Information & Benefits
Here’s the estimated nutritional breakdown for a serving of 6 nuggets (about 4 ounces of chicken):
- Calories: 320
- Protein: 35g
- Fat: 12g
- Carbohydrates: 18g
- Fiber: 1g
- Sugar: 3g
- Sodium: 580mg
These numbers are estimates and will vary based on specific ingredients and portion sizes. The buttermilk marinade adds minimal calories but significant tenderness, which means you can skip heavy sauces and still enjoy a satisfying nugget.
Health-wise, these nuggets are a solid choice for a balanced diet. Chicken breast is lean protein that keeps you full and supports muscle health. The Parmesan adds calcium and a savory boost without needing much. And since they’re air fried instead of deep fried, you’re saving a significant amount of oil and calories compared to traditional nuggets.
If you’re watching your sodium, use low-sodium seasoning blends and skip the salt in the buttermilk. The Parmesan adds enough saltiness on its own. For a lower-carb option, swap the panko for crushed pork rinds or almond flour mixed with Parmesan. I’ve tried both, and while the texture is different, they’re still delicious.
I’m not a nutritionist, but I am someone who cares about what goes into my body. These nuggets make me feel good about feeding them to my family—they’re real food, made with real ingredients, and they taste like a treat. That’s a win in my book.
Conclusion
These crispy air fryer chicken nuggets lunch box style nuggets are more than just a recipe—they’re a solution to the eternal question of what to pack for lunch or make for dinner when you want something satisfying without the hassle. They’re quick enough for a busy weeknight, sturdy enough for a lunch box, and delicious enough to make everyone happy.
I love that this recipe respects your time without cutting corners that matter. The buttermilk soak, the double coating, the resting period—every step has a purpose. And the result is a nugget that’s genuinely crispy, genuinely juicy, and genuinely better than anything you’ll find in the frozen aisle. I’ve made these for picky toddlers, skeptical teenagers, and adults who swore they didn’t like homemade nuggets. Every single time, the plate comes back empty.
Now I want to hear from you. Have you tried making nuggets in your air fryer? What’s your go-to dipping sauce? Drop a comment below and let me know how these turned out for you. And if you come up with a killer variation, share that too—I’m always looking for new ideas to test in my kitchen. Happy cooking, friends. You’ve got this.
Frequently Asked Questions
Can I use frozen chicken breasts for this recipe?
I don’t recommend it. Frozen chicken releases too much water as it thaws, which makes the coating slide off. If you’re in a pinch, thaw the chicken completely in the refrigerator overnight, then pat it very dry before starting. The texture won’t be quite as good, but it’ll still work.
Why are my nuggets not crispy in the air fryer?
This usually happens for one of three reasons: you overcrowded the basket, you didn’t spray enough oil on the coating, or you skipped the resting step after breading. Make sure there’s space between each nugget, give them a good spritz of oil, and let them rest for 10 minutes before cooking. That should solve the problem.
Can I make these ahead of time for meal prep?
Absolutely. Cook the nuggets as directed, let them cool completely, and store them in an airtight container in the fridge for up to 4 days. For best results, reheat them in the air fryer at 375°F for 3-4 minutes. They’re also great cold in lunch boxes—just pack them separately from any wet ingredients.
What’s the best dipping sauce for these nuggets?
I love a simple honey mustard made from Greek yogurt, honey, and Dijon. But honestly, these nuggets are good with almost anything—ranch, barbecue sauce, buffalo sauce, sweet chili sauce, or even just a squeeze of lemon. My kids prefer ketchup, and I don’t judge.
Can I make these nuggets dairy-free?
Yes. Use coconut milk yogurt or almond milk mixed with lemon juice for the buttermilk substitute, and skip the Parmesan in the coating. The texture will be slightly less crispy, but still delicious. Add an extra tablespoon of nutritional yeast to the coating for a cheesy flavor without the dairy.
Pin This Recipe!
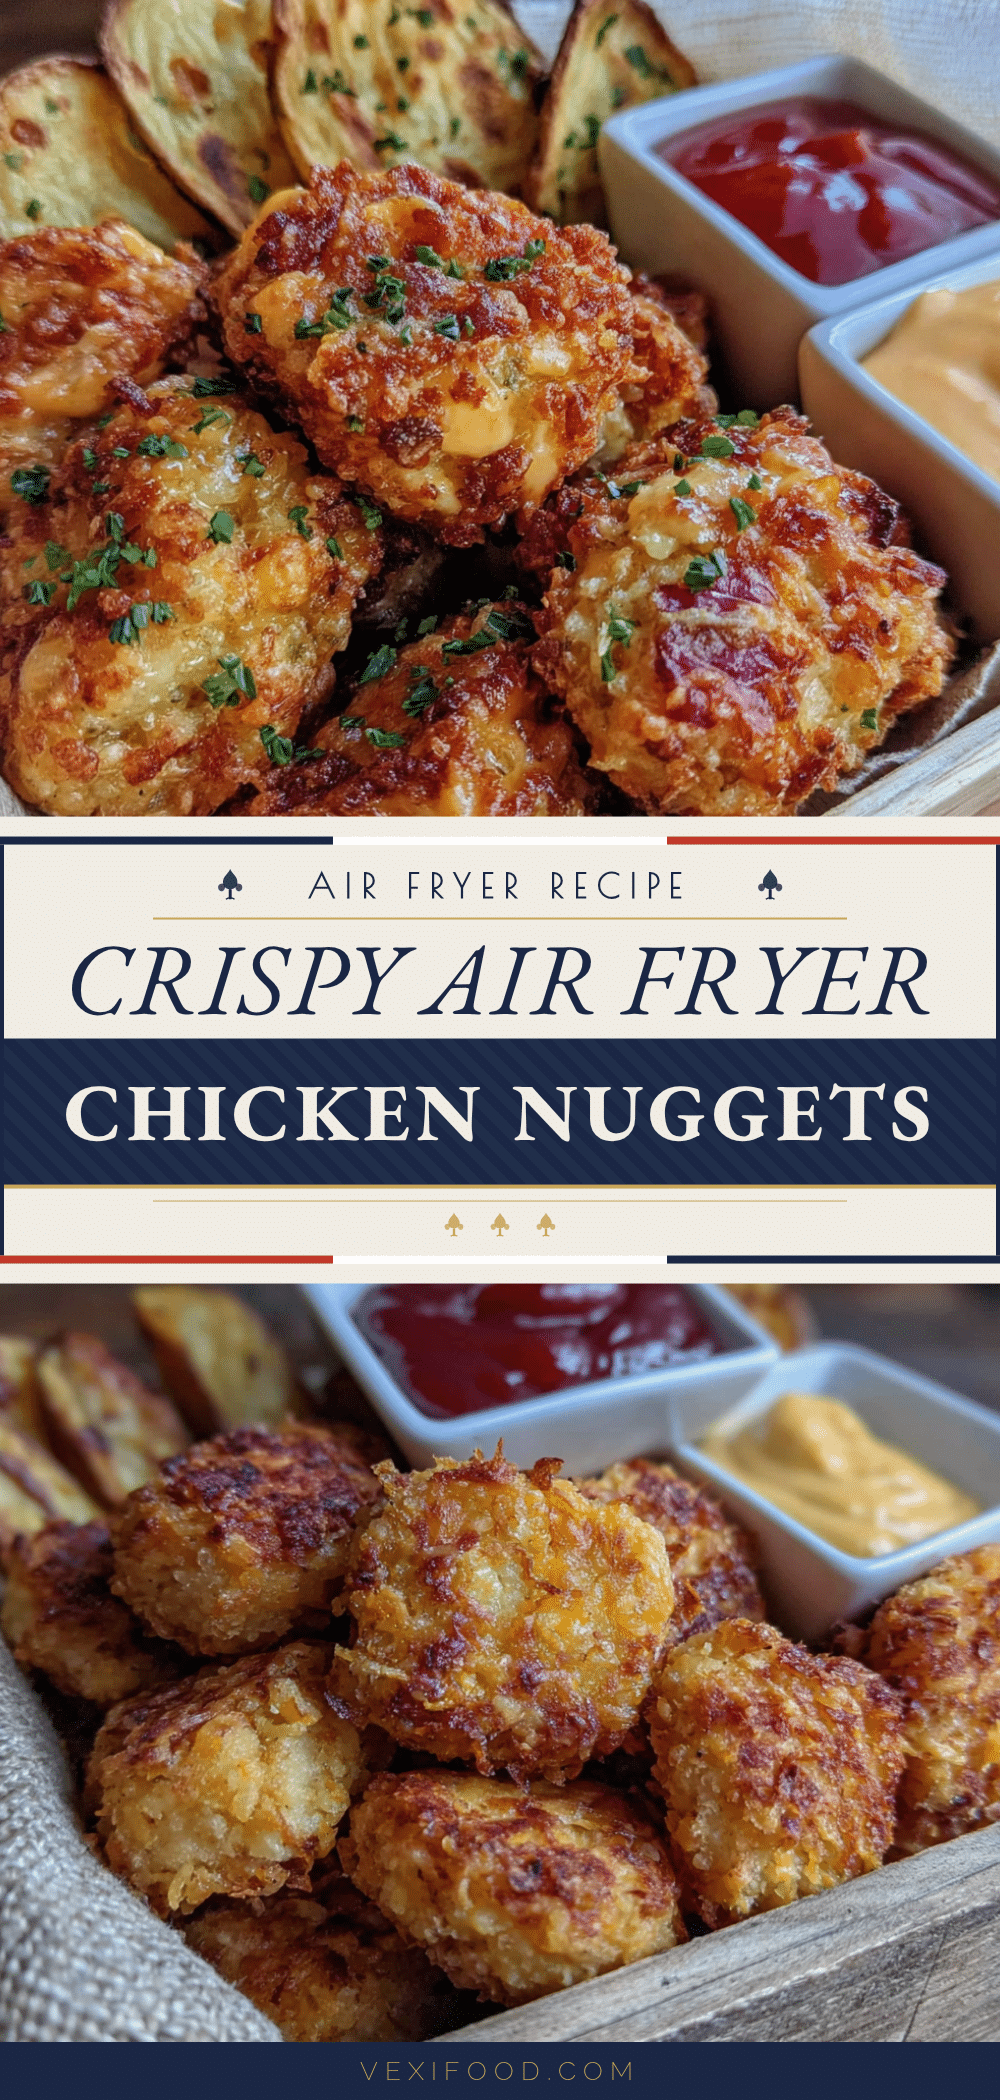
Crispy Air Fryer Chicken Nuggets Best Lunch Box Recipe

These crispy air fryer chicken nuggets are quick, easy, and perfect for lunch boxes. Made with simple ingredients and a double-coating technique, they stay crunchy for hours and are a crowd-pleaser for kids and adults alike.
- Prep Time: 15 minutes
- Cook Time: 12 minutes
- Total Time: 27 minutes
- Yield: 4 servings 1x
- Category: Main Course
- Cuisine: American
Ingredients
- 1½ pounds boneless, skinless chicken breasts (about 3 medium breasts)
- 1 cup buttermilk
- 1 teaspoon fine sea salt
- ½ teaspoon black pepper
- 1½ cups panko breadcrumbs
- ½ cup finely grated Parmesan cheese
- 1 teaspoon garlic powder
- 1 teaspoon paprika (smoked or regular)
- ½ teaspoon onion powder
- ¼ teaspoon cayenne pepper (optional)
- 2 tablespoons olive oil or avocado oil spray
- ½ cup plain Greek yogurt (for dipping sauce)
- 2 tablespoons honey (for dipping sauce)
- 1 tablespoon Dijon mustard (for dipping sauce)
- Squeeze of lemon juice (for dipping sauce)
Instructions
- Prep the chicken: Pat chicken breasts dry with paper towels. Cut into nugget-sized pieces, about 1½ inches each. You’ll get about 20-24 nuggets.
- Marinate: In a medium bowl, whisk together buttermilk, salt, and pepper. Add chicken pieces and toss to coat. Let sit at least 10 minutes (up to 2 hours in fridge).
- Make the coating: In a shallow bowl, combine panko, Parmesan, garlic powder, paprika, onion powder, and cayenne (if using). Mix well.
- Set up breading station: Line up bowls: buttermilk mixture on left, coating in middle, clean baking sheet on right.
- Bread the nuggets: One piece at a time, lift chicken from buttermilk, letting excess drip off. Drop into coating and press firmly onto all sides. Place on baking sheet. Repeat with remaining chicken.
- Rest the nuggets: Let breaded nuggets sit at room temperature for 10 minutes to help coating adhere.
- Preheat air fryer to 400°F (200°C) for 3 minutes.
- Prepare for cooking: Lightly spray air fryer basket with oil. Arrange nuggets in a single layer, leaving space between each piece. Cook in batches if needed.
- Cook: Lightly spray tops of nuggets with oil. Air fry at 400°F for 10-12 minutes, flipping halfway at 6 minutes, until deep golden brown and firm.
- Check doneness: Internal temperature should reach 165°F (74°C). Juices should run clear, meat white.
- Rest and serve: Let nuggets rest on a wire rack for 2-3 minutes before serving. Serve immediately or cool completely for lunch boxes.
Notes
Don’t skip the buttermilk soak—it tenderizes the chicken and helps coating stick. Press coating firmly into chicken. Let nuggets rest after breading for 10 minutes. Work in batches to avoid overcrowding. Flip halfway through cooking. Use oil spray for even coating. Check one nugget early to gauge doneness.
Nutrition
- Serving Size: 6 nuggets (about 4 o
- Calories: 320
- Sugar: 3
- Sodium: 580
- Fat: 12
- Saturated Fat: 3
- Carbohydrates: 18
- Fiber: 1
- Protein: 35
Keywords: air fryer chicken nuggets, crispy chicken nuggets, lunch box recipe, homemade nuggets, easy chicken recipe