Love this? Save it for later!
Share the inspiration with your friends
It was 11:47 PM on a rainy Tuesday, and I had a very specific craving for fried chicken. I didn’t have a deep fryer, but I had a bag of bone-in, skin-on chicken thighs from the discount bin at the grocery store and an air fryer that I’d barely used since buying it on a whim. Honestly, I was skeptical. Could an air fryer really deliver that shatteringly crisp skin I was dreaming about? I was too tired to care about perfection. I just wanted something crunchy, salty, and satisfying without standing over a sputtering pot of oil. So I grabbed my biggest mixing bowl, raided the spice cabinet, and started experimenting. Maybe you’ve been there—standing in your kitchen late at night, willing a shortcut to taste like the real thing. Well, let me tell you, what came out of that air fryer was nothing short of a miracle. The skin was so crispy it crackled when I bit into it, and the meat was impossibly juicy. I stood at the counter, eating one right off the bone, and knew I’d stumbled onto something I’d be making for years. This is that recipe.
Why You’ll Love This Recipe
Let’s be honest: feeding a family on a budget while trying to keep everyone happy is a constant juggling act. These crispy air fryer chicken thighs solve that problem in a big way. They’re fast, affordable, and the kind of dinner that makes everyone at the table quiet because they’re too busy eating.
- Quick & Easy: From fridge to table in about 25 minutes. No marinating overnight, no complicated steps. Just a quick spice rub and into the air fryer.
- Simple Ingredients: You probably have everything you need in your pantry right now. Chicken thighs are cheap—often under $2 a pound—and the seasoning uses common spices.
- Perfect for Busy Weeknights: This is my go-to when I’ve had a long day and need dinner on the table fast. The air fryer does all the work while I throw together a quick salad or roast some veggies.
- Crowd-Pleaser: My kids devour these. The crispy skin is like the best part of fried chicken, without the grease. Even my picky eater who “doesn’t like chicken” asks for seconds.
- Unbelievably Delicious: The contrast between the ultra-crispy skin and the tender, juicy meat is next-level comfort food. You won’t miss the deep fryer at all.
This recipe isn’t just good—it’s the kind that makes you close your eyes after the first bite. It’s comfort food reimagined: faster, healthier, and cheaper than takeout, but with the same soul-soothing satisfaction. Perfect for impressing your family without any stress.
What Ingredients You Will Need
This recipe uses simple, budget-friendly ingredients to deliver big flavor. Most of these are pantry staples, which makes this a perfect last-minute dinner solution.
- Chicken thighs, bone-in, skin-on (6-8 pieces, about 2 lbs / 900g): This is the star. Bone-in, skin-on thighs are cheaper than breasts and way more forgiving. The skin gets incredibly crispy, and the bone keeps the meat juicy. I always buy the family pack from the store—it’s the best value.
- Olive oil or avocado oil (2 tablespoons / 30ml): Just enough to help the seasoning stick and encourage browning. Avocado oil has a higher smoke point, but olive oil works perfectly here.
- Garlic powder (1 teaspoon): Adds savory depth without burning like fresh garlic can in the air fryer.
- Onion powder (1 teaspoon): A subtle sweetness that rounds out the flavor.
- Smoked paprika (1 teaspoon): This is non-negotiable for me. It adds that beautiful golden-red color and a subtle smokiness that mimics outdoor grilling. Smoked paprika chicken recipes are a staple in my kitchen.
- Dried thyme (½ teaspoon): An earthy, slightly floral note that pairs beautifully with chicken.
- Salt (1 teaspoon): I use kosher salt for better control and flavor.
- Black pepper (½ teaspoon): Freshly ground is best, but pre-ground works fine.
- Optional: Cayenne pepper (¼ teaspoon): For a little heat. Leave it out if you’re cooking for kids or sensitive palates.
- Optional: Baking powder (½ teaspoon): This is my secret trick. A tiny bit of baking powder mixed with the seasoning helps dry out the skin even more, creating an extra-crispy crust. Make sure it’s aluminum-free to avoid any metallic taste.
Ingredient Selection Tips: Look for chicken thighs that have the skin still attached and intact. The skin is what gets crispy, so you want it in good condition. If you can, pat the chicken dry with paper towels before seasoning—this is the most important step for crispy skin. For the best results, let the seasoned chicken sit in the fridge for 30 minutes (or up to 24 hours) to let the salt penetrate and the skin dry out further.
Equipment Needed
You don’t need much for this recipe, which is part of why I love it so much.
- Air fryer (any size, but 5.8 quarts or larger is ideal): This is the key piece of equipment. I use a basket-style air fryer, but an oven-style one works too—you might just need to adjust the cooking time slightly. If you don’t have an air fryer, you can bake these in a regular oven at 425°F (220°C) for about 35-40 minutes, though they won’t be quite as crispy.
- Large mixing bowl: For tossing the chicken with oil and seasoning. A glass or stainless steel bowl works best.
- Tongs: For turning the chicken halfway through cooking. Silicone-tipped tongs won’t scratch your air fryer basket.
- Paper towels: For patting the chicken dry—this step is crucial.
- Instant-read thermometer (optional but recommended): Chicken thighs are done at 175°F (80°C), but I actually prefer pulling them at 185°F (85°C) for more tender, fall-apart meat. A thermometer takes the guesswork out.
- Cutting board and knife: For any prep work, though honestly, this recipe is mostly hands-off.
Budget-Friendly Tip: If you don’t own an air fryer yet, check your local thrift store. I found mine for $12, and it’s paid for itself many times over in saved takeout money.
Preparation Method
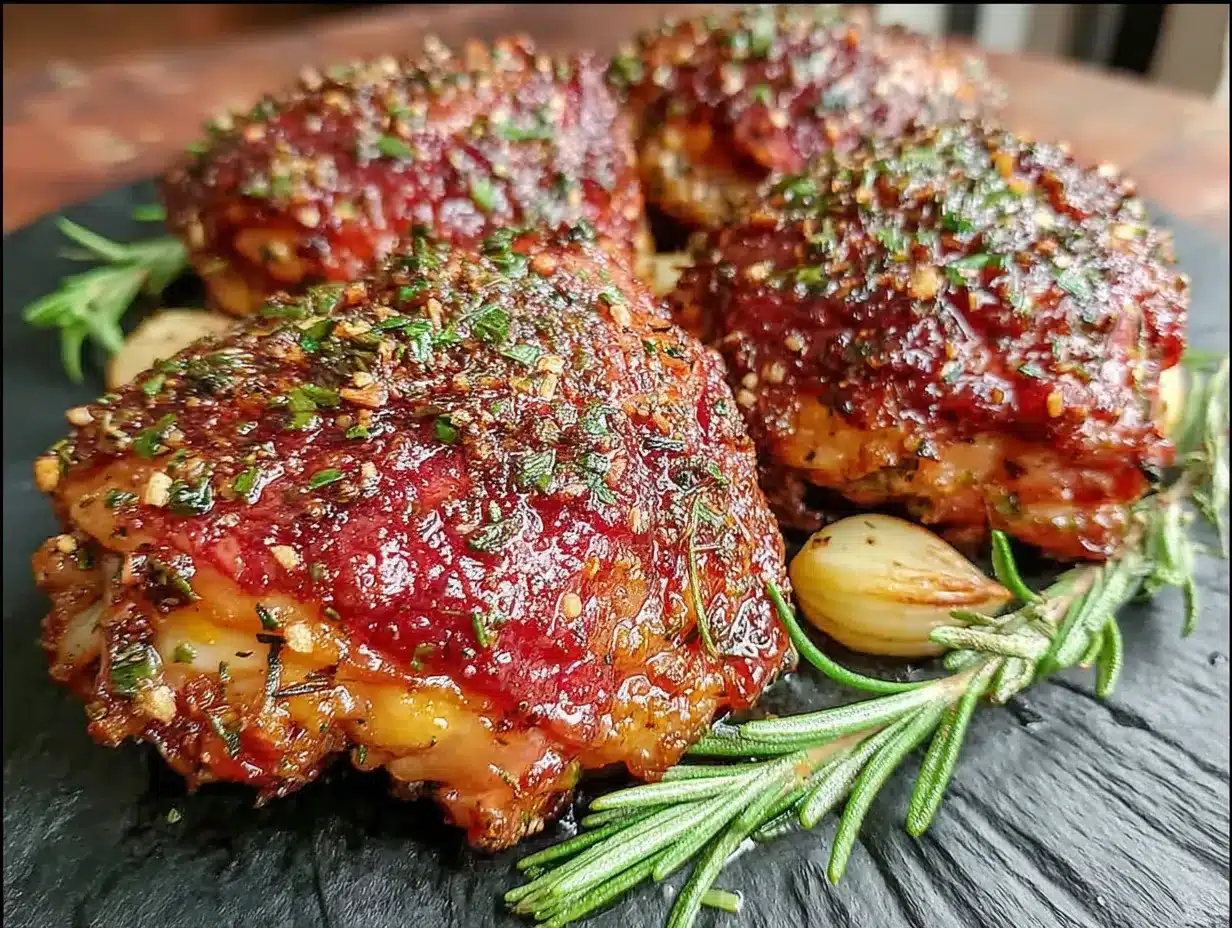
Let’s get cooking. This method is simple, but each step matters for that perfect crispy result.
- Pat the chicken dry (5 minutes): Take your chicken thighs out of the package and pat them thoroughly dry with paper towels. This is the single most important step. Moisture is the enemy of crispy skin. Get every surface as dry as you can, especially the skin side. Let them sit on a plate while you prepare the seasoning.
- Make the seasoning rub (2 minutes): In a small bowl, combine 1 teaspoon garlic powder, 1 teaspoon onion powder, 1 teaspoon smoked paprika, ½ teaspoon dried thyme, 1 teaspoon salt, ½ teaspoon black pepper, and ½ teaspoon baking powder (if using). Stir to combine. If you’re adding cayenne, mix it in now.
- Season the chicken (3 minutes): Place the dry chicken thighs in a large mixing bowl. Drizzle with 2 tablespoons of oil and toss to coat evenly. Sprinkle the seasoning mixture over the chicken and use your hands to rub it into every nook and cranny. Make sure you get some seasoning under the skin too—just gently lift the skin and rub a little in. This flavors the meat directly.
- Preheat the air fryer (3 minutes): Set your air fryer to 400°F (200°C) and let it preheat for 3 minutes. Preheating ensures the chicken starts cooking immediately, which helps the skin crisp up faster.
- Arrange the chicken in the basket (2 minutes): Place the seasoned chicken thighs in the air fryer basket in a single layer. Make sure they aren’t touching or overlapping. You want hot air to circulate around each piece. If your air fryer is small, cook in batches. Crowding the basket will steam the chicken instead of crisping it.
- Cook for 12 minutes: Air fry at 400°F (200°C) for 12 minutes. Don’t open the basket during this time—let the heat do its work.
- Flip and cook again (8-10 minutes): Using tongs, carefully flip each chicken thigh over. The skin side should be golden and starting to crisp. Cook for another 8-10 minutes, until the internal temperature reaches 185°F (85°C) and the skin is deep golden brown and crackling. If you like it extra crispy, add 2 more minutes.
- Rest before serving (5 minutes): Remove the chicken from the air fryer and let it rest on a plate or cutting board for 5 minutes. This allows the juices to redistribute. I know it’s hard to wait, but trust me—it’s worth it.
Sensory Cues: At the 12-minute mark, the kitchen will smell incredible—smoky, savory, and a little bit like a fair. When you flip the chicken, the skin should look golden and feel slightly firm to the touch. When it’s done, the skin will be deeply browned and sound crispy when you tap it with a fork. The meat should feel tender when pierced, and the juices should run clear.
Cooking Tips & Techniques
I’ve made these chicken thighs more times than I can count, and I’ve learned a few things the hard way. Here’s what I wish I’d known from the start.
Don’t skip drying the chicken. I once got distracted and forgot to pat the chicken dry. The skin came out chewy and sad, not crispy. Moisture is the enemy of crispiness, so take those extra 30 seconds.
Use aluminum-free baking powder. If you decide to use the baking powder trick, make sure it’s aluminum-free. Regular baking powder can leave a metallic aftertaste. I learned this the hard way when a batch tasted faintly like tin foil.
Watch the smoke point. Chicken thighs are fatty, and that fat can render and smoke in the air fryer. If you see a lot of smoke, don’t panic—it’s normal. Just crack a window. To reduce smoking, you can pour off the rendered fat halfway through cooking.
Don’t overcrowd the basket. This is the most common mistake. If the chicken thighs are touching, they’ll steam instead of crisp. Cook in batches if needed. The extra 10 minutes are worth the texture.
Let the chicken rest. I know you’re hungry, but cutting into a hot chicken thigh right away will release all those precious juices onto the plate. Five minutes of rest makes a huge difference.
Timing strategy: While the chicken cooks, I usually throw together a quick side dish. Roasted broccoli or a simple salad both come together in about 10 minutes, which means everything is ready at the same time.
Variations & Adaptations
This recipe is wonderfully flexible. Here are some ways to change it up based on what you have or what your family likes.
- Spicy Honey Glaze: In the last 2 minutes of cooking, brush the chicken with a mixture of 2 tablespoons honey and ½ teaspoon cayenne pepper. The heat and sweetness caramelize on the crispy skin. My kids love this version—they call it “sticky chicken.”
- Lemon Herb Version: Add the zest of one lemon and 2 tablespoons of fresh chopped parsley to the seasoning rub. Squeeze fresh lemon juice over the finished chicken. It’s bright, fresh, and perfect for spring.
- BBQ Style: Skip the paprika and thyme and use 2 tablespoons of your favorite barbecue rub instead. Brush with barbecue sauce during the last 3 minutes of cooking for sticky, saucy chicken.
- Gluten-Free Option: This recipe is naturally gluten-free as written. Just double-check your spice blends if you’re sensitive—some pre-made mixes contain wheat starch.
- Dairy-Free: This recipe is already dairy-free. No adjustments needed.
- Oven Method: If you don’t have an air fryer, bake the chicken on a wire rack set over a baking sheet at 425°F (220°C) for 35-40 minutes. The wire rack lets air circulate underneath, which helps the bottom crisp up too.
Serving & Storage Suggestions
Serving: Serve these chicken thighs hot, right after they’ve rested. The skin is at its crispiest straight out of the air fryer. I love them with a simple side of roasted vegetables—broccoli, asparagus, or green beans all work beautifully. For a complete meal, add some mashed potatoes or a crisp green salad. My family’s favorite combination is these chicken thighs with creamy mac and cheese and steamed peas. It’s pure comfort food.
Storage: Leftover chicken thighs keep well in an airtight container in the refrigerator for up to 4 days. The skin will soften as they sit, but don’t worry—you can bring the crispiness back.
Reheating: The air fryer is the best way to reheat these. Pop them back in at 375°F (190°C) for 3-4 minutes, and the skin will crisp right up again. You can also reheat them in a 400°F (200°C) oven for about 8-10 minutes. Avoid the microwave—it will make the skin rubbery.
Freezing: Cooked chicken thighs freeze beautifully. Let them cool completely, then wrap each one individually in plastic wrap and place in a freezer bag. They’ll keep for up to 3 months. To reheat, thaw in the refrigerator overnight and then air fry at 375°F (190°C) for 5-6 minutes.
Flavor Development: Honestly, these are even better the next day. The seasoning has more time to meld with the meat, and the flavors deepen overnight. I often make a double batch just for leftovers.
Nutritional Information & Benefits
Here’s the estimated nutritional breakdown per serving (2 chicken thighs):
- Calories: 420
- Protein: 35g
- Fat: 30g
- Saturated Fat: 8g
- Carbohydrates: 2g
- Fiber: 0g
- Sugar: 0g
- Sodium: 680mg
Health Benefits: Chicken thighs are a fantastic source of high-quality protein, which is essential for muscle repair and growth. They also provide important B vitamins, including B6 and B12, which support energy metabolism and brain function. The skin contains healthy fats that help your body absorb fat-soluble vitamins. Compared to deep-fried chicken, this air fryer version uses significantly less oil—about 90% less fat—making it a lighter choice without sacrificing flavor.
Dietary Considerations: This recipe is naturally gluten-free, dairy-free, and low-carb. It fits well into paleo and keto diets. If you’re watching your sodium, you can reduce the salt to ½ teaspoon without affecting the crispiness too much.
Conclusion
These crispy air fryer chicken thighs have become a weekly staple in my kitchen, and I think they’ll become one in yours too. They’re proof that you don’t need fancy ingredients or complicated techniques to make something truly delicious. Just a few pantry staples, an air fryer, and about 25 minutes are all it takes to get dinner on the table. The best part? They please everyone—from the pickiest kid to the hungriest adult—without blowing your grocery budget. I’d love to hear how they turn out for you. Did you try a variation? Did your kids ask for seconds? Drop a comment below and let me know. And if you loved this recipe, share it with a friend who needs a quick, budget-friendly dinner idea. Happy cooking!
Frequently Asked Questions
Can I use boneless, skinless chicken thighs for this recipe?
You can, but the result won’t be as crispy. Boneless, skinless thighs have less fat and no skin to crisp up. If you use them, reduce the cooking time to about 15-18 minutes total, and check for doneness at 165°F (74°C).
Why is my chicken skin not getting crispy?
The most common reasons are not drying the chicken thoroughly, overcrowding the air fryer basket, or not cooking at a high enough temperature. Make sure your chicken is very dry, cook in a single layer with space between pieces, and use 400°F (200°C).
Can I make this recipe ahead of time?
Absolutely. You can season the chicken up to 24 hours in advance and keep it covered in the refrigerator. This actually helps the flavor penetrate deeper and dries out the skin for even better crispiness.
How do I prevent the air fryer from smoking?
Chicken thighs are fatty, and some smoking is normal. To minimize it, pour off any rendered fat halfway through cooking. You can also line the bottom of the air fryer basket with a piece of bread to absorb the dripping fat.
Can I use frozen chicken thighs?
I don’t recommend it. Frozen chicken releases too much moisture as it cooks, which will steam the skin instead of crisping it. Always thaw chicken completely in the refrigerator before cooking, and pat it very dry.
Pin This Recipe!

Crispy Air Fryer Chicken Thighs: Easy 20-Minute Dinner

These crispy air fryer chicken thighs are fast, affordable, and deliver shatteringly crisp skin with tender, juicy meat. Perfect for busy weeknights, this recipe uses simple pantry ingredients and takes about 25 minutes from fridge to table.
- Prep Time: 10 minutes
- Cook Time: 20 minutes
- Total Time: 30 minutes
- Yield: 4 servings 1x
- Category: Main Course
- Cuisine: American
Ingredients
- 6–8 bone-in, skin-on chicken thighs (about 2 lbs / 900g)
- 2 tablespoons olive oil or avocado oil (30ml)
- 1 teaspoon garlic powder
- 1 teaspoon onion powder
- 1 teaspoon smoked paprika
- ½ teaspoon dried thyme
- 1 teaspoon kosher salt
- ½ teaspoon black pepper, freshly ground
- ¼ teaspoon cayenne pepper (optional)
- ½ teaspoon aluminum-free baking powder (optional)
Instructions
- Pat the chicken thighs dry with paper towels. This is crucial for crispy skin.
- In a small bowl, combine garlic powder, onion powder, smoked paprika, dried thyme, salt, black pepper, and baking powder (if using). Stir to combine.
- Place the dry chicken thighs in a large mixing bowl. Drizzle with oil and toss to coat evenly. Sprinkle the seasoning mixture over the chicken and rub it into every nook and cranny, including under the skin.
- Preheat the air fryer to 400°F (200°C) for 3 minutes.
- Arrange the seasoned chicken thighs in the air fryer basket in a single layer, ensuring they are not touching or overlapping.
- Air fry at 400°F (200°C) for 12 minutes. Do not open the basket during this time.
- Using tongs, carefully flip each chicken thigh. Cook for another 8-10 minutes, until the internal temperature reaches 185°F (85°C) and the skin is deep golden brown and crispy.
- Remove the chicken from the air fryer and let it rest for 5 minutes before serving.
Notes
Patting the chicken dry is the most important step for crispy skin. For extra crispiness, use aluminum-free baking powder. Do not overcrowd the air fryer basket. Let the chicken rest for 5 minutes before serving. Leftovers can be reheated in the air fryer at 375°F (190°C) for 3-4 minutes to restore crispiness.
Nutrition
- Serving Size: 2 chicken thighs
- Calories: 420
- Sodium: 680
- Fat: 30
- Saturated Fat: 8
- Carbohydrates: 2
- Protein: 35
Keywords: air fryer chicken thighs, crispy chicken thighs, easy chicken dinner, budget-friendly chicken, weeknight dinner, gluten-free chicken, dairy-free chicken