Love this? Save it for later!
Share the inspiration with your friends
My cousin Leo had sworn off gluten for about two years. Two years of side-eyeing every cookie I brought to family gatherings, muttering something about “the texture being off.” I’d nod and pretend not to notice him sneaking a glance at the plate. Then, last December, I made a batch of these flourless peanut butter blossom cookies just for myself—secretly, in my own kitchen, no expectations. I walked into the living room to grab my phone and came back to find Leo standing over the cooling rack, mid-chew, with chocolate smudged on his thumb. “These are gluten-free?” he asked, trying to sound casual. He had three more before anyone else even knew they existed. I just smiled. Honestly, that moment made my whole holiday.
These cookies weren’t supposed to be a big deal. Five ingredients, no flour, no fuss. But there’s something about that combo—rich peanut butter, melty chocolate, that soft-but-chewy texture—that just works. I mean, I’ve made a lot of cookies in my time, and let me tell you, the ones that surprise you are always the best. This one surprised me. It surprised Leo. And if you’ve got someone in your life who thinks gluten-free desserts are a compromise, well, this might just change their mind too.
The first time I made them, I accidentally used crunchy peanut butter instead of creamy. It still worked. The little peanut bits added a nice crunch, actually. So if you’re the type to grab the wrong jar—welcome to the club. These cookies are forgiving that way. They don’t care about perfection. They just care about tasting amazing.
Why You’ll Love This Recipe
Let me tell you why these flourless peanut butter blossom cookies have earned a permanent spot in my recipe rotation. I’ve tested this batch more times than I care to admit—some with slightly too much sugar, some where the chocolate sank right through—and this version is the one that finally made me stop tweaking.
- Quick & Easy: From mixing bowl to cookie jar in under 30 minutes. No chilling, no waiting, no complicated steps. Perfect for those “I need cookies NOW” moments.
- Simple Ingredients: You probably have everything already. Peanut butter, sugar, an egg, vanilla, and chocolate kisses. That’s it. No trips to specialty stores.
- Perfect for Gluten-Free Guests: This is the cookie that makes people forget they’re eating gluten-free. It’s that good. Bring it to potlucks, holiday parties, or just your Tuesday afternoon.
- Crowd-Pleaser: Kids love them. Adults love them. Even my cousin Leo, who’s notoriously picky, can’t stop at one. They disappear fast.
- Unbelievably Delicious: The edges get slightly crispy, the centers stay soft and chewy, and that chocolate kiss on top? Pure nostalgia. It’s comfort food without the flour.
What makes this recipe different from every other peanut butter cookie out there? It’s the texture. Without flour, the peanut butter takes center stage, giving you a denser, richer bite that’s almost fudgy. Plus, the five-ingredient thing isn’t a gimmick—it genuinely works. I’ve tried versions with added butter or oil, and honestly, they just get greasy. This one stays pure and simple, which is exactly what you want when peanut butter is the star.
This is the kind of cookie that makes you close your eyes after the first bite. It’s comfort food reimagined—healthier in the sense that there’s no weird stuff, faster because you’re not messing with flour sifting, but with the same soul-soothing satisfaction as the cookies your grandma used to make. Perfect for impressing gluten-free guests without stress, or turning a regular Tuesday into something a little special.
What Ingredients You Will Need
This recipe uses simple, wholesome ingredients to deliver bold flavor and satisfying texture without the fuss. Most of these are pantry staples, which makes this perfect for spontaneous baking.
- 1 cup creamy peanut butter (I prefer Skippy or Jif for consistent texture; natural peanut butter that separates can make the cookies too oily, so stick with the regular stuff here)
- 1 cup granulated sugar (plus a little extra for rolling, about 2 tablespoons; you can use coconut sugar for a less refined option, but the cookies will be slightly darker and less sweet)
- 1 large egg, room temperature (this helps everything bind together; if you forget to take it out early, place it in warm water for 5 minutes)
- 1 teaspoon vanilla extract (pure vanilla makes a difference, but imitation works fine in a pinch)
- About 24 milk chocolate kisses, unwrapped (Hershey’s are classic, but dark chocolate kisses work beautifully if you prefer less sweetness)
Ingredient selection tips: Look for peanut butter that’s shelf-stable and doesn’t have added oil on top. The kind you have to stir? Save that for toast. For these cookies, you want the emulsified stuff that stays thick and creamy. It gives you a better structure.
Substitution guidance: If you need a dairy-free option, use dairy-free chocolate kisses or chocolate chunks. For a lower-sugar version, you can reduce the sugar to 3/4 cup, but the cookies will spread a bit more and be less sweet. Almond butter works in a pinch, but the flavor is milder and the texture can be slightly greasier. I’ve tried it, and honestly, stick with peanut butter for the best result.
Equipment Needed
You don’t need much for these flourless peanut butter blossom cookies, which is part of their charm. Here’s what you’ll want handy:
- Mixing bowl (medium-sized, any material works—I use a glass one because I can see if everything’s combined)
- Electric mixer or sturdy wooden spoon (the dough gets thick, so a hand mixer makes it easier, but a spoon and some elbow grease work too)
- Baking sheet (I like using a light-colored metal sheet for even browning; dark sheets can make the bottoms too dark)
- Parchment paper or silicone baking mat (non-stick is key here—these cookies are tender and can stick to bare pans)
- Small bowl (for the extra sugar to roll the dough balls in)
- Cooling rack (to let the cookies set properly before adding the kisses)
- Cookie scoop or tablespoon (for even-sized cookies; I use a 1.5-tablespoon scoop for consistency)
If you don’t have a cooling rack, you can let the cookies cool on the baking sheet for a few extra minutes before moving them. And if you’re using a dark baking sheet, just reduce the bake time by a minute or two to prevent burning. I learned that the hard way—my first batch had slightly crispy bottoms.
Preparation Method
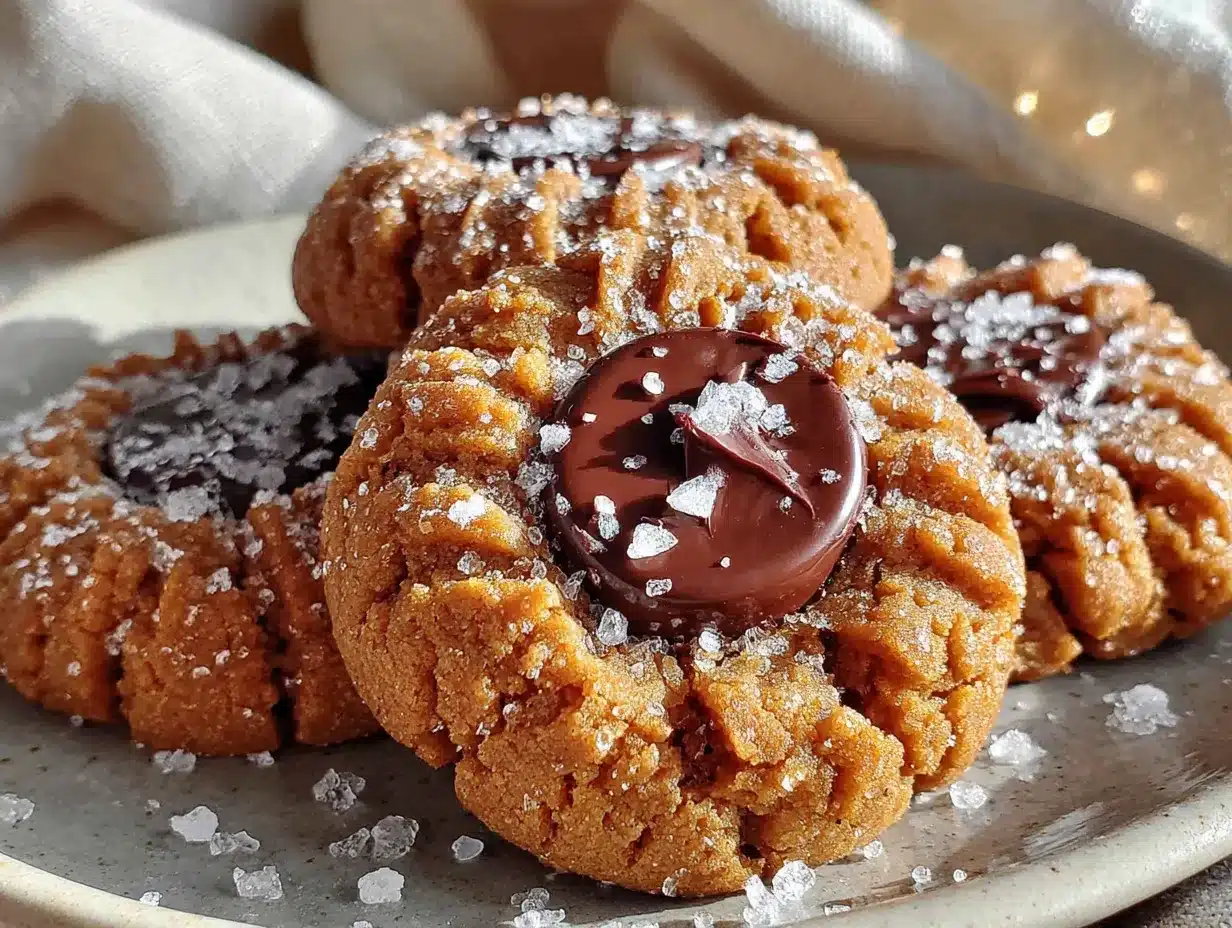
Follow these steps carefully, and you’ll have a batch of perfect flourless peanut butter blossom cookies in no time. I’ve added some notes from my own trials to help you avoid my mistakes.
- Preheat your oven to 350°F (175°C). Line a baking sheet with parchment paper or a silicone mat. This ensures the cookies don’t stick and makes cleanup a breeze. Trust me on this—I’ve tried without parchment, and it’s not pretty.
- In a medium mixing bowl, combine 1 cup creamy peanut butter and 1 cup granulated sugar. Mix with an electric mixer on medium speed, or by hand with a sturdy spoon, until the mixture is smooth and well combined. It should look like a thick paste with no streaks of sugar. This takes about 1-2 minutes with a mixer, or 3-4 minutes by hand. Don’t rush this step—proper mixing ensures the sugar dissolves slightly into the peanut butter for a better texture.
- Add 1 large egg and 1 teaspoon vanilla extract. Mix again until everything is fully incorporated. The dough will be soft, slightly sticky, and hold together when pressed. If it seems too dry, add a teaspoon of water. If it seems too wet, add a tablespoon of peanut butter. I’ve had to adjust both ways, and it always works out.
- Pour about 2 tablespoons of extra granulated sugar into a small bowl. Using a cookie scoop or tablespoon, scoop out about 1.5 tablespoons of dough and roll it into a smooth ball between your palms. The dough should be slightly sticky but manageable. Roll each ball in the sugar until evenly coated. Place on the prepared baking sheet, spacing them about 2 inches apart. You should get about 24 cookies.
- Bake for 10-12 minutes, or until the cookies are puffed slightly and the edges look set. The centers will still look soft and slightly underdone—that’s exactly what you want. They’ll continue cooking from residual heat after you take them out. If you overbake them, they’ll be dry instead of chewy. I’ve made that mistake, and it’s heartbreaking.
- Remove from the oven and let the cookies cool on the baking sheet for exactly 2 minutes. This is the crucial window. While the cookies are still warm and soft, gently press a chocolate kiss into the center of each cookie. Press just until the cookie cracks slightly around the edges—don’t push all the way through. If you wait too long, the cookies will firm up and the kiss won’t stick. If you press too soon, the cookie might crumble. Two minutes is the sweet spot.
- Transfer the cookies to a cooling rack using a spatula. Let them cool completely, about 15-20 minutes. The chocolate will firm up as they cool, and the cookies will set into their final chewy texture. Resist the urge to eat one immediately—the chocolate will be molten and could burn your mouth. I speak from experience.
Cooking Tips & Techniques
After making these flourless peanut butter blossom cookies more times than I can count, I’ve picked up a few tricks that make a real difference. Here’s what I wish someone had told me.
Don’t overmix the dough. I know it’s tempting to keep stirring until everything looks perfectly smooth, but overmixing can make the cookies tough. Mix just until the ingredients come together, then stop. You’ll see a few tiny streaks of egg or vanilla—that’s fine. They’ll disappear during baking.
Use a cookie scoop for even sizing. This isn’t just about aesthetics—cookies that are the same size bake at the same rate. If some are bigger and some are smaller, you’ll end up with a batch where half are perfect and half are overdone. I learned this after one particularly frustrating batch where I was rushing.
Watch the bake time like a hawk. Every oven runs differently. My old oven baked these in exactly 10 minutes. My new one takes 11. Start checking at 9 minutes. The cookies should look puffed and slightly cracked on top, with golden edges. The centers should still look soft and slightly underdone. If they look fully set, they’re overbaked.
Press the kisses gently but firmly. You want the chocolate to stick without destroying the cookie. If the cookie cracks too much, it might fall apart. If you don’t press enough, the kiss will fall off when you move the cookie. It’s a delicate balance, but you’ll get a feel for it after the first few. I always mess up the first one—it’s my sacrificial cookie.
Let them cool completely before stacking. I know you’re excited, but stacking warm cookies will cause the chocolate to smudge and the cookies to stick together. Give them a full 20 minutes on the cooling rack. Use that time to make tea or clean up your kitchen. Your cookies will thank you.
Variations & Adaptations
One of the best things about this recipe is how easy it is to customize. Here are some variations I’ve tried and loved.
Chocolate Peanut Butter Blossom Cookies: Swap the milk chocolate kisses for dark chocolate or white chocolate kisses. Dark chocolate adds a nice bitterness that balances the sweet peanut butter. White chocolate makes it extra indulgent. I’ve also used caramel-filled kisses, which are incredible but messy.
Crunchy Peanut Butter Version: Use crunchy peanut butter instead of creamy for added texture. The little peanut bits give the cookies a satisfying crunch. Just make sure the crunchy peanut butter is still the shelf-stable kind, not natural. This was my accidental discovery, and it’s become my favorite way to make them.
Lower-Sugar Option: Reduce the sugar to 3/4 cup and use sugar-free chocolate kisses. The cookies will be slightly less sweet and a bit more fragile, but they still taste great. I’ve also tried using monk fruit sweetener, and while the texture is slightly different, it works in a pinch.
Add-In Ideas: Mix in 1/4 cup of mini chocolate chips or chopped peanuts before rolling the dough. This adds extra flavor and texture without changing the basic recipe. I once added a pinch of sea salt on top before baking, and it was a game-changer—the salty-sweet combo is irresistible.
Vegan Adaptation: Use a flax egg (1 tablespoon ground flaxseed mixed with 3 tablespoons water, let sit for 5 minutes) and dairy-free chocolate. The texture will be slightly less chewy, but still delicious. I’ve made this for vegan friends, and they loved it.
Serving & Storage Suggestions
These flourless peanut butter blossom cookies are best served at room temperature, when the chocolate is firm but the cookie is still soft and chewy. They’re perfect with a glass of cold milk, a cup of hot coffee, or even a scoop of vanilla ice cream for an indulgent dessert.
For presentation, arrange them on a platter with the chocolate kisses facing up. They look beautiful on a holiday cookie tray or as a simple afternoon treat. I like to dust them with a little powdered sugar for a festive touch, though that’s purely optional.
Storage: Store these cookies in an airtight container at room temperature for up to 5 days. Place a piece of bread in the container to keep them soft—the cookies will absorb the moisture from the bread. Replace the bread every couple of days if the cookies last that long. They rarely do in my house.
Freezer Instructions: These cookies freeze beautifully. Place them in a single layer on a baking sheet and freeze until solid, about 1 hour. Then transfer to a freezer-safe bag or container. They’ll keep for up to 3 months. To thaw, let them sit at room temperature for about 15 minutes. You can also freeze the unbaked dough balls—just roll them in sugar, freeze on a baking sheet, then transfer to a bag. Bake from frozen, adding 1-2 minutes to the bake time.
Reheating: If you want that just-baked experience, pop a cookie in the microwave for 10 seconds. The chocolate gets slightly melty, and the cookie softens up beautifully. It’s dangerous, but worth it.
Flavor Development: These cookies actually taste better the next day. The flavors meld together, and the texture becomes even more chewy and cohesive. So if you can resist eating them all on day one, you’re in for a treat on day two. I’ve never managed it, but I’ve heard it’s true.
Nutritional Information & Benefits
While these flourless peanut butter blossom cookies are definitely a treat, they do offer some nutritional perks worth noting. Here’s a rough estimate per cookie (based on 24 cookies):
- Calories: ~150
- Fat: 8g (mostly from peanut butter, which is heart-healthy unsaturated fat)
- Carbohydrates: 18g
- Protein: 4g
- Fiber: 1g
- Sugar: 14g
Health Benefits: Peanut butter is a good source of protein, healthy fats, and vitamin E. It’s also rich in magnesium and potassium. The egg adds a little extra protein and B vitamins. Compared to traditional cookies made with white flour and butter, these are lower in carbs and free from refined grains.
Dietary Considerations: This recipe is naturally gluten-free, making it safe for those with celiac disease or gluten sensitivity. It’s also dairy-free if you use dairy-free chocolate. However, it does contain peanuts and eggs, so it’s not suitable for those with allergies to those ingredients.
Personal Wellness Perspective: I love that these cookies let me enjoy a classic treat without the bloated feeling I sometimes get from flour-based desserts. They’re satisfying in a way that feels wholesome, even though they’re still indulgent. It’s all about balance, right?
Conclusion
These flourless peanut butter blossom cookies are proof that you don’t need a long ingredient list or complicated techniques to make something truly special. Five ingredients, 30 minutes, and you’ve got a batch of cookies that will impress everyone—even the gluten-free skeptics in your life.
I love this recipe because it’s forgiving, adaptable, and always delivers. Whether you’re baking for a holiday party, a family gathering, or just because you need a little comfort, these cookies never disappoint. They’ve become my go-to for last-minute baking emergencies, and they’ve converted more than a few gluten-free doubters along the way.
Now I want to hear from you. Have you tried these cookies? Did you make any substitutions or add your own twist? Drop a comment below and let me know how they turned out. And if you loved them, share this recipe with a friend who needs a little cookie magic in their life. Happy baking, friend—you’ve got this.
Frequently Asked Questions
Can I use natural peanut butter for this recipe?
I don’t recommend it. Natural peanut butter that separates can make the cookies too oily and cause them to spread too much. Stick with shelf-stable creamy peanut butter like Skippy or Jif for the best texture. If you only have natural, stir it very well and consider reducing the sugar slightly to compensate for the extra oil.
Why did my cookies spread too much?
This usually happens if the dough is too warm or if you used natural peanut butter. Make sure your egg is at room temperature, and don’t overmix the dough. If your kitchen is warm, you can chill the dough balls for 15 minutes before baking. Also, check that your baking sheet isn’t too dark, as dark sheets absorb more heat and can cause spreading.
Can I make these cookies without eggs?
Yes, you can use a flax egg (1 tablespoon ground flaxseed mixed with 3 tablespoons water, let sit for 5 minutes) as a substitute. The texture will be slightly less chewy and a bit more crumbly, but they’ll still taste great. I’ve also used a commercial egg replacer with good results.
How do I prevent the chocolate kisses from falling off?
Press the kisses into the cookies exactly 2 minutes after they come out of the oven. If you press too early, the cookie might crumble. If you wait too long, the cookie firms up and the kiss won’t stick. Also, make sure the kisses are at room temperature—cold kisses from the fridge can cause the chocolate to not adhere properly.
Can I double this recipe?
Absolutely. This recipe doubles beautifully. Just make sure you have enough baking sheets or bake in batches. The dough can sit at room temperature for about 30 minutes without issue. If you’re making a large batch, you can also freeze the unbaked dough balls for later, which is super convenient for holiday baking.
PrintEasy 5-Ingredient Flourless Peanut Butter Blossom Cookies
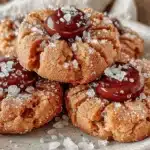
These flourless peanut butter blossom cookies are made with just five simple ingredients and come together in under 30 minutes. They’re soft, chewy, and topped with a chocolate kiss, making them a perfect gluten-free treat that even skeptics will love.
- Prep Time: 10 minutes
- Cook Time: 10-12 minutes
- Total Time: 30 minutes
- Yield: 24 cookies 1x
- Category: Dessert
- Cuisine: American
Ingredients
- 1 cup creamy peanut butter (Skippy or Jif recommended)
- 1 cup granulated sugar (plus 2 tablespoons for rolling)
- 1 large egg, room temperature
- 1 teaspoon vanilla extract
- About 24 milk chocolate kisses, unwrapped
Instructions
- Preheat your oven to 350°F (175°C). Line a baking sheet with parchment paper or a silicone mat.
- In a medium mixing bowl, combine 1 cup creamy peanut butter and 1 cup granulated sugar. Mix with an electric mixer on medium speed, or by hand with a sturdy spoon, until smooth and well combined (1-2 minutes with mixer, 3-4 minutes by hand).
- Add 1 large egg and 1 teaspoon vanilla extract. Mix until fully incorporated. The dough will be soft, slightly sticky, and hold together when pressed.
- Pour about 2 tablespoons of extra granulated sugar into a small bowl. Using a cookie scoop or tablespoon, scoop out about 1.5 tablespoons of dough and roll into a smooth ball. Roll each ball in the sugar until evenly coated. Place on the prepared baking sheet, spacing them about 2 inches apart. You should get about 24 cookies.
- Bake for 10-12 minutes, or until the cookies are puffed slightly and the edges look set. The centers will still look soft and slightly underdone.
- Remove from the oven and let the cookies cool on the baking sheet for exactly 2 minutes. While still warm and soft, gently press a chocolate kiss into the center of each cookie, just until the cookie cracks slightly around the edges.
- Transfer the cookies to a cooling rack using a spatula. Let them cool completely, about 15-20 minutes.
Notes
Use shelf-stable creamy peanut butter (like Skippy or Jif) for best results; natural peanut butter can make cookies too oily. Don’t overmix the dough. Watch bake time closely—cookies should look puffed and slightly cracked on top with golden edges. Press chocolate kisses exactly 2 minutes after removing from oven for best adhesion. Cookies taste even better the next day. Store in an airtight container at room temperature for up to 5 days; freeze for up to 3 months.
Nutrition
- Serving Size: 1 cookie
- Calories: 150
- Sugar: 14
- Sodium: 80
- Fat: 8
- Saturated Fat: 2
- Carbohydrates: 18
- Fiber: 1
- Protein: 4
Keywords: flourless peanut butter blossom cookies, gluten-free cookies, 5-ingredient cookies, easy peanut butter cookies, chocolate kiss cookies