Love this? Save it for later!
Share the inspiration with your friends
This was supposed to be a simple turkey sandwich. The day after Thanksgiving, I stood in front of the open fridge, staring at a mountain of leftover stuffing that had been sitting there for two days. The turkey was gone, the cranberry sauce was half-empty, and I was already tired of reheating the same plate. I grabbed the waffle iron out of the cabinet on a whim, and I honestly didn’t think it would work. I mean, stuffing in a waffle iron? That sounded like a disaster waiting to happen.
The first batch was a mess. I packed the stuffing in too loose, and it fell apart into a sad pile of crumbs. My kitchen smelled like sage and regret. But I was too stubborn to give up, and honestly, I didn’t have anything else for lunch. So I tried again, pressing it down firm, leaving it a little longer than felt right, and when I lifted the lid, there it was—golden, crispy, and holding its shape. I poured some leftover cranberry sauce mixed with maple syrup over the top, took a bite, and just stood there in the middle of my messy kitchen, chewing in disbelief.
Maybe you’ve been there—standing over a container of leftovers, wondering why you made so much food, feeling like you’ll be eating the same thing for a week. That’s exactly where I was. But these leftover stuffing waffles changed everything. They turned the most predictable post-holiday meal into something I actually looked forward to. The edges get impossibly crispy, the inside stays soft and herby, and that cranberry maple syrup? Let me tell you, it’s the kind of simple combination that makes you wonder why you never thought of it before. I’ve been making these all winter long, even when there’s no holiday in sight. Sometimes I’ll make a small batch of stuffing just so I can have these waffles the next day.
Why You’ll Love This Recipe
I’ve tested this recipe more times than I care to admit, and I can tell you with confidence that it works every single time. There’s something deeply satisfying about taking a leftover that feels tired and turning it into something crispy, golden, and completely new. Here’s why this recipe is going to become your new favorite way to use up holiday leftovers:
- Quick & Easy: From fridge to plate in under 15 minutes. No chopping, no mixing, no extra dishes. Just stuffing, a waffle iron, and about 8 minutes of your time.
- Simple Ingredients: You literally only need leftover stuffing. That’s it. The cranberry maple syrup uses two ingredients you probably already have in your fridge. No fancy grocery trips required.
- Perfect for Weeknight Dinners: Look, I know stuffing is usually a holiday thing, but these waffles are so good that I’ve started making extra stuffing on purpose. They’re perfect for those nights when you want something comforting but don’t have the energy to cook.
- Crowd-Pleaser: I served these at a casual dinner party, and people were genuinely confused at first. Then they took a bite, and suddenly everyone wanted the recipe. Kids love them, adults love them, and they spark the best conversations.
- Unbelievably Delicious: The texture is what gets you. The outside gets this incredible crunch, like the best part of stuffing multiplied by ten, while the inside stays tender and soft. The cranberry maple syrup adds this sweet-tart brightness that cuts through all that savory goodness.
What makes this recipe different from every other leftover idea out there is the technique. I’ve learned exactly how to pack the stuffing into the waffle iron so it holds together perfectly, and I’ve figured out the precise cooking time that gives you those deep golden ridges without burning. This isn’t just throwing leftovers in a waffle iron and hoping for the best—this is a tested, repeatable method that works with any type of stuffing, whether it’s homemade or from a box.
Honestly, this recipe makes me close my eyes after the first bite every single time. It’s comfort food reimagined—faster, simpler, but with that same soul-soothing satisfaction. Perfect for impressing guests without stress, or turning a simple Tuesday night into something memorable.
What Ingredients You Will Need
This recipe uses the simplest ingredients you can imagine, and that’s exactly what makes it so brilliant. You don’t need anything special, and you almost certainly have everything you need already sitting in your fridge. Let’s break down what you’ll need and why each ingredient works:
For the Stuffing Waffles
- Leftover stuffing: About 2 cups, packed. This is the star of the show, and the beauty is that any type of stuffing works. Classic sage stuffing, cornbread stuffing, sausage stuffing, mushroom stuffing—I’ve tried them all, and they all turn into incredible waffles. If your stuffing is on the dry side, you might need to add a splash of chicken broth to help it bind together. If it’s very moist, you’re golden. I personally prefer using a stuffing that has some texture to it, like one with chunks of bread and visible herbs, because those bits get extra crispy in the waffle iron.
For the Cranberry Maple Syrup
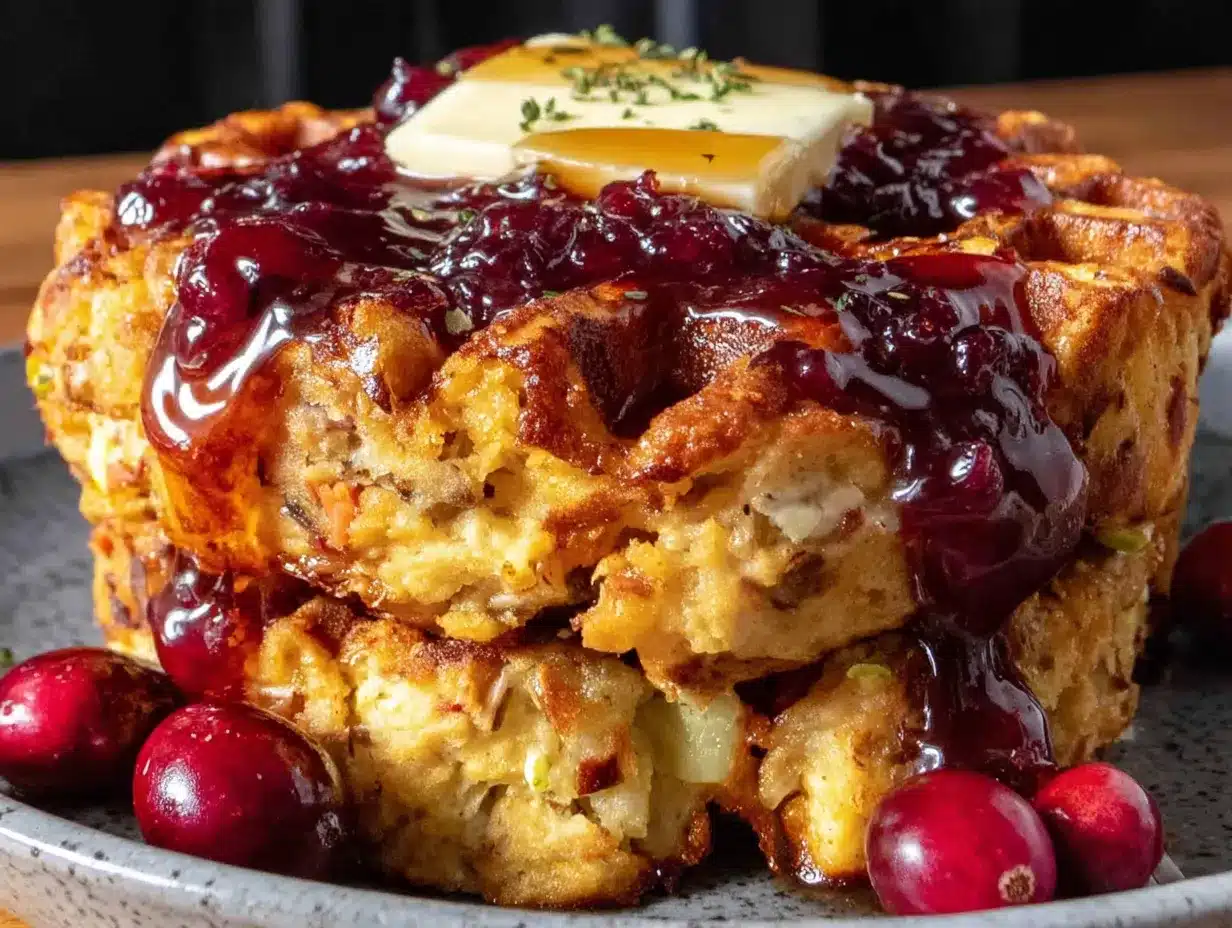
- Leftover cranberry sauce: ½ cup. Homemade or canned, it doesn’t matter. I’ve used both, and they both work beautifully. If you have whole berry cranberry sauce, you’ll get lovely little bursts of tart fruit in your syrup. If you have the jellied kind, it melts down into a smooth, silky sauce. I actually prefer the jellied kind for this recipe because it creates a more uniform syrup, but don’t go buying a can just for this—use whatever you have.
- Pure maple syrup: ¼ cup. Please use real maple syrup here, not the pancake syrup stuff. The real thing has a depth of flavor that stands up to the savory stuffing and tart cranberries. I recommend Grade A dark amber for the richest flavor, but any real maple syrup will work. If you only have pancake syrup, you can use it, but the flavor won’t be as complex.
- Optional pinch of cinnamon or orange zest: If you want to get fancy, a tiny pinch of cinnamon or a scrape of orange zest adds a lovely warmth to the syrup. This is completely optional, but it’s a nice touch if you have the ingredients on hand.
That’s literally it. Two ingredients for the waffles, two ingredients for the syrup, plus one optional upgrade. This is the kind of recipe that makes you feel like a genius with almost no effort. I always keep a bag of dried cranberries in my pantry just in case I want to make this outside of the holiday season, and a quick homemade stuffing using boxed mix and some sauteed onions works perfectly too.
Equipment Needed
You don’t need much for this recipe, which is part of what makes it so perfect for busy weeknights. Here’s what you’ll need:
- Waffle iron: This is non-negotiable. Any standard waffle iron will work—round, square, Belgian-style, doesn’t matter. I’ve used a cheap $20 waffle iron and a fancy one, and they both produce great results. The key is making sure it’s properly preheated. I’ve learned the hard way that a cold waffle iron leads to sad, falling-apart stuffing waffles. Give it a full 5 minutes to heat up before you start.
- Non-stick spray or butter: Even if your waffle iron claims to be non-stick, spray it anyway. Stuffing has a tendency to stick, and you don’t want to be scraping crispy bits out of the ridges. I use a neutral cooking spray, but melted butter works great too and adds a little extra flavor.
- Spatula: A thin, flexible spatula is helpful for gently lifting the waffle out of the iron without breaking it. I’ve used a fork in a pinch, but a spatula gives you more control.
- Small saucepan: For warming up the cranberry maple syrup. You can also use a microwave-safe bowl, but I find the saucepan gives you more control over the consistency.
- Measuring cups: You’ll need a ½ cup measure for the cranberry sauce and a ¼ cup measure for the maple syrup. Eyeballing works too, but measuring ensures the perfect balance of sweet and tart.
If you don’t have a waffle iron, you can actually make these as crispy stuffing patties in a skillet, but honestly, the waffle iron is what gives you that incredible texture. I found mine at a thrift store for $5, and it’s one of the best kitchen investments I’ve ever made. Just make sure the plates are removable for easy cleaning, because stuffing can leave behind some stubborn crumbs.
Preparation Method
Let me walk you through exactly how to make these, step by step. I’ve made this recipe dozens of times, and I’ve learned a few tricks along the way that make all the difference.
- Preheat your waffle iron: Turn your waffle iron on and let it heat up fully. This usually takes about 5 minutes. While it’s heating, take your leftover stuffing out of the fridge. If it’s been sitting in a cold container, let it sit on the counter for a few minutes to take the chill off. Cold stuffing straight from the fridge won’t cook evenly in the center.
- Check your stuffing consistency: Take a look at your stuffing. Is it moist and clumpy, or dry and crumbly? If it’s on the dry side, drizzle a tablespoon or two of chicken broth over it and mix it in with a fork. You want the stuffing to hold together when you squeeze a handful of it. If it’s already moist, you’re good to go. I’ve made this with both wet and dry stuffing, and the key is just adjusting slightly. Too dry and it won’t hold together; too wet and it won’t get crispy.
- Spray the waffle iron: Once it’s hot, spray both sides generously with non-stick spray. Don’t be shy here. I’ve skipped this step before and ended up with half the waffle stuck to the iron. Learn from my mistakes.
- Pack the stuffing in: Scoop about 1 cup of stuffing into the center of the waffle iron. Use the back of your measuring cup or a spatula to press it down firmly and spread it evenly. You want it to reach the edges but not overflow. This is the most important step—if you don’t pack it firmly enough, the waffle will fall apart when you try to lift it. I press down until I can feel the stuffing compacting under the pressure.
- Close and cook: Close the waffle iron and let it cook for 6-8 minutes. Don’t be tempted to open it early to check. The first time I made these, I opened it at 4 minutes and the stuffing was still steaming and loose. Give it the full time. You’ll know it’s done when you see steam slowing down and the waffle iron stops releasing as much steam. The waffle should be deep golden brown and feel firm when you gently press on the lid.
- Remove carefully: Open the waffle iron and use a thin spatula to gently lift the waffle out. It should come out in one piece, with beautiful crispy ridges. If it sticks a little, use the spatula to gently coax it loose. Transfer it to a plate and let it rest for a minute while you make the syrup.
- Make the cranberry maple syrup: In a small saucepan over medium-low heat, combine ½ cup leftover cranberry sauce and ¼ cup maple syrup. Stir until the cranberry sauce melts into the syrup and everything is smooth and warm. This takes about 2-3 minutes. If you’re using whole berry cranberry sauce, you’ll have lovely berry pieces throughout. If you’re using jellied, it will be completely smooth. Both are delicious. If you want to add a pinch of cinnamon or orange zest, stir it in now.
- Serve immediately: Pour the warm cranberry maple syrup over the stuffing waffle. The contrast between the hot, crispy waffle and the sweet-tart syrup is pure magic. Cut it into quarters or strips, and eat it while it’s hot. These waffles are best fresh, so don’t make them ahead of time.
A few notes from my experience: If you’re making multiple waffles, keep the finished ones warm in a 200°F oven on a baking sheet while you cook the rest. The first waffle will stay crispy for about 10-15 minutes in the oven. Also, if your waffle iron has a temperature setting, medium-high works best. Too low and the waffle won’t crisp up; too high and the outside burns before the inside is heated through.
Cooking Tips & Techniques
After making these waffles more times than I can count, I’ve picked up a few tricks that make the process smoother and the results more consistent. Let me share what I’ve learned.
The biggest mistake people make is not packing the stuffing firmly enough. I know it feels like you’re over-compacting it, but trust me, you’re not. The stuffing needs to be pressed together tightly so that it holds its shape during cooking. Think of it like making a rice crispy treat—you need that pressure to bind everything together. If your waffle falls apart when you open the iron, it’s almost always because you didn’t pack it firmly enough.
Temperature control is everything. I ruined my first few batches by not letting the waffle iron get hot enough. Give it the full preheat time, and if your iron has a light that indicates when it’s ready, wait an extra minute after that light goes off. The first waffle always takes a little longer than subsequent ones because the iron needs to recover its heat after you open it.
Don’t overfill the waffle iron. I know it’s tempting to pack as much stuffing in as possible, but too much will cause it to overflow and make a mess. About 1 cup of stuffing for a standard round waffle iron is perfect. If you have a bigger Belgian-style iron, you might need a little more. You’ll learn the right amount after one or two tries.
Let the waffle rest for 30 seconds after cooking. This allows the steam to escape and the exterior to set, making it even crispier. I know it’s hard to wait, but that brief rest makes a noticeable difference in texture.
If your stuffing is very wet, add a handful of breadcrumbs. Some stuffings are so moist that they steam rather than crisp up. If you notice your waffle isn’t getting those beautiful golden ridges, try mixing in a quarter cup of plain breadcrumbs or crushed croutons before cooking. This absorbs excess moisture and helps create that crispy exterior.
I once made the mistake of using a stuffing that had been sitting in the fridge for five days. It was still safe to eat, but it had dried out significantly. I added too much broth trying to rehydrate it, and the waffle turned into a soggy mess. Now I know to add broth a tablespoon at a time, mixing well and checking the consistency before adding more. A little moisture is good; too much turns your waffle into stuffing pudding.
Variations & Adaptations
One of the best things about this recipe is how adaptable it is. I’ve experimented with all sorts of variations, and they’ve all been delicious in their own way. Here are some of my favorites:
Savory Breakfast Waffle
Top your stuffing waffle with a fried egg and a drizzle of hot sauce instead of the cranberry maple syrup. The runny yolk soaks into the crispy stuffing, and the heat from the hot sauce cuts through the richness. This has become my go-to breakfast the morning after Thanksgiving. The combination of crispy stuffing, runny egg, and spicy sauce is honestly better than any fancy brunch I’ve ever had.
Vegetarian Gravy Version
If you’re not in the mood for sweet, skip the cranberry syrup and pour warm mushroom gravy over the top instead. Use a good quality store-bought vegetarian gravy or make your own with sauteed mushrooms, garlic, and vegetable broth. The earthy gravy complements the herby stuffing perfectly, and it turns the waffle into a hearty main dish. I serve this with a side of roasted vegetables for a complete meal.
Gluten-Free Adaptation
If your leftover stuffing is already gluten-free, you’re all set. If not, you can make a quick gluten-free stuffing using cornbread or gluten-free bread cubes. The waffle technique works exactly the same way. Just make sure your stuffing holds together well before cooking. Gluten-free stuffing can be a bit more crumbly, so you might need to pack it even more firmly into the waffle iron.
Cheesy Stuffing Waffle
Before packing the stuffing into the waffle iron, mix in a handful of shredded cheddar or gruyere cheese. The cheese melts into the stuffing as it cooks, creating these incredible crispy cheese edges that are absolutely addictive. I discovered this variation when I had some leftover cheese that needed to be used up, and now I do it intentionally. It adds a whole new dimension of flavor and texture.
Dairy-Free Option
Most stuffings are already dairy-free or can be made dairy-free with simple substitutions. Use olive oil instead of butter in the stuffing, and make sure your broth is dairy-free. The cranberry maple syrup is naturally dairy-free, so this variation is incredibly easy to pull off. I’ve served this to dairy-free friends, and they were thrilled to have a leftover option that felt special.
Serving & Storage Suggestions
These stuffing waffles are best served immediately, while they’re hot and crispy. The contrast between the crunchy exterior and the soft, tender interior is what makes them so special, and that texture doesn’t last long. Here’s how to serve them for the best experience:
Serving temperature: Serve hot, straight from the waffle iron. Pour the warm cranberry maple syrup over the top just before serving so the waffle stays crispy. If you pour the syrup on too early, the waffle will start to soften. I like to serve the syrup on the side so everyone can add as much or as little as they want.
Presentation: Cut the waffle into quarters or strips and arrange them on a plate. Drizzle the syrup over the top, and if you’re feeling fancy, add a sprinkle of fresh herbs like parsley or thyme. A few fresh cranberries or a dusting of powdered sugar makes for a beautiful presentation, especially if you’re serving these to guests.
Complementary dishes: These waffles pair beautifully with a simple green salad dressed with a tangy vinaigrette. The acidity of the dressing cuts through the richness of the waffle and syrup. For a heartier meal, serve them alongside roasted chicken or turkey, or with a side of roasted vegetables like Brussels sprouts or carrots.
Storage: If you have leftover waffles (which honestly doesn’t happen often in my house), let them cool completely, then store them in an airtight container in the refrigerator for up to 3 days. The waffles will lose their crispiness in the fridge, but they can be refreshed in the toaster or oven.
Reheating: The best way to reheat these waffles is in a toaster or toaster oven. Pop them in for 2-3 minutes until they’re hot and crispy again. A regular oven at 350°F for 5-7 minutes works too. Avoid the microwave at all costs—it will turn your crispy waffle into a sad, soggy mess. I learned this the hard way when I was too impatient to wait for the toaster.
Freezing: These waffles freeze surprisingly well. Let them cool completely, then wrap each one individually in plastic wrap and place them in a freezer bag. They’ll keep for up to 2 months. To reheat, pop them straight from the freezer into the toaster or a 350°F oven until hot and crispy. This is a great way to use up a large batch of leftover stuffing.
Nutritional Information & Benefits
While these stuffing waffles are definitely a comfort food, they do offer some nutritional benefits worth noting. Here’s a rough breakdown per serving (one waffle with about 2 tablespoons of syrup):
- Calories: Approximately 350-400 calories
- Protein: 6-8 grams (depending on the stuffing)
- Carbohydrates: 45-55 grams
- Fat: 15-20 grams
- Fiber: 2-4 grams
- Sugar: 15-20 grams (mostly from the syrup)
The exact nutritional values will vary depending on your specific stuffing recipe. Stuffing made with whole grain bread offers more fiber and nutrients than stuffing made with white bread. If you used vegetables like celery, onions, and carrots in your stuffing, you’re getting a good dose of vitamins and antioxidants.
The cranberry sauce adds vitamin C and antioxidants, while the maple syrup provides manganese and zinc. It’s not a health food by any means, but it’s a satisfying meal that uses up leftovers and prevents food waste, which is a win in my book.
Dietary considerations: This recipe can be gluten-free if you use gluten-free stuffing, and dairy-free if your stuffing is made without butter or milk. It’s naturally egg-free and nut-free, making it a safe option for many common allergies. If you’re watching your sodium intake, be mindful of the broth and seasonings in your stuffing, as they can add up quickly.
Personally, I love that this recipe turns a leftover that might otherwise go to waste into something I actually look forward to eating. It’s not about being healthy—it’s about being smart with what you have and making something delicious in the process.
Conclusion
If you’ve made it this far, I hope you’re feeling inspired to dig that waffle iron out of the back of your cabinet and give these leftover stuffing waffles a try. They’ve honestly become one of my favorite ways to use up holiday leftovers, and I’ve been known to make extra stuffing just so I can have them during the year.
What I love most about this recipe is how it transforms something familiar into something completely new. That first bite, when you get the crispy edge combined with the soft, herby center and the sweet-tart syrup—it’s the kind of moment that makes you glad you took a chance on a weird idea. It’s proof that some of the best recipes come from moments of desperation and a willingness to try something that might not work.
I’d love to hear how these turn out for you. Did you try a different variation? Did you top them with something unexpected? Drop a comment below and let me know—I read every single one, and your ideas always inspire me to try something new. And if you loved this recipe, share it with a friend who needs a new way to use up their holiday leftovers.
Until next time, happy cooking—and don’t be afraid to experiment with whatever’s sitting in your fridge.
Frequently Asked Questions
Can I use boxed stuffing mix for this recipe?
Absolutely! Boxed stuffing mix works perfectly. Just prepare it according to the package directions, let it cool slightly, and then follow the same waffle-making instructions. The texture might be a bit more uniform than homemade stuffing, but it still gets wonderfully crispy. I’ve used Stove Top and several store-brand versions, and they all work great.
My waffle fell apart when I tried to remove it. What went wrong?
This usually happens for one of three reasons: the stuffing wasn’t packed firmly enough into the waffle iron, the waffle iron wasn’t hot enough when you added the stuffing, or you didn’t cook it long enough. Next time, press the stuffing down firmly with a measuring cup or spatula, make sure your waffle iron is fully preheated, and let it cook for the full 6-8 minutes without peeking.
Can I make these ahead of time for a party?
You can, but they’re best fresh. If you need to make them ahead, cook the waffles, let them cool completely on a wire rack, and store them in an airtight container in the refrigerator. Reheat them in a toaster or 350°F oven for 3-5 minutes until hot and crispy. The cranberry maple syrup can be made ahead and reheated gently on the stove or in the microwave.
What if I don’t have leftover cranberry sauce?
No problem! You can easily make a quick cranberry sauce by simmering ½ cup fresh or frozen cranberries with ¼ cup maple syrup and a splash of water for about 5 minutes until the berries burst and the sauce thickens. Alternatively, you can use store-bought cranberry sauce, or skip the syrup altogether and serve the waffles with warm maple syrup and a squeeze of fresh lemon juice for brightness.
Can I use a different type of syrup?
Yes, you can experiment with different syrups. Honey works well, though it has a stronger flavor that might overpower the stuffing. Agave nectar is a good neutral option. For a savory twist, try a balsamic reduction or a warm honey mustard sauce. The key is balancing the sweetness with something acidic or tangy to cut through the richness of the waffle.
Pin This Recipe!
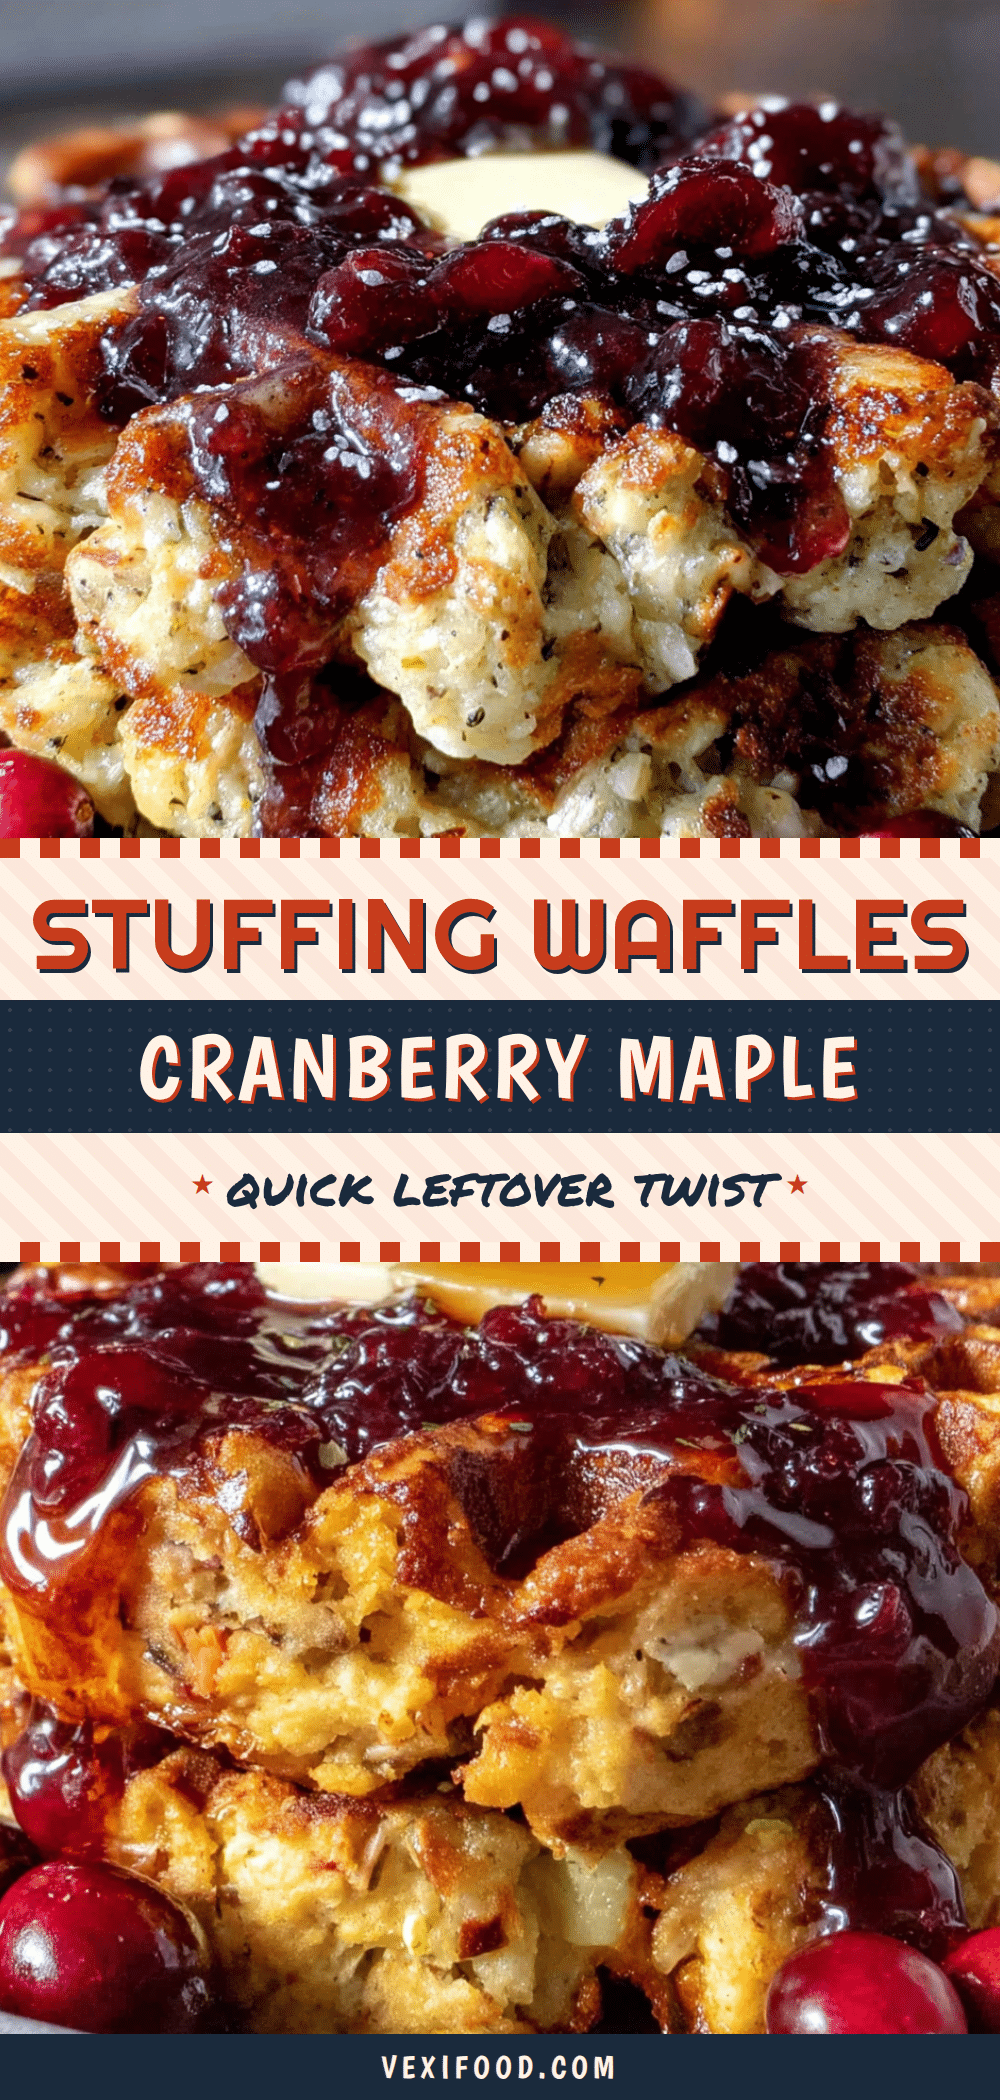
Quick Leftover Stuffing Waffles with Cranberry Maple Syrup

Transform your holiday leftovers into crispy, golden stuffing waffles topped with a sweet-tart cranberry maple syrup. This quick and easy recipe turns the most predictable post-holiday meal into something you’ll actually look forward to.
- Prep Time: 5 minutes
- Cook Time: 8 minutes
- Total Time: 13 minutes
- Yield: 2 servings 1x
- Category: Main Course
- Cuisine: American
Ingredients
- 2 cups leftover stuffing, packed
- 1/2 cup leftover cranberry sauce
- 1/4 cup pure maple syrup
- Optional: pinch of cinnamon or orange zest
- Non-stick spray or butter for waffle iron
Instructions
- Preheat your waffle iron fully (about 5 minutes).
- Check stuffing consistency: if dry, add 1-2 tablespoons chicken broth and mix; if moist, proceed.
- Spray both sides of the hot waffle iron generously with non-stick spray.
- Pack about 1 cup of stuffing firmly into the center of the waffle iron, spreading evenly to the edges.
- Close the waffle iron and cook for 6-8 minutes without opening. The waffle should be deep golden brown and firm.
- Carefully remove the waffle with a thin spatula and let rest for 30 seconds.
- In a small saucepan over medium-low heat, combine cranberry sauce and maple syrup. Stir until smooth and warm (2-3 minutes). Add optional cinnamon or orange zest if desired.
- Serve immediately: pour warm syrup over the waffle and enjoy while hot.
Notes
Pack stuffing firmly into the waffle iron to prevent falling apart. Let waffle rest 30 seconds after cooking for extra crispiness. For multiple waffles, keep warm in a 200°F oven. Avoid microwaving leftovers; reheat in toaster or oven.
Nutrition
- Serving Size: 1 waffle with about
- Calories: 375
- Sugar: 17.5
- Sodium: 600
- Fat: 17.5
- Saturated Fat: 3.5
- Carbohydrates: 50
- Fiber: 3
- Protein: 7
Keywords: leftover stuffing, stuffing waffles, cranberry maple syrup, holiday leftovers, quick breakfast, easy dinner, comfort food