Love this? Save it for later!
Share the inspiration with your friends
It was 11:47 PM on a random Tuesday in October, and I had a very specific, very ridiculous craving. I wanted a jello shot that looked like a candy corn. I didn’t have any of the fancy bar tools or themed candy molds that a normal person would use for this, but I had three boxes of jello—orange, lemon, and vanilla—and a bottle of vanilla vodka that was collecting dust in the back of my liquor cabinet. The idea just arrived, fully formed, like a weird little gift from my sleep-deprived brain at that late hour. I honestly thought it was going to be a disaster. I mean, who makes layered jello shots at nearly midnight?
Let me tell you, the first batch was a mess. I poured the orange layer too hot and it melted the yellow. I had to start over. But something about the quiet of the kitchen, the hum of the fridge, and the total lack of an audience made me stubborn. I wasn’t going to bed until I had a perfect little striped shot sitting in my fridge. By the time I finally got it right—three distinct, beautiful layers of yellow, orange, and white—it was almost 1 AM. I texted a photo to my sister, who replied with a single line: “You’re insane. Bring those to the Halloween party on Saturday.”
So I did. And you know what? They were the first thing to disappear. People couldn’t stop talking about them. Someone called them “the most Halloween thing I’ve ever seen.” That late-night, slightly unhinged experiment turned into the recipe I now make for every single fall gathering. It’s the kind of thing that looks complicated but is secretly simple—and that’s the whole point. Maybe you’ve been there, staring at your pantry at an unreasonable hour, daring yourself to try something just because it sounds fun. This is that recipe. And honestly, it’s the best decision you’ll make all Halloween season.
Why You’ll Love This Recipe
Let me tell you why these Candy Corn Jello Shots are about to become your new favorite party trick. I’ve tested this recipe about a dozen times across different gatherings, from small dinner parties to a massive Halloween bash with 40 people. Every single time, they steal the show. They look like you spent hours on them, but the whole process takes about 20 minutes of active work. The rest is just waiting for the layers to set—which, let’s be honest, is the perfect excuse to start your own pre-party cocktail.
Here’s why these stand out from every other Halloween recipe you’ll find:
- Instantly Impressive: The three-layer look is a total conversation starter. People will ask how you did it, and you get to look like a kitchen wizard.
- Simple Ingredients: No weird candy-making supplies or specialty alcohols. You probably already have vanilla vodka in your bar, and the jello is just a grocery store run.
- Perfect for Hosting: These are designed for a crowd. You can easily double or triple the recipe and have a full platter ready before your first guest rings the doorbell.
- Make-Ahead Magic: They need to set for a few hours anyway, so you prep them the night before. Zero stress on party day.
- Crowd-Pleaser: Even people who “don’t do jello shots” try these because they’re so cute. And then they have two more.
- Totally Customizable: Swap the vanilla vodka for whipped cream vodka or even a plain vodka with a splash of cream. It’s endlessly adaptable.
What makes this recipe different from the basic jello shot tutorials out there is the technique. I figured out the exact temperature for each layer so they don’t bleed into each other. No muddy colors, no messy stripes. Just clean, sharp lines that look like actual candy corn. It’s a small tweak that makes a massive difference, and it’s the kind of detail you only learn from making a mess in your kitchen at midnight. Trust me, your guests will notice.
What Ingredients You Will Need
This recipe uses simple, grocery-store ingredients to create something that looks way more complicated than it is. The magic is in the layering, not in fancy components. Here’s exactly what you need to make about 16 shots, depending on your cup size.
For the Yellow Layer (Bottom):
- 1 box (3 oz) lemon jello (I prefer Jell-O brand for consistent setting)
- 1 cup boiling water
- 1/2 cup vanilla vodka (cold)
For the Orange Layer (Middle):
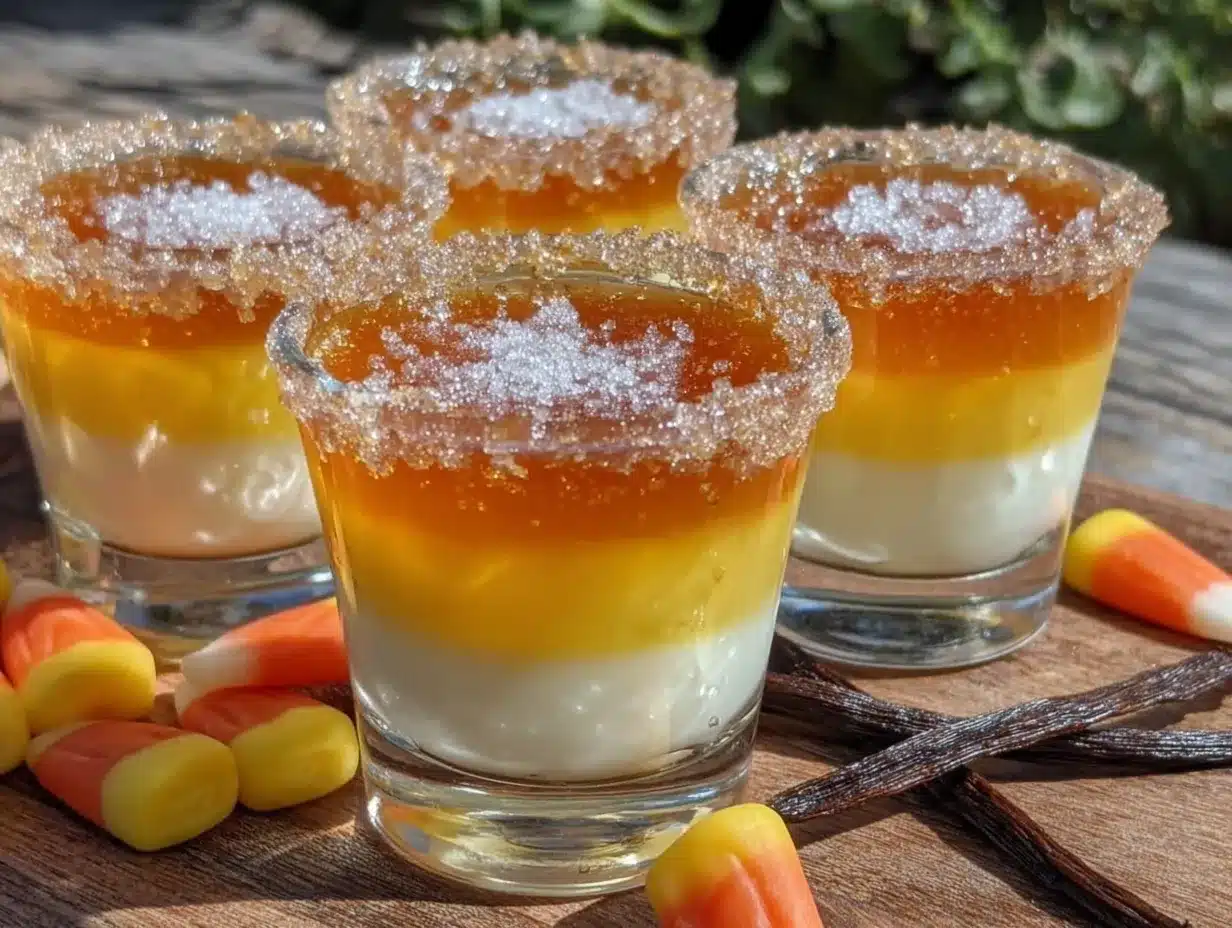
- 1 box (3 oz) orange jello
- 1 cup boiling water
- 1/2 cup vanilla vodka (cold)
For the White Layer (Top):
- 1 box (3 oz) white or vanilla jello (unflavored gelatin works too, but the flavor is weaker)
- 1 cup boiling water
- 1/2 cup vanilla vodka (cold)
- 1/4 cup sweetened condensed milk (adds creaminess and opacity)
Ingredient Tips from My Kitchen:
For the vanilla vodka, I’ve tried a few brands and honestly, Absolut Vanilla works beautifully without being too sweet. If you want to save a few bucks, Svedka Vanilla is also solid. Stay away from the really cheap stuff—it has a harsh aftertaste that the jello won’t fully mask. If you can’t find vanilla vodka, use plain vodka and add 1 teaspoon of vanilla extract to the white layer. It’s not quite the same, but it gets the job done.
The sweetened condensed milk is non-negotiable for the white layer. I tried using regular milk and cream, and both made the layer too thin and watery. The condensed milk gives it that thick, opaque look that perfectly mimics the top of a candy corn. Make sure you stir it in thoroughly while the gelatin is still warm, or it will separate.
For the jello, I’ve used store brands before and they work fine, but the color payoff is slightly less vibrant. If you want those bright, eye-catching layers, stick with name-brand Jell-O. The lemon and orange flavors are perfect because they’re light and fruity, which pairs beautifully with the vanilla vodka. Don’t be tempted to use lime or berry—the colors won’t match the candy corn vibe.
Equipment Needed
- 2-cup liquid measuring cup with a spout (for easy pouring)
- Small mixing bowls (3 total, one for each layer)
- Whisk or fork for stirring
- 16 2-ounce plastic shot cups with lids (the clear ones show off the layers best)
- Baking sheet or tray to hold the cups while they set
- Refrigerator space (you need a flat, stable spot)
- Turkey baster or small dropper (optional, but makes layering much cleaner)
I found that using a turkey baster for the top layer is a total game-changer. Pouring from a measuring cup tends to disturb the layer below. With a baster, you can gently squeeze the mixture right onto the surface without splashing. You can find one at any grocery store for a few bucks. If you don’t have one, a small spoon works in a pinch—just pour the mixture over the back of the spoon to break the fall.
Preparation Method
This process requires patience, but the active work is minimal. Plan for about 4 hours total, with most of that being chill time. I usually make these the night before a party and they’re perfect by morning.
Step 1: Prep Your Workspace (5 minutes)
Line up your 16 shot cups on a baking sheet. Make sure they’re stable and not wobbling. I learned this the hard way when a whole tray tipped over in my fridge. Place them close together so you can move the tray without spilling. Boil about 4 cups of water total—you’ll need 1 cup per layer, plus a little extra for rinsing your bowls.
Step 2: Make the Yellow Layer (10 minutes + 1 hour chill)
In a small bowl, empty the lemon jello packet. Add 1 cup of boiling water and whisk for 2 minutes until the powder is completely dissolved. You should see no granules at the bottom. Stir in 1/2 cup of cold vanilla vodka. Let the mixture cool for 5 minutes at room temperature—this is crucial. If it’s too hot, it will melt the previous layer (which doesn’t apply here since it’s the first one, but get in the habit). Pour about 1 tablespoon of the mixture into each cup. You want the layer to be about 1/3 of the cup’s height. Place the tray in the fridge and chill for 1 hour, or until the layer is firm to the touch.
Step 3: Make the Orange Layer (10 minutes + 1 hour chill)
Once the yellow layer is set, repeat the process with the orange jello. Dissolve the powder in 1 cup of boiling water, stir in 1/2 cup of cold vanilla vodka, and let it cool for 5 minutes. Here’s the trick: let it cool for a full 7-8 minutes if your kitchen is warm. The mixture should be just barely warm to the touch, not hot. Pour it gently over the yellow layer using your turkey baster or the back of a spoon. Fill each cup to about 2/3 full. Chill for another hour.
Step 4: Make the White Layer (10 minutes + 2 hours chill)
For the final layer, dissolve the white or vanilla jello in 1 cup of boiling water. Whisk in 1/2 cup of cold vanilla vodka and 1/4 cup of sweetened condensed milk. Stir until the milk is fully incorporated and the mixture looks creamy and opaque. Let it cool for 8-10 minutes—this layer needs to be cooler than the others because it’s going on top of a soft surface. If it’s too warm, it will sink into the orange layer and ruin the stripe effect. Carefully pour or baste the mixture into each cup, filling to the top. Chill for at least 2 hours, or overnight for best results.
Step 5: Serve (2 minutes)
Right before serving, pop the lids on the cups. Arrange them on a platter or tray. I like to line them up in rows like little candy corn soldiers. They’re ready to go!
Cooking Tips & Techniques
I’ve made this recipe about eight times now, and I’ve messed up more batches than I care to admit. Here’s what I’ve learned so you don’t have to repeat my mistakes.
The Temperature Trap: The biggest issue is layer bleeding. If your mixture is too warm when you pour it, it will melt the layer below and you’ll get a muddy orange-brown mess instead of three distinct stripes. Let each layer cool to room temperature before pouring. I usually set a timer for 8 minutes after mixing. If the bowl still feels warm to the touch, wait another 2 minutes. Patience is everything here.
The Pouring Technique: Never pour directly from a measuring cup into the shot cups. The stream is too heavy and will disturb the layer below. Use a turkey baster or a small spoon. If you’re using a spoon, hold it just above the cup and pour the mixture over the back of the spoon. This breaks the fall and lets the liquid settle gently on top. It takes a little longer, but the results are worth it.
The First Layer Disaster: My very first attempt, I poured the yellow layer and immediately put the tray in the fridge without letting it cool first. The heat caused condensation inside the cups, which made the jello cloudy. Now I always let the mixture sit for 5 minutes before pouring, and I make sure the cups are at room temperature before I start.
Timing Your Layers: If you’re making these for a party, start them the night before. The layers need at least 4 hours total to set, and overnight is even better. I’ve tried rushing the process by reducing chill times, and the layers always end up soft and messy. Give them the full time. Your fridge will thank you, and your guests will too.
Variations & Adaptations
Once you’ve mastered the basic candy corn look, the possibilities are endless. Here are a few variations I’ve tried and loved.
Pumpkin Spice Version: Replace the vanilla vodka with pumpkin spice vodka and use a cinnamon-flavored white layer by adding a pinch of cinnamon to the condensed milk mixture. This gives the shots a warm, fall-spice flavor that’s perfect for Thanksgiving gatherings. I made these for a Friendsgiving and they were a huge hit.
Non-Alcoholic Version: For a booze-free option, replace the vanilla vodka with cold water mixed with 1 teaspoon of vanilla extract per layer. The texture stays the same, and the flavor is still sweet and creamy. These are great for parties where kids are around or for designated drivers. I’ve served them alongside the alcoholic version and nobody felt left out.
Berry Candy Corn Twist: Swap the lemon jello for yellow berry punch jello and the orange for strawberry-orange. The flavor profile changes to a fruity, berry-forward taste that’s surprisingly good with the vanilla vodka. The colors stay the same, so they still look like candy corn. I tried this on a whim when I was out of lemon jello, and honestly, I might like it better.
Creamy Coconut Version: Use coconut rum instead of vanilla vodka and add a splash of coconut cream to the white layer. The tropical flavor pairs beautifully with the citrus jello. This is my go-to for summer Halloween parties or any gathering that needs a little island vibe.
Serving & Storage Suggestions
These shots are best served cold, straight from the fridge. The texture is firm but jiggly, and the cold temperature keeps the layers distinct. I like to arrange them on a black platter or a Halloween-themed tray to make the colors pop. If you’re feeling fancy, you can add a small candy corn on top of each cup as a garnish—just set it on the lid before serving.
For a full party spread, I pair these with other Halloween snacks like ghost-shaped cookies, pumpkin dip, and spicy popcorn. The sweet, creamy shots balance out salty snacks beautifully. If you’re serving a meal, these work great as a pre-dinner appetizer or a post-dinner treat. They’re not too heavy, so they won’t spoil anyone’s appetite.
Storage is simple. Keep the lids on the cups and store them in the fridge for up to 5 days. The texture stays consistent, and the flavors actually meld together a bit over time, making them even better on day two. I do not recommend freezing them—the texture becomes grainy and the layers separate when thawed. If you’re making them ahead, prepare them no more than 3 days before your event for the best quality.
When reheating (not that you need to), just let them sit at room temperature for 10 minutes before serving. They soften slightly and become easier to eat. But honestly, they’re best cold.
Nutritional Information & Benefits
Let’s be real—these are a treat, not a health food. But here’s the breakdown if you’re curious. Per 2-ounce shot (using the recipe as written), you’re looking at approximately 80-100 calories, 0 grams of fat, 15 grams of carbohydrates (mostly sugar from the jello and condensed milk), and about 5 grams of alcohol by volume. The vanilla vodka adds about 0.5 ounces of alcohol per shot, so they’re moderately strong—enough to feel it after two or three.
On the plus side, the gelatin in the jello provides a small amount of collagen, which is good for skin and joint health. It’s a tiny benefit, but hey, every little bit counts. The sweetened condensed milk adds calcium and protein, though the sugar content is high. If you’re watching your sugar intake, you can use sugar-free jello and replace the condensed milk with a sugar-free vanilla pudding mix mixed with water. The texture changes slightly, but it’s a decent alternative.
These shots are gluten-free as written, since jello and vodka are naturally gluten-free. Always check your specific brands to be safe. They are not dairy-free because of the condensed milk, but you can substitute canned coconut cream for a dairy-free version. The flavor will be slightly different, but still delicious.
Conclusion
These Candy Corn Jello Shots are more than just a party trick—they’re a conversation starter, a crowd-pleaser, and honestly, a little bit of a flex. They look like you spent hours crafting them, but the truth is, they’re simple enough for a late-night kitchen experiment. That’s the beauty of this recipe. It’s forgiving, adaptable, and guaranteed to impress.
I love making these because they remind me of that ridiculous Tuesday night when I couldn’t sleep and decided to play with jello. Every time I serve them, someone asks for the recipe, and I get to tell that story. It’s a small joy, but it’s real. I hope you make these your own—change up the flavors, try a new vodka, or just stick with the classic. However you make them, they’ll be a hit.
Now I want to hear from you. Have you tried making these? Did you come up with a fun variation? Drop a comment below and let me know how they turned out. And if you’re looking for another crowd-pleasing Halloween treat, you should definitely check out my spooky pumpkin dip recipe—it pairs perfectly with these shots. Don’t forget to share this recipe with your party-planning friends. Happy Halloween!
Frequently Asked Questions
Can I use a different type of alcohol?
Absolutely! While vanilla vodka is the classic choice for that candy corn flavor, you can use plain vodka, whipped cream vodka, or even white rum. Just keep in mind that the flavor will change. Darker alcohols like whiskey or bourbon will muddy the colors and overpower the jello.
How far in advance can I make these?
You can make them up to 5 days ahead of time. Store them in the fridge with the lids on. The texture stays perfect, and the flavors actually get a little better after a day or two as they meld together. Just don’t freeze them—the texture will suffer.
Why did my layers bleed together?
This is usually because the mixture was too warm when you poured it. Let each layer cool to room temperature before adding the next one. Also, make sure the previous layer is fully set—at least 1 hour of chill time per layer. Patience is key here.
Can I make these without the sweetened condensed milk?
You can, but the white layer will be translucent instead of opaque, so it won’t look as much like a candy corn. If you want to skip the condensed milk, use plain unflavored gelatin and add a splash of cream or milk. The texture will be slightly different, but it still works.
How many shots does this recipe make?
This recipe makes about 16 2-ounce shots, depending on how full you fill each cup. If you’re using smaller cups, you’ll get more. I usually get exactly 16 when I use standard 2-ounce plastic shot cups. For a larger party, just double the recipe.
Pin This Recipe!
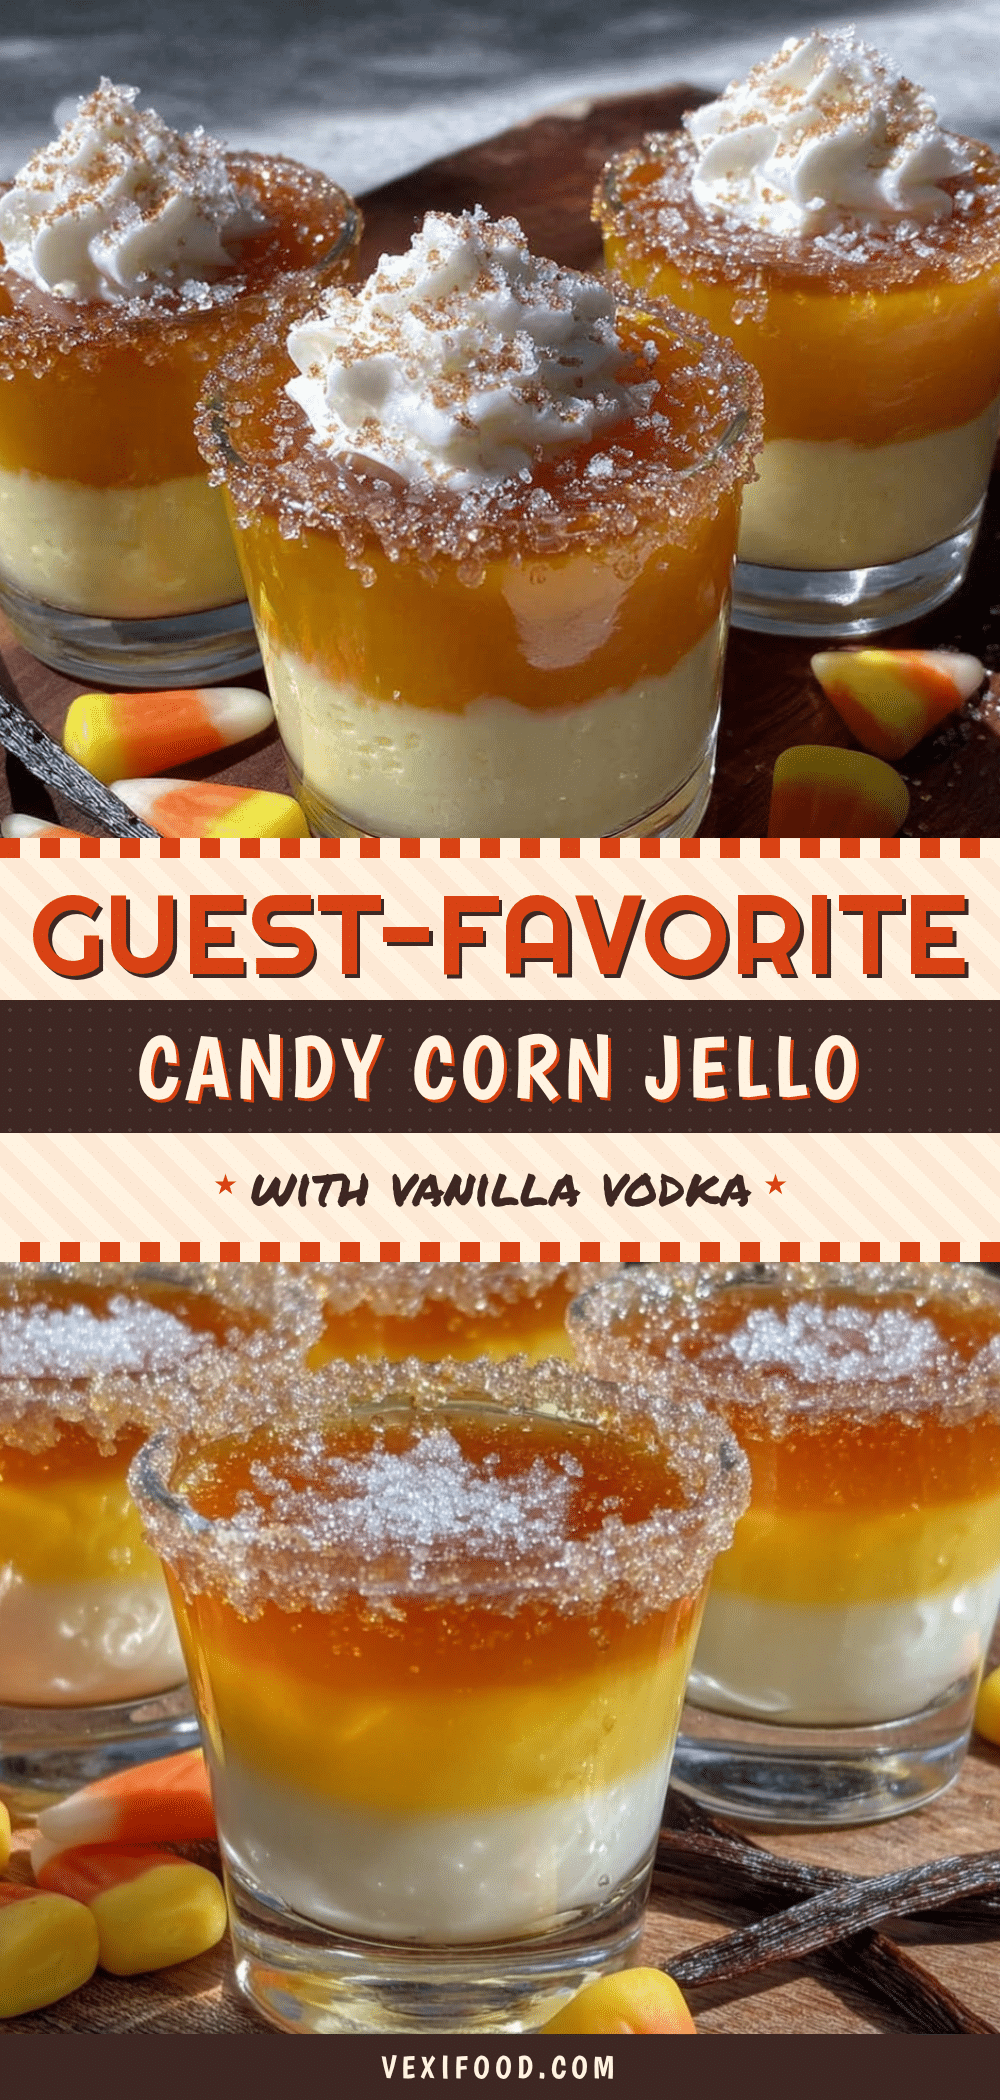
Easy Candy Corn Jello Shots: Best Halloween Vodka Recipe
These layered Candy Corn Jello Shots are a fun and impressive Halloween party treat. With simple ingredients and a clever technique, you can create perfect three-layer shots that look just like candy corn.
- Prep Time: 20 minutes
- Cook Time: 0 minutes
- Total Time: 4 hours 20 minutes (includes chilling)
- Yield: 16 servings 1x
- Category: Dessert
- Cuisine: American
Ingredients
- 1 box (3 oz) lemon jello
- 1 cup boiling water
- 1/2 cup vanilla vodka (cold)
- 1 box (3 oz) orange jello
- 1 cup boiling water
- 1/2 cup vanilla vodka (cold)
- 1 box (3 oz) white or vanilla jello
- 1 cup boiling water
- 1/2 cup vanilla vodka (cold)
- 1/4 cup sweetened condensed milk
Instructions
- Line up 16 2-ounce shot cups on a baking sheet. Boil about 4 cups of water.
- Make the yellow layer: In a small bowl, dissolve lemon jello in 1 cup boiling water. Whisk for 2 minutes. Stir in 1/2 cup cold vanilla vodka. Let cool for 5 minutes. Pour about 1 tablespoon into each cup (about 1/3 full). Chill for 1 hour until firm.
- Make the orange layer: Dissolve orange jello in 1 cup boiling water. Stir in 1/2 cup cold vanilla vodka. Let cool for 7-8 minutes until just barely warm. Gently pour over the yellow layer using a turkey baster or back of a spoon, filling each cup to about 2/3 full. Chill for 1 hour.
- Make the white layer: Dissolve white or vanilla jello in 1 cup boiling water. Stir in 1/2 cup cold vanilla vodka and 1/4 cup sweetened condensed milk until creamy and opaque. Let cool for 8-10 minutes. Carefully pour or baste into each cup, filling to the top. Chill for at least 2 hours or overnight.
- Serve cold with lids on. Arrange on a platter and enjoy.
Notes
Let each layer cool to room temperature before pouring to prevent bleeding. Use a turkey baster for the top layer to avoid disturbing the layer below. For best results, make the night before and chill overnight. Store in fridge for up to 5 days; do not freeze.
Nutrition
- Serving Size: 1 shot (2 ounces)
- Calories: 90
- Sugar: 14
- Sodium: 40
- Carbohydrates: 15
- Protein: 1
Keywords: candy corn jello shots, Halloween jello shots, layered jello shots, Halloween vodka recipe, party shots