Love this? Save it for later!
Share the inspiration with your friends
It was 11:17 PM on a quiet Tuesday, and I had this sudden, almost desperate craving for a peanut butter and jelly sandwich. Now, I didn’t have the fancy little Uncrustables that you find in the freezer aisle—no, my freezer was an empty void of disappointment. But what I did have was a loaf of sandwich bread, some stubborn peanut butter, and a jar of grape jelly that had been sitting around since who knows when. Honestly, the late-night kitchen is where I tend to get my best ideas (or my weirdest, depending on how you see it).
I decided, right then and there, to make my own version of those frozen PB&J sandwiches—easy DIY Uncrustables, if you will. The quiet hum of the fridge, the soft rustling of wax paper, and the way the peanut butter spread just right on the bread… it all felt kind of meditative. I almost forgot to seal the edges properly and ended up with a little jelly oozing out, but hey, that’s part of the charm, right? Maybe you’ve been there too, staring into your fridge at odd hours, thinking, “I want that, but I don’t want to leave the house.”
This recipe stuck with me because it’s simple, satisfying, and made from what’s already in your kitchen. Plus, it’s perfect for those moments when you want a comforting snack but aren’t about to drag yourself out to the store. It’s also a little bit of a kitchen hack—making homemade frozen PB&J sandwiches means you get to control the ingredients and avoid all the preservatives and mystery oils that sometimes sneak into store-bought versions. So, let me tell you how you can whip these up with just a few pantry staples and a little late-night creativity.
Why You’ll Love This Recipe
Honestly, making your own easy DIY Uncrustables is a game-changer. I’ve tested this recipe multiple times, tweaking the amount of peanut butter and jelly to get just the right balance—because let’s face it, no one likes a dry or jelly-overloaded sandwich. Here’s why this homemade frozen PB&J sandwich recipe stands out:
- Quick & Easy: Ready in under 20 minutes, making it perfect for busy mornings or last-minute lunch preps.
- Simple Ingredients: Uses everyday pantry staples—no need to hunt down specialty items or pre-packaged snacks.
- Perfect for Lunchboxes: Great for school lunches, picnics, or road trips where you want a mess-free snack.
- Crowd-Pleaser: Kids love them, and adults appreciate the nostalgia with a fresh twist.
- Customizable: You can swap peanut butter for almond or sunflower butter and experiment with different jelly flavors.
What makes this recipe really different is the easy sealing technique I use—pressing the edges with a fork not only removes the crust but also locks in the fillings, so you won’t get jelly stains all over your bag. Plus, freezing them means you can make a batch ahead of time and just grab what you need. I’ve found these sandwiches taste just as good thawed as they do fresh, which is a win in my book.
This isn’t just some quick fix; it’s a homemade snack that brings back that nostalgic feeling of those little frozen treats but with your personal touch. You get to control the sweetness, the thickness of the fillings, and avoid any weird additives. Honestly, you might find yourself making these more often than you planned.
What Ingredients You Will Need
This recipe uses super simple ingredients that come together to make a nostalgic, satisfying treat. Most of them are pantry staples, which means you probably have everything on hand already.
- White sandwich bread (12 slices; soft, fresh bread works best to avoid tearing)
- Peanut butter (smooth or crunchy, about ½ cup; I prefer Skippy for its creamy texture)
- Grape jelly (½ cup; Welch’s grape jelly is my go-to for authentic flavor)
- Optional: Honey or maple syrup (1 tablespoon, for a touch of extra sweetness)
- Wax paper or parchment paper (for wrapping the sandwiches before freezing)
If you want to get creative or need substitutions, here are a few tips:
- Use whole wheat or gluten-free bread for dietary needs (just make sure it’s soft and pliable)
- Swap peanut butter with almond butter or sunflower seed butter to accommodate allergies or preferences
- Try different jelly flavors like strawberry, raspberry, or even a mixed berry jam for variety
- If your peanut butter is too stiff, microwave for 10-15 seconds to soften for easier spreading
Seasonal tweaks? In summer, fresh sliced strawberries or mashed berries can replace jelly for a fresher taste. Just be aware fresh fruit might make the sandwiches a bit messier when thawed.
Equipment Needed
You don’t need fancy tools for these easy DIY Uncrustables, which is part of the beauty. Here’s what I use:
- A butter knife or small spatula for spreading peanut butter and jelly evenly
- A fork to press and seal the sandwich edges (works better than your fingers for a tight seal)
- Wax paper or parchment paper sheets to wrap each sandwich individually before freezing
- A baking sheet or tray to lay the sandwiches flat in the freezer
If you want to get a bit fancier, a round sandwich cutter makes the sandwiches look neat and uniform, but honestly, a simple square-cut with a fork seal works just fine. For budget-friendly options, I’ve always found basic butter knives and forks from any kitchen drawer do the trick.
One little tip: keep your wax paper handy and don’t skip wrapping the sandwiches individually. It prevents them from sticking together and keeps the freezer clean.
Preparation Method
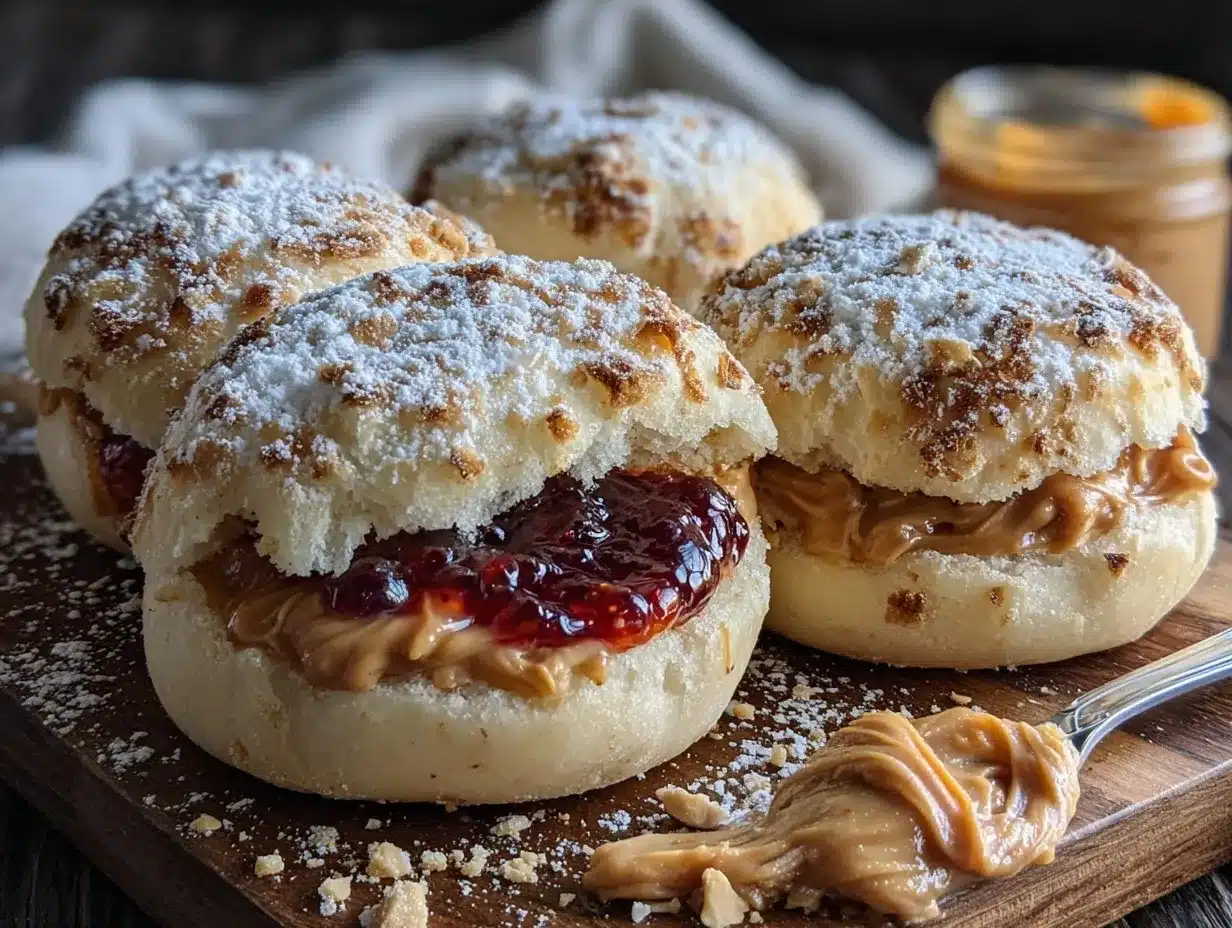
- Lay out your bread slices. Take 12 slices of white sandwich bread and place them on a clean surface, like a cutting board or countertop.
- Trim the crusts. Using a sharp knife, carefully cut off the crusts from each slice. This step makes the sandwiches easier to seal and more like the classic Uncrustables texture. Set aside the crusts for breadcrumbs later if you want.
- Spread the peanut butter. Take 6 slices of bread and spread about 1 tablespoon (15g) of peanut butter evenly over each slice. Don’t go too thick or the sandwich will be hard to seal.
- Add the jelly. Spoon about 1 tablespoon (15g) of grape jelly onto the peanut butter layer and spread gently, leaving a small margin around the edges to help with sealing.
- Top with remaining bread slices. Place the second slice of bread on top of each open-faced sandwich to form a neat sandwich.
- Seal the edges. Press the edges of each sandwich firmly with a fork, all around the perimeter. This crimping action seals the jelly and peanut butter inside and removes the crust edges.
- Wrap individually. Wrap each sandwich tightly in wax paper or parchment paper to prevent freezer burn and sticking.
- Freeze flat. Place the wrapped sandwiches on a baking sheet or tray in a single layer and freeze for at least 2 hours until firm.
- Store. Once frozen solid, transfer the sandwiches to a freezer-safe container or zip-top bag for long-term storage.
Pro tip: If the peanut butter is too stiff to spread, microwave it for 10 seconds to soften. Also, don’t overfill with jelly or it will leak during freezing. The sandwiches should feel firm but not squished after sealing.
Cooking Tips & Techniques
Here are some tricks I’ve learned from making these sandwiches late into the night (and sometimes a little too hurriedly):
- Use fresh, soft bread: If the bread is stale or too firm, it won’t seal well and might tear. I always keep an eye on bread freshness before starting.
- Don’t overfill: Too much jelly or peanut butter causes leaks and messes in your freezer. Stick to about a tablespoon of each per sandwich.
- Seal firmly: Press the edges with a fork gently but firmly. This step is key to keeping everything inside and creating that classic Uncrustables look.
- Freeze flat: Lay sandwiches flat in a single layer before freezing. This prevents them from sticking together and keeps them uniform.
- Wrap tightly: Use wax or parchment paper to wrap each sandwich. It avoids freezer burn and makes grab-and-go easy.
- Thawing tips: Let frozen sandwiches thaw at room temperature for 20-30 minutes or in a lunchbox overnight. If you’re in a rush, a quick zap in the microwave for 15 seconds works wonders.
One time, I tried stacking the sandwiches without wrapping, and let me tell you—the jelly disaster was real. Lesson learned: don’t skip the wrapping step!
Variations & Adaptations
You can easily change this recipe to suit different tastes or dietary needs:
- Nut-free version: Swap peanut butter for sunflower seed butter and use a safe jelly like strawberry or raspberry. Great for school snacks with allergy concerns.
- Gluten-free option: Use gluten-free sandwich bread from brands like Udi’s or Canyon Bakehouse. Just make sure it’s soft and pliable enough to seal.
- Flavor twists: Try adding a sprinkle of cinnamon to the peanut butter or swap grape jelly for apricot preserves for a different fruity note.
- Healthier swaps: Use natural peanut butter without added sugar and opt for no-sugar-added jelly for a cleaner snack.
- Size play: Use a cookie cutter to make smaller, bite-sized sandwiches perfect for lunchboxes or party platters.
Once, I made a batch using almond butter and homemade raspberry preserves—it was a hit at a weekend brunch with friends who swore it tasted gourmet despite how easy it was!
Serving & Storage Suggestions
These easy DIY Uncrustables are best served after thawing, so plan ahead if you want to pack them for lunch or snacks. They thaw nicely at room temperature in about 20-30 minutes, or you can microwave for a few seconds if you’re in a hurry.
For presentation, unwrap and slice diagonally for a classic sandwich look. They pair wonderfully with a side of fresh fruit, a handful of veggie sticks, or even a cold glass of milk or your favorite tea.
Store the wrapped sandwiches in an airtight freezer bag or container for up to 2 months. Just keep them flat so they don’t stick together. Over time, the flavors meld nicely, but don’t let them hang out too long or the bread might dry out.
When reheating, avoid overheating in the microwave—start with 10 to 15-second bursts to keep the bread soft but not soggy.
Nutritional Information & Benefits
Each homemade frozen PB&J sandwich roughly contains:
| Nutrient | Per Sandwich (approx.) |
|---|---|
| Calories | 250-300 kcal |
| Protein | 8-10g |
| Carbohydrates | 30-35g |
| Fat | 10-12g |
| Fiber | 3-4g |
| Sugar | 10-12g (mostly from jelly) |
Key ingredients like peanut butter provide healthy fats and protein, while grape jelly adds sweetness and antioxidants from the fruit. You can tailor this recipe to be gluten-free, nut-free, or lower sugar depending on your dietary needs.
Personally, I appreciate this recipe as a balanced comfort snack that keeps me going during busy days without resorting to processed options packed with preservatives.
Conclusion
This easy DIY Uncrustables recipe is a simple, satisfying way to make classic frozen PB&J sandwiches right in your own kitchen. I love how it lets me control the ingredients and customize flavors, plus it’s a total time-saver when I prep a batch ahead for busy mornings or lunches. You can tweak it to your tastes or dietary needs, making it truly your own.
Give it a try, and let me know how your homemade frozen PB&J sandwiches turn out! I’m always curious to hear your variations or tips. After all, the best kitchen experiments happen when we make things a little bit ours—and a little bit fun.
Happy sandwich making!
FAQs
Can I use different types of bread for homemade Uncrustables?
Yes! Soft sandwich bread works best, but you can use whole wheat, gluten-free, or even sandwich thins if you prefer. Just make sure the bread is pliable enough to seal.
How long can I store the DIY Uncrustables in the freezer?
They keep well for up to 2 months when wrapped tightly and stored in an airtight container or bag.
Can I use natural peanut butter that separates?
Absolutely. Just stir it well before spreading. If it’s too stiff, warm it slightly in the microwave for easier spreading.
What’s the best way to thaw frozen PB&J sandwiches?
Leave them at room temperature for 20-30 minutes, or microwave for 10-15 seconds for a quick thaw.
Can I make these without peanut butter?
Yes, try almond butter, sunflower seed butter, or even a nut-free spread to suit allergies or preferences.
Pin This Recipe!
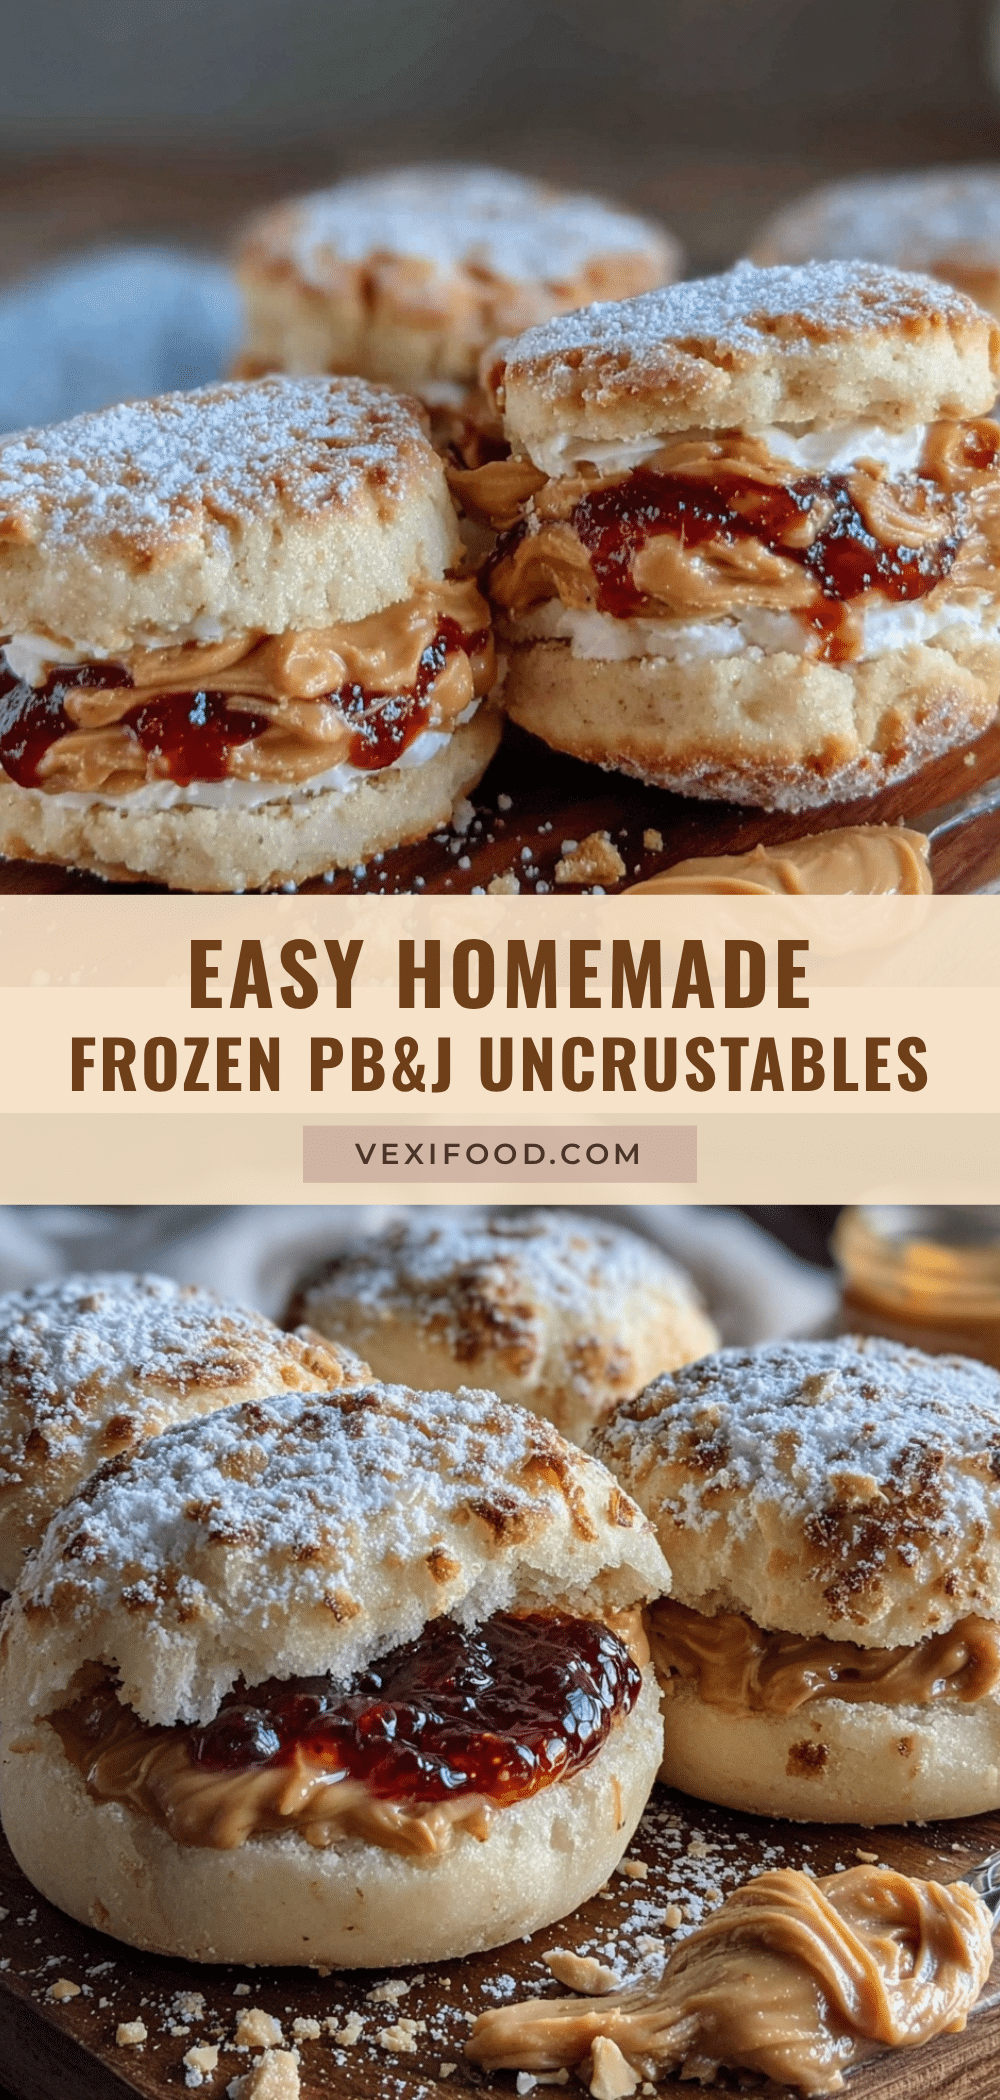
Easy DIY Uncrustables Recipe Perfect Homemade Frozen PB&J Sandwiches
A simple and satisfying recipe to make homemade frozen peanut butter and jelly sandwiches that are perfect for lunchboxes, snacks, and busy mornings.
- Prep Time: 10 minutes
- Cook Time: 2 hours (freezing time)
- Total Time: 2 hours 10 minutes
- Yield: 6 sandwiches 1x
- Category: Snack
- Cuisine: American
Ingredients
- 12 slices white sandwich bread (soft, fresh bread works best)
- ½ cup peanut butter (smooth or crunchy)
- ½ cup grape jelly
- Optional: 1 tablespoon honey or maple syrup for extra sweetness
- Wax paper or parchment paper for wrapping sandwiches
Instructions
- Lay out 12 slices of white sandwich bread on a clean surface.
- Trim the crusts off each slice carefully with a sharp knife.
- Spread about 1 tablespoon (15g) of peanut butter evenly over 6 slices of bread.
- Spoon about 1 tablespoon (15g) of grape jelly onto the peanut butter layer, leaving a small margin around the edges.
- Place the remaining 6 slices of bread on top to form sandwiches.
- Press the edges of each sandwich firmly with a fork to seal and remove crust edges.
- Wrap each sandwich tightly in wax paper or parchment paper.
- Place wrapped sandwiches on a baking sheet in a single layer and freeze for at least 2 hours until firm.
- Transfer frozen sandwiches to a freezer-safe container or zip-top bag for storage.
Notes
Use fresh, soft bread to avoid tearing. Don’t overfill with peanut butter or jelly to prevent leaks. Wrap sandwiches individually to avoid sticking. Thaw at room temperature for 20-30 minutes or microwave for 10-15 seconds for quick thawing. You can substitute peanut butter with almond or sunflower seed butter and use gluten-free bread if needed.
Nutrition
- Serving Size: 1 sandwich
- Calories: 275
- Sugar: 11
- Sodium: 200
- Fat: 11
- Saturated Fat: 2
- Carbohydrates: 32
- Fiber: 3.5
- Protein: 9
Keywords: PB&J, peanut butter and jelly, homemade Uncrustables, frozen sandwiches, lunchbox snack, easy snack, DIY Uncrustables