Love this? Save it for later!
Share the inspiration with your friends
My sister had refused to participate in Halloween dessert-making for years. Not because she didn’t like sweets—the woman has a legendary sweet tooth—but because she insisted themed desserts were “just for kids” and “too much effort for something that gets eaten in five minutes.” Then last October, I caught her standing over my kitchen counter, spoon in hand, scraping the last bits of crushed cookies from a dirt cup I’d made “just for myself.” She didn’t even look guilty. She just said, “Okay, these are actually good.”
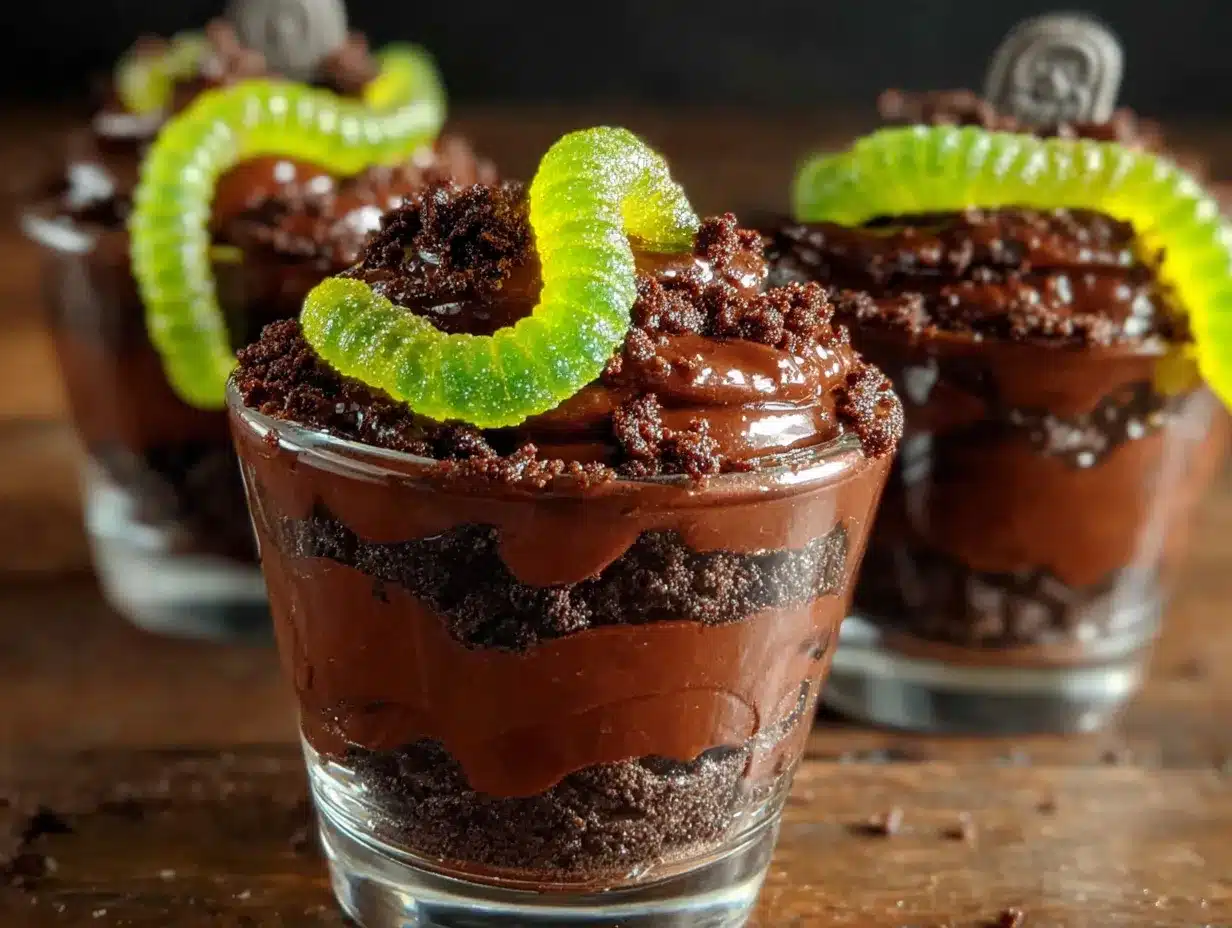
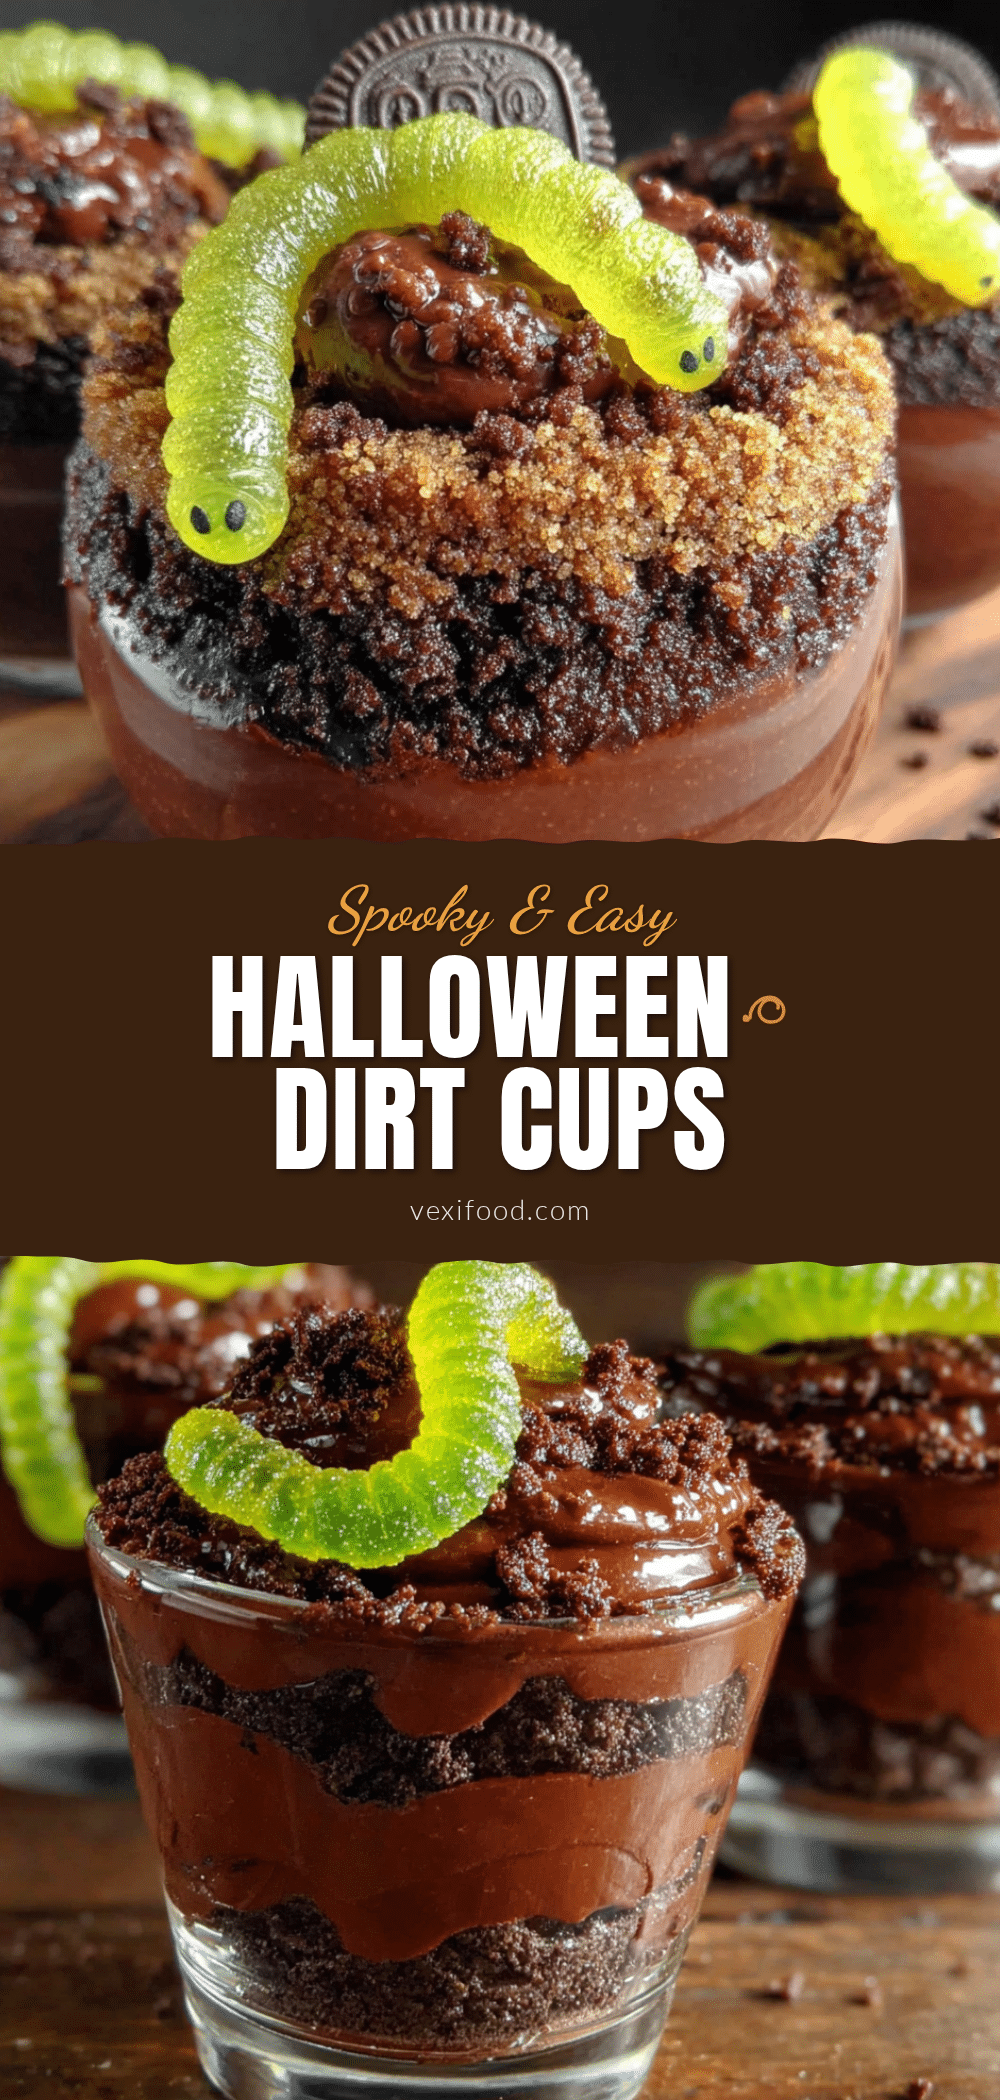
That moment stuck with me. Not the smug satisfaction—okay, maybe a little of that—but the realization that some recipes have this quiet power to change your mind. These cozy Halloween dirt cups with gummy worms aren’t trying to be fancy. They’re not pretending to be anything other than what they are: creamy chocolate pudding layered with crushed Oreos, topped with a few wiggly gummy worms peeking out like they’re escaping the soil. But honestly? That’s exactly why they work. They’re simple, they’re nostalgic, and they taste like the kind of dessert you’d make on a rainy October afternoon when the air gets crisp and the neighborhood starts smelling like woodsmoke and damp leaves.
Maybe you’ve been there too—rolling your eyes at yet another Pinterest-perfect holiday recipe, convinced it’s all style and no substance. I get it. But these dirt cups have staying power. The pudding gets silky and rich, the cookie crumble stays crunchy if you layer it right, and the gummy worms add that little pop of sweetness that makes kids (and, apparently, grown sisters) go quiet for a minute. I’ve been making them for five Halloweens now, and they’re the one thing I never skip. Even when I forget to buy the gummy worms until the last minute and have to run to the corner store in my slippers. Which, let’s be honest, happens more often than I’d like to admit.
Why You’ll Love This Recipe
These cozy Halloween dirt cups with gummy worms aren’t just another holiday novelty. They’re the kind of dessert that delivers on every level—flavor, texture, ease, and that warm fuzzy feeling you get when something turns out exactly right. I’ve tested this recipe more times than I can count, tweaking the pudding-to-crumb ratio, testing different cookie brands, and even experimenting with dairy-free options. This version is the one I keep coming back to.
Here’s what makes it special:
- Quick & Easy: You can have these assembled in under 20 minutes. No baking, no complicated steps, no stress. Perfect for Halloween parties or a last-minute treat on a cozy weeknight.
- Simple Ingredients: You probably already have most of what you need in your pantry. Oreos, instant pudding mix, milk, and gummy worms. That’s it. No fancy grocery trips required.
- Perfect for Halloween: Whether you’re hosting a spooky movie night, sending treats to school, or just want something fun for the kids (or yourself), these dirt cups fit the bill. They’re festive without being fussy.
- Crowd-Pleaser: I’ve served these at parties where adults pretended they were “just for the kids” and then quietly went back for seconds. They’re universally loved, and nobody can resist that gummy worm peeking out.
- Unbelievably Delicious: The combination of silky chocolate pudding, crunchy cookie crumble, and chewy gummy worms hits every texture note. It’s comfort food in a cup—simple, satisfying, and impossible to stop eating.
What makes this version different from the rest? It’s the little things. Using whole milk instead of skim for a creamier pudding. Letting the pudding set properly before layering so it doesn’t get runny. And crushing the Oreos just right—some fine crumbs, some small chunks—for that perfect soil-like texture. I’ve also found that adding a tiny pinch of salt to the pudding mix brings out the chocolate flavor in a way that makes people ask, “What did you put in this?” It’s a small tweak, but it makes all the difference.
This recipe isn’t just good—it’s the kind that makes you close your eyes after the first bite. It’s Halloween comfort food, reimagined as something you can make in your pajamas with zero stress. And honestly? That’s exactly what you need on a busy October evening.
What Ingredients You Will Need
This recipe uses simple, everyday ingredients to create something that feels special. Most of these are pantry staples, and the ones that aren’t are easy to find at any grocery store. Here’s what you’ll need to make these cozy Halloween dirt cups with gummy worms:
For the Pudding Base
- 1 box (3.9 oz) instant chocolate pudding mix – I prefer Jell-O brand for its consistent texture, but any brand works. Make sure it’s the instant kind, not cook-and-serve, or the texture won’t be right.
- 2 cups whole milk – Whole milk gives the pudding a richer, creamier texture. You can use 2% in a pinch, but avoid skim—the pudding will be thinner and less satisfying. For a dairy-free version, oat milk works surprisingly well.
- Pinch of sea salt – This is optional but highly recommended. It deepens the chocolate flavor without making the pudding taste salty. Trust me on this one.
For the “Dirt” Layer
- 1 package (14.3 oz) Oreo cookies – Regular Oreos work best. Double Stuf is fine too, but you’ll get a slightly sweeter crumb. Avoid the thin ones—they don’t crush into that soil-like texture you’re going for.
- Optional: 2 tablespoons melted butter – If you want the crumb to hold together a bit more (like real dirt), mix the crushed Oreos with melted butter. It’s not necessary, but it adds a nice richness.
For the Halloween Touch
- 1 bag gummy worms – Get the colorful, squiggly kind. I like the Trolli brand because they’re extra wiggly and have that bright, artificial fruit flavor that screams Halloween. You’ll need about 3-4 worms per cup.
- Optional toppings: Halloween sprinkles, candy eyeballs, or a few pumpkin-shaped candies for extra flair. These are purely decorative but add to the fun.
One thing I’ve learned from making these dirt cups for years is that the quality of your pudding matters. Cheap store-brand mixes can sometimes turn out grainy or too sweet. I splurge on the name brand, and it’s worth it. Also, check the expiration date on your pudding mix—old mix won’t set properly, and you’ll end up with soup instead of pudding. Ask me how I know.
For the Oreos, I recommend buying a full package even if you think you won’t use all of them. The crumbs settle as you layer, and you’ll want extra for topping. Plus, having a few Oreos left over for snacking while you assemble is basically a requirement of this recipe. It’s in the unofficial rulebook.
If you’re making these for a classroom party or a gathering with dietary restrictions, there are easy swaps. Use dairy-free milk and a vegan pudding mix for a plant-based version. Most gummy worms are gelatin-free these days, but check the label if you need them to be vegan. And for a gluten-free option, use gluten-free chocolate sandwich cookies—they work just as well, though the texture is slightly different.
Equipment Needed
You don’t need much to make these cozy Halloween dirt cups with gummy worms. That’s part of the beauty. Here’s what you’ll need:
- Large mixing bowl – For whisking the pudding. Any bowl works, but a wide one makes whisking easier.
- Whisk or electric mixer – A whisk is fine, but an electric mixer on low speed will get the pudding smooth faster. I usually whisk by hand because it’s less cleanup.
- Measuring cups – For the milk. A liquid measuring cup with a spout is ideal.
- Ziploc bag or food processor – For crushing the Oreos. A Ziploc bag and a rolling pin (or your hands) works perfectly. A food processor gives a finer, more even crumb, but it’s not necessary.
- Small cups or glasses – Clear plastic cups are classic for dirt cups because you can see the layers. I use 6-ounce juice glasses or small mason jars. Shot glasses work for mini versions.
- Spoon or small spatula – For layering. A small offset spatula is nice but not required.
- Refrigerator – For setting the pudding. You’ll need at least 30 minutes, but an hour is better.
If you don’t have a food processor, don’t stress. I’ve crushed Oreos with a wine bottle, a heavy skillet, and once, in a pinch, a clean brick from my garden. The Ziploc bag method is foolproof. Just seal it tight—learned that lesson the hard way when crumbs exploded across my kitchen. My dog was very helpful cleaning up.
For the cups, clear ones really do make a difference visually. The layers of chocolate pudding and dark crumb look gorgeous when you can see them. But if all you have are opaque cups, they’ll taste just as good. I’ve served these in everything from fancy glassware to paper cups at a potluck, and nobody complained.
Preparation Method
Making these cozy Halloween dirt cups with gummy worms is almost embarrassingly easy. But there are a few tricks to getting the texture and presentation just right. Follow these steps, and you’ll have a dessert that looks like it took way more effort than it actually did.
- Make the pudding. In a large mixing bowl, whisk together the instant chocolate pudding mix and 2 cups of cold whole milk. Whisk vigorously for about 2 minutes, or until the mixture starts to thicken. If you’re using an electric mixer, keep it on low speed to avoid splashing. Add a tiny pinch of sea salt and whisk once more. The pudding will be thin at first—don’t panic. It needs time to set.
- Let the pudding set. Cover the bowl with plastic wrap and refrigerate for at least 30 minutes, or up to an hour. This is the most important step. If you try to layer the pudding before it’s fully set, it will mix with the cookie crumbs and turn into a muddy mess. You want the pudding to be thick and spoonable, like a mousse. Patience, my friend.
- Crush the Oreos. While the pudding sets, crush your Oreos. Place them in a Ziploc bag and seal it tight—double-check the seal, seriously—then crush them with a rolling pin or the bottom of a heavy pan. You want a mix of fine crumbs and small chunks. If you’re using a food processor, pulse in short bursts to avoid turning everything into dust. Some texture is good; it mimics real soil.
- Optional: Mix with melted butter. If you want the crumb to hold together slightly, stir 2 tablespoons of melted butter into the crushed Oreos. This step is optional, but it gives the “dirt” a slightly clumpy, more realistic texture. I skip it sometimes when I’m in a hurry, and it’s still great.
- Layer the cups. Once the pudding is set, spoon a layer of crushed Oreos into the bottom of each cup. About 2 tablespoons per cup is a good starting point. Then add a layer of chocolate pudding—about ¼ cup per cup, depending on the size of your glasses. Repeat with another layer of Oreos, then another layer of pudding. End with a final layer of Oreos on top. The top layer should look like soil.
- Add the gummy worms. Here’s where the fun begins. Gently press 3-4 gummy worms into the top layer of each cup, letting some of them dangle over the edge as if they’re escaping the dirt. You can also push a few deeper into the pudding so they’re partially hidden. Kids love discovering them.
- Chill before serving. Refrigerate the assembled cups for at least 15 minutes before serving. This helps the layers settle and makes the gummy worms feel more “buried.” If you’re making them ahead, they’ll keep in the fridge for up to 2 days—though the Oreo crumbs will soften over time.
- Add optional decorations. Right before serving, you can sprinkle on some Halloween sprinkles, add candy eyeballs to the worms, or place a small pumpkin candy on top. These are purely cosmetic but make the cups extra festive for parties.
A few notes from my many batches: The pudding will continue to thicken as it chills, so don’t worry if it seems a bit soft after 30 minutes. Also, if you’re layering in clear cups, use a spoon to gently spread each layer to the edges so the stripes are visible. And for the love of all things cozy, don’t skip the gummy worms. They’re not just decoration—the chewy texture and bright fruit flavor contrast beautifully with the rich, creamy pudding and crunchy cookie crumb.
One time I made these for a Halloween potluck and realized I’d forgotten the gummy worms at home. I used pretzel sticks instead, sticking them upright like little tombstone markers. They were a hit, and honestly? I might do it again on purpose. But for the classic dirt cup experience, gummy worms are non-negotiable.
Cooking Tips & Techniques
After making these cozy Halloween dirt cups with gummy worms more times than I can count, I’ve picked up a few tricks that make the process smoother and the results better. Here are the ones worth knowing:
Use cold milk. Instant pudding relies on cold liquid to activate the thickening agents. If your milk is warm or room temperature, the pudding won’t set properly. I keep my milk in the fridge right up until I need it. If I forget to chill it, I pop it in the freezer for 10 minutes—just long enough to get it really cold, but not frozen.
Don’t overmix the pudding. Whisk just until the powder is dissolved and the mixture starts to thicken. Overmixing can break down the starches and result in a thinner pudding. You’ll see it start to come together after about 2 minutes. Stop there. Let the fridge do the rest of the work.
Crush Oreos in batches. If you’re making a big batch, crush the cookies in two or three batches rather than all at once. It’s easier to get even crumbs, and you avoid the dreaded Ziploc bag explosion. Yes, that happened to me. Yes, I was finding Oreo dust in my kitchen for weeks.
Layer with intention. The key to beautiful dirt cups is even layers. Use a small spoon or a piping bag for the pudding if you want really clean stripes. I’m too lazy for piping bags, so I just spoon the pudding in gently and tap the cup on the counter to settle it. Works like a charm.
Make ahead for better flavor. These dirt cups actually taste better the next day. The flavors meld together, and the Oreo crumbs soften slightly, creating a texture that’s more like actual moist soil. If you’re serving them at a party, make them the night before and keep them refrigerated. Just add the gummy worms right before serving so they stay chewy.
Watch the portion sizes. These cups are rich. I use 6-ounce cups for adults and 4-ounce cups for kids. If you’re serving them after a heavy Halloween dinner, smaller portions are better. Nobody wants to be too full for candy.
My biggest failure? I once tried to make these with sugar-free pudding and skim milk in an attempt to be “healthy.” It was a disaster. The pudding was watery, the texture was off, and everyone could tell something was wrong. Some recipes are meant to be indulgent, and this is one of them. Embrace the full-fat goodness. Your taste buds will thank you.
Variations & Adaptations
These cozy Halloween dirt cups with gummy worms are endlessly adaptable. Here are some of my favorite variations, tested and approved by my family and friends:
Peanut Butter Dirt Cups. Stir 2 tablespoons of creamy peanut butter into the pudding mix before adding the milk. It adds a rich, nutty flavor that pairs beautifully with the chocolate. Use peanut butter cookies instead of Oreos for the crumb layer. My nephew calls these “Reese’s cups” and requests them for every holiday.
Pumpkin Spice Dirt Cups. Swap the chocolate pudding for vanilla or butterscotch pudding, then stir in ½ teaspoon of pumpkin pie spice and a tablespoon of canned pumpkin puree. Use crushed graham crackers or ginger snaps for the “dirt.” Top with candy corn instead of gummy worms for a fall-themed twist. These are perfect for Thanksgiving or a cozy autumn evening.
Vegan Dirt Cups. Use a vegan instant pudding mix (most brands have one), oat milk or coconut milk, and vegan chocolate sandwich cookies. Most gummy worms are accidentally vegan, but double-check the label. The texture is slightly different—coconut milk makes the pudding richer—but just as delicious. I’ve served these to vegan friends and non-vegan friends alike, and nobody could tell the difference.
Gluten-Free Dirt Cups. Use gluten-free chocolate sandwich cookies for the crumb layer. Most instant pudding mixes are gluten-free, but check the label to be safe. The texture is a bit crumblier, so handle the layers gently. I’ve found that gluten-free cookies crush more finely, so pulse them in a food processor for best results.
Spooky Spider Dirt Cups. Instead of gummy worms, use black licorice strings to create spider legs. Place a chocolate truffle or a large chocolate-covered raisin in the center for the spider body. Arrange the licorice legs around it. These are extra fun for Halloween parties and look impressively creepy.
Mini Dirt Cups. Use shot glasses or small disposable cups for bite-sized versions. These are perfect for classroom parties or for when you want a little treat without committing to a full cup. The assembly is the same, just smaller portions. Kids love having their own mini cup.
My personal favorite variation? The peanut butter version, hands down. I made it one year when I was out of gummy worms and had a jar of peanut butter staring at me from the pantry. It was one of those happy accidents that turned into a new tradition. Now I make both versions side by side, and people fight over the peanut butter ones. Try it—you’ll see.
Serving & Storage Suggestions
These cozy Halloween dirt cups with gummy worms are best served cold, straight from the fridge. The contrast between the chilled pudding and the crunchy Oreo crumb is what makes them so satisfying. Here’s how to serve and store them for the best experience:
Serving Temperature: Serve them cold, but not ice-cold. If they’ve been in the fridge for more than a few hours, let them sit at room temperature for about 5 minutes before serving. This takes the chill off and lets the flavors open up. I know it sounds fussy, but it makes a difference.
Presentation Ideas: Arrange the cups on a platter or tray lined with fake spider webs for a spooky Halloween display. Add a few plastic spiders or skeleton fingers for extra atmosphere. If you’re serving them at a party, label each cup with a small tag—”Worm Dirt” or “Graveyard Pudding”—for a fun touch.
What to Serve With Them: These dirt cups are rich enough to stand alone, but they pair beautifully with a warm drink. A mug of hot apple cider, a pumpkin spice latte, or even a simple cup of coffee balances the sweetness. For a kids’ party, serve them with apple slices or carrot sticks to offset all that sugar. For an adult gathering, a glass of cold milk is the classic pairing.
Storage Instructions: Store assembled dirt cups in the refrigerator, covered with plastic wrap or lids if your cups have them. They’ll keep for up to 3 days, but the texture is best within 24 hours. The Oreo crumbs will soften over time, which some people actually prefer—it becomes more like a pudding-cake texture.
Freezer Instructions: I don’t recommend freezing these. The pudding becomes grainy when thawed, and the gummy worms turn into hard, chewy nuggets. If you need to make them far in advance, prepare the pudding and crumb layers separately and assemble them the day you plan to serve. The pudding will keep in the fridge for up to 5 days, and the Oreo crumbs can be stored in an airtight container at room temperature for a week.
Reheating: Don’t. These are meant to be served cold. If you want a warm chocolate dessert, make a mug cake or brownies. Dirt cups are all about that cold, creamy, crunchy experience.
One thing I love about this recipe is how the flavors develop over time. The first day, the pudding is light and fluffy, and the Oreo crumbs are crunchy. By day two, the crumbs have softened into something almost cake-like, and the pudding has deepened in flavor. Both versions are delicious in their own way. I usually make a double batch so I can enjoy them at every stage.
Nutritional Information & Benefits
Let’s be real—these cozy Halloween dirt cups with gummy worms are a treat, not a health food. But that doesn’t mean they’re without merit. Here’s a rough breakdown of what you’re getting in each serving:
Estimated Nutritional Values (per 6-ounce cup):
- Calories: 320-350
- Total Fat: 14g
- Saturated Fat: 7g
- Cholesterol: 15mg
- Sodium: 420mg
- Total Carbohydrates: 48g
- Dietary Fiber: 2g
- Sugars: 34g
- Protein: 6g
- Calcium: 150mg (15% DV)
Health Benefits of Key Ingredients:
- Milk provides calcium, vitamin D, and protein, which are essential for bone health and muscle function. Even the small amount in each cup contributes to your daily intake.
- Chocolate pudding (made with real cocoa) contains antioxidants called flavonoids, which can support heart health and reduce inflammation. It’s not a superfood, but it’s not empty calories either.
- Oreo cookies are mostly sugar and refined flour, but they do contain a small amount of iron and B vitamins from the enriched flour. Plus, they make you happy, and that counts for something.
Dietary Considerations:
- Contains dairy, gluten, and soy (from the Oreos).
- Can be made vegan with substitutions (see variations above).
- Can be made gluten-free with gluten-free cookies.
- Not suitable for low-carb or keto diets due to the high sugar content.
- Contains no nuts unless you add the peanut butter variation.
Potential Allergens: Milk, wheat, soy. Check your specific pudding mix and cookie brands for allergen information, as formulations vary.
My personal take? These dirt cups are a Halloween tradition, and traditions don’t need to be nutritionally perfect. They’re about joy, nostalgia, and sharing something fun with the people you love. One cup isn’t going to derail your healthy eating goals. Plus, if you’re making them with your kids or friends, the time spent together is its own kind of nourishment. Balance, right?
Conclusion
These cozy Halloween dirt cups with gummy worms are proof that the simplest recipes are often the most memorable. They’re not complicated. They’re not fancy. But they have this magical way of bringing people together—whether it’s kids giggling over the gummy worms peeking out of the “dirt” or adults sneaking a second cup when they think no one’s looking.
I love this recipe because it’s forgiving. You can tweak it, adapt it, make it your own. Use different cookies, different pudding flavors, different candies. It’s a canvas for your Halloween creativity. And no matter what you do, it’s going to be delicious. That’s the kind of recipe worth keeping in your back pocket.
So go ahead—make a batch. Let the pudding set while you crush Oreos with a rolling pin. Stick gummy worms into the dirt and watch them wiggle. Serve them at your Halloween party, or just make them for yourself on a quiet October evening. You deserve something fun and cozy and a little bit silly. We all do.
If you make these, I’d love to hear about it. Drop a comment below with your favorite variation, or tag me in your photos if you share them online. Happy Halloween, friends. May your dirt cups be creamy, your gummy worms be wiggly, and your October be full of cozy, delicious moments.
Frequently Asked Questions
Can I make these dirt cups ahead of time?
Yes! These are actually better when made a day ahead. Assemble the cups without the gummy worms, cover, and refrigerate. Add the gummy worms just before serving so they stay chewy. The pudding and cookie layers will meld together beautifully overnight.
What kind of cups should I use?
Clear plastic cups or small glass jars work best because you can see the layers. Disposable 6-ounce cups are perfect for parties. For a more elegant look, use small mason jars or juice glasses. Just make sure they’re food-safe and easy to eat from.
Can I use homemade pudding instead of instant?
You can, but the texture will be different. Homemade pudding is thinner and won’t set as firmly, so the layers might blend together. If you want to use homemade pudding, let it chill for at least 4 hours or overnight before layering. Instant pudding is really the best choice for this recipe.
How do I keep the Oreo crumbs crunchy?
The crumbs will naturally soften over time as they absorb moisture from the pudding. To keep them crunchier longer, add a layer of melted white chocolate or butter between the pudding and the crumbs. You can also add the top crumb layer just before serving for maximum crunch.
Can I use other candies besides gummy worms?
Absolutely! Gummy spiders, candy corn, pumpkin-shaped candies, or even chocolate bugs all work great. For a non-candy option, use pretzel sticks as “tombstones” or sliced almonds as “grubs.” Get creative—Halloween is all about the fun details.
Pin This Recipe!
Easy Halloween Dirt Cups with Gummy Worms
Creamy chocolate pudding layered with crushed Oreos and topped with gummy worms peeking out like they’re escaping the soil. A simple, nostalgic, and crowd-pleasing Halloween dessert that comes together in under 20 minutes.
- Prep Time: 15 minutes
- Cook Time: 0 minutes
- Total Time: 45 minutes (includes chilling time)
- Yield: 4 servings 1x
- Category: Dessert
- Cuisine: American
Ingredients
- 1 box (3.9 oz) instant chocolate pudding mix
- 2 cups whole milk
- Pinch of sea salt
- 1 package (14.3 oz) Oreo cookies
- 2 tablespoons melted butter (optional)
- 1 bag gummy worms
- Optional toppings: Halloween sprinkles, candy eyeballs, or pumpkin-shaped candies
Instructions
- In a large mixing bowl, whisk together the instant chocolate pudding mix and 2 cups of cold whole milk. Whisk vigorously for about 2 minutes, or until the mixture starts to thicken. Add a tiny pinch of sea salt and whisk once more.
- Cover the bowl with plastic wrap and refrigerate for at least 30 minutes, or up to an hour, until the pudding is thick and spoonable.
- While the pudding sets, crush the Oreos. Place them in a Ziploc bag and seal it tight, then crush them with a rolling pin or the bottom of a heavy pan until you have a mix of fine crumbs and small chunks.
- Optional: Stir 2 tablespoons of melted butter into the crushed Oreos for a clumpier texture.
- Once the pudding is set, spoon a layer of crushed Oreos into the bottom of each cup (about 2 tablespoons per cup). Add a layer of chocolate pudding (about ¼ cup per cup). Repeat with another layer of Oreos and another layer of pudding. End with a final layer of Oreos on top.
- Gently press 3-4 gummy worms into the top layer of each cup, letting some dangle over the edge.
- Refrigerate the assembled cups for at least 15 minutes before serving.
- Right before serving, add optional decorations like Halloween sprinkles or candy eyeballs.
Notes
Use whole milk for a creamier pudding. Let the pudding set properly before layering to avoid a muddy mess. Crush Oreos to a mix of fine crumbs and small chunks for the best ‘soil’ texture. For a dairy-free version, use oat milk and a vegan pudding mix. For gluten-free, use gluten-free chocolate sandwich cookies. The assembled cups can be stored in the refrigerator for up to 3 days, but the texture is best within 24 hours.
Nutrition
- Serving Size: 1 cup (6 ounces)
- Calories: 335
- Sugar: 34
- Sodium: 420
- Fat: 14
- Saturated Fat: 7
- Carbohydrates: 48
- Fiber: 2
- Protein: 6
Keywords: Halloween dirt cups, gummy worms, chocolate pudding, Oreo dirt cups, easy Halloween dessert, no-bake dessert, kids Halloween treat