Love this? Save it for later!
Share the inspiration with your friends
I was digging through my son’s backpack last Tuesday—looking for a permission slip, as you do—when a crumbled napkin fell out with something brown and suspicious smeared on it. I almost tossed it without a second thought. But then I caught a whiff. It was faint, but unmistakable: that buttery, slightly salty, cheese-and-ham aroma that only comes from a warm muffin fresh out of the oven. And suddenly I was seven years old, sitting at my Aunt Maggie’s tiny kitchen table in her apartment above the laundromat on Elm Street. She’d slide a basket of these golden muffins toward me, steam curling up, and I’d burn my tongue on the first bite every single time because I couldn’t wait. She passed away three years ago, and honest to goodness, I haven’t thought about those mornings in forever.
The thing is, I never even got her recipe. She was one of those cooks who just “knew” how much of everything to add. So for the past week, I’ve been on a mission. I’ve made six batches of ham and cheese muffins, and let me tell you—my kitchen looks like a flour bomb went off. The first batch was too dry. The second? Soggy in the middle. The third actually caught on the bottom (I may have forgotten to check the oven rack position). But batch number four? That was the one. That was Aunt Maggie’s muffin, recreated in my own messy, imperfect kitchen at 11 p.m. on a Wednesday.
These aren’t fancy. They’re not meant to be. They’re the kind of muffins you throw together when the bus is coming in twenty minutes and someone forgot to eat breakfast. They’re forgiving, they’re filling, and they taste like a warm hug from someone who loves you. Maybe you’ve had a morning like that—where everything’s chaos and you just need one thing to go right. These muffins are that thing. Honestly, I’m almost glad I lost that permission slip, because it led me back to this recipe.
Why You’ll Love This Recipe
Let’s face it—school mornings are a battlefield. You’re trying to find matching socks, sign three forms, and convince a small human that oatmeal is actually delicious. The last thing you need is a complicated breakfast recipe. These Easy Ham and Cheese School Morning Muffins are my secret weapon, and here’s why they’ll become yours too:
- Ready in 25 Minutes: From mixing bowl to cooling rack in under half an hour. That’s faster than arguing about breakfast cereal.
- Pantry-Friendly Ingredients: You probably have everything already. Flour, eggs, milk, cheese, and ham. No fancy trips to a specialty store.
- Make-Ahead Magic: Bake them Sunday night and grab one (or three) all week. They actually taste better on day two.
- Kid-Approved (Even Picky Ones): My nephew refused to eat anything with “green stuff” in it. He inhaled three of these. The secret? No green stuff.
- Perfectly Portable: No syrup, no spoons, no mess. Just grab and go. Eat them in the car, on the bus, or standing at the front door.
What makes these different from every other ham and cheese muffin recipe out there? It’s the texture. I tested this six times to get it right. The trick is using a combination of shredded cheddar and a tiny bit of cream cheese in the batter. It keeps the muffins incredibly moist without being greasy. Plus, I add a pinch of smoked paprika and a dash of Dijon mustard powder—neither of which you can taste directly, but both of which make the ham and cheese sing. It’s not just another muffin. It’s the muffin that makes your kid say “can I have another one?” before they’ve even finished the first.
These muffins are comfort food disguised as a quick breakfast. They’re the kind of recipe that makes you feel like you’ve got your act together, even when you’re running on three hours of sleep and cold coffee. Trust me on this one.
What Ingredients You Will Need
This recipe uses simple, honest ingredients that come together to create something unexpectedly wonderful. Most of these are probably in your fridge and pantry right now, which is exactly the point. Here’s what you’ll need and why each one matters:
For the Muffin Batter
- All-Purpose Flour, 2 cups (250g): The backbone of the muffin. Spoon and level it—don’t scoop directly from the bag, or you’ll end up with dense, dry muffins. I use Gold Medal, but any brand works fine.
- Baking Powder, 2 teaspoons: Make sure it’s fresh. If your baking powder is more than six months old, it loses its oomph. Test it by dropping a bit in hot water—it should fizz immediately.
- Baking Soda, 1/2 teaspoon: Helps with browning and gives the muffins a tender crumb.
- Salt, 1/2 teaspoon: Don’t skip it. Salt doesn’t just add saltiness—it enhances every other flavor, especially the cheese.
- Smoked Paprika, 1/2 teaspoon: This is my secret ingredient. It doesn’t make the muffins taste smoky, but it adds a warmth and depth that plain paprika can’t touch.
- Dijon Mustard Powder, 1/4 teaspoon: Another stealth ingredient. It brightens the cheese flavor without tasting like mustard. If you don’t have powder, use 1 teaspoon of regular Dijon mustard mixed into the wet ingredients.
- Black Pepper, 1/4 teaspoon: Freshly ground if you have it.
For the Wet Ingredients

- Large Eggs, 2: Room temperature is best. If you forgot to take them out of the fridge, place them in a bowl of warm water for 5 minutes. Cold eggs can make the batter seize up.
- Whole Milk, 1 cup (240ml): Whole milk gives the richest texture, but 2% works too. Avoid skim milk—the muffins will be tougher. For a dairy-free version, unsweetened oat milk is my top pick.
- Unsalted Butter, 1/4 cup (56g), melted and slightly cooled: Melted butter gives these muffins a tender, almost scone-like texture. I melt mine in the microwave in 20-second bursts. Let it cool for a couple minutes so it doesn’t cook the eggs when you mix them.
- Cream Cheese, 2 ounces (56g), softened: This is the game-changer. It adds moisture and a slight tang that makes the muffins taste richer than they are. Let it sit out for 20 minutes to soften.
For the Mix-Ins
- Diced Cooked Ham, 1 cup (about 150g): Use good-quality ham from the deli counter, not the pre-packaged stuff if you can help it. I like Black Forest ham or honey ham. Dice it into small, even cubes—about 1/4 inch—so every bite gets some. Leftover holiday ham works beautifully here.
- Shredded Sharp Cheddar Cheese, 1 cup (100g): Sharp cheddar gives the most flavor. Shred it yourself from a block—the pre-shredded stuff has anti-caking agents that prevent it from melting smoothly. Trust me on this one. I learned the hard way.
- Fresh Chives, 2 tablespoons, finely chopped (optional): Adds a mild oniony freshness. If you don’t have chives, use a tablespoon of finely chopped green onion tops. Or skip them entirely—the muffins are still fantastic.
Equipment Needed
You don’t need a professional bakery setup for these muffins. Here’s what you’ll actually use:
- 12-Cup Standard Muffin Pan: The non-stick kind is easiest, but any metal pan works. Avoid dark-colored pans—they absorb more heat and can over-brown the bottoms. If that’s all you have, reduce the oven temperature by 25°F.
- Paper or Silicone Muffin Liners: I prefer paper liners for easy cleanup, but silicone ones are reusable and work great. If you don’t have either, grease the pan generously with butter or cooking spray.
- Two Mixing Bowls: One medium for dry ingredients, one large for wet. Glass or stainless steel is fine.
- Whisk: For mixing the dry ingredients and for beating the wet ingredients until smooth.
- Rubber Spatula: For folding the ham and cheese into the batter without overmixing. Overmixing = tough muffins.
- 1/4 Cup Measuring Cup or Cookie Scoop: For evenly portioning the batter. A #20 cookie scoop (about 3 tablespoons) is perfect. I got mine at a restaurant supply store for $4, and it’s one of my most-used tools.
- Cooling Rack: Crucial for preventing soggy bottoms. If you don’t have one, let the muffins cool in the pan for 5 minutes, then transfer them to a plate propped up on its side to allow air to circulate underneath.
Preparation Method
Alright, let’s make these muffins. I promise it’s easier than it looks. Here’s the step-by-step, including all the little things I wish someone had told me the first time I attempted this.
- Preheat your oven to 375°F (190°C). Position the rack in the center of the oven. Line your muffin pan with 10 paper liners—yes, 10, not 12. This recipe makes 10 generously-sized muffins, not 12 skimpy ones. I learned this after my first batch came out looking like sad little hockey pucks.
- In a medium bowl, whisk together the dry ingredients: 2 cups flour, 2 teaspoons baking powder, 1/2 teaspoon baking soda, 1/2 teaspoon salt, 1/2 teaspoon smoked paprika, 1/4 teaspoon mustard powder, and 1/4 teaspoon black pepper. Whisk until everything is evenly distributed—about 15 seconds. Set aside.
- In a large bowl, beat the wet ingredients: Start with the 2 ounces of softened cream cheese. Beat it with a whisk until it’s smooth and creamy—no lumps. Then add the 2 eggs and whisk until fully incorporated. Pour in the 1 cup of milk and the 1/4 cup of melted, slightly cooled butter. Whisk until everything is combined and smooth. It should look like a thin, pale yellow liquid.
- Pour the dry ingredients into the wet ingredients. Here’s the crucial part: use a rubber spatula and stir gently, just until the flour disappears. You’ll still see a few small lumps—that’s fine. Overmixing at this stage develops gluten, which makes muffins tough and rubbery. Stop stirring the moment you can’t see any more dry flour. This takes about 10 to 12 strokes.
- Fold in the ham, cheese, and chives. Add the 1 cup of diced ham, 1 cup of shredded cheddar, and 2 tablespoons of chives (if using). Use the spatula to fold them in with just a few gentle turns. Don’t overdo it. The batter will be thick and chunky. That’s exactly what you want.
- Divide the batter among the 10 lined muffin cups. Use a 1/4 cup measuring cup or a cookie scoop. Fill each cup almost to the top—about 3/4 full. The batter should be mounded slightly above the rim. Don’t worry, they won’t overflow. I promise they’ll rise into beautiful domed tops.
- Bake for 18 to 22 minutes. Start checking at 18 minutes. The muffins are done when they’re golden brown on top, and a toothpick inserted into the center of one comes out clean or with a few moist crumbs (not wet batter). The tops should spring back when you gently press them with your finger.
- Cool in the pan for 5 minutes. This is important—it lets the muffins set so they don’t fall apart when you remove them. After 5 minutes, transfer them to a wire rack to cool completely. If you’re eating them right away, let them cool for at least 2 minutes on the rack before serving. The cheese inside is molten hot straight out of the oven.
Pro tip from my sixth batch: If you want extra-golden tops, brush the muffins with a little melted butter right when they come out of the oven. It gives them a beautiful sheen and adds a touch of richness. I did this for batch number five, and my husband said they looked “bakery-quality.” High praise from a man who usually just grunts at breakfast.
Cooking Tips & Techniques
I’ve made enough mistakes with these muffins to fill a small notebook. Here’s what I’ve learned so you don’t have to repeat my errors:
Don’t overmix the batter. I cannot say this enough. The first time I made these, I used an electric mixer because I was impatient. The muffins came out tough and dense, with tunnels running through them. Mixing by hand with a spatula gives you much more control. Stir until the flour just disappears, then stop. Lumps are your friends here.
Room temperature ingredients matter more than you think. Cold eggs and cold milk can make the melted butter solidify into little flecks when you mix them together. This results in uneven texture and greasy spots. Take everything out of the fridge 20 minutes before you start. If you’re in a hurry, place the eggs in a bowl of warm water and microwave the milk for 15 seconds.
Shred your own cheese. I know it’s tempting to buy the bagged shredded cheese. I’ve done it. But the anti-caking agents (usually potato starch and cellulose) prevent the cheese from melting smoothly into the batter. You end up with little pockets of unmelted cheese rather than that beautiful, even distribution. Shredding a block of cheddar takes two minutes and makes a noticeable difference.
Dice the ham uniformly. If some pieces are huge and some are tiny, you’ll get uneven bites. Aim for 1/4-inch cubes. I find it easiest to slice the ham into 1/4-inch slices, then cut those into strips, then dice the strips. It sounds fussy, but it takes about 90 seconds.
Check your oven temperature. My oven runs 25 degrees hot. I learned this after my first batch burned on the bottom while the tops were still pale. An inexpensive oven thermometer changed my baking life. Place it on the center rack and adjust your oven setting accordingly.
Let them cool properly. I know it’s hard to wait. The smell is intoxicating. But if you try to eat one straight out of the pan, two things happen: you burn your mouth on molten cheese, and the muffin collapses because it hasn’t set yet. Five minutes in the pan, then at least two minutes on the rack. Your patience will be rewarded.
Variations & Adaptations
One of the best things about this recipe is how flexible it is. Here are some variations I’ve tried and loved:
Cheese Swap: Sharp cheddar is my go-to, but Gruyère gives these a nutty, sophisticated flavor that’s incredible. Swiss cheese works too, especially if you’re using ham. For a milder version, try Monterey Jack or mozzarella. Avoid pre-shredded blends—they don’t melt as well.
Meat Alternatives: Cooked and crumbled breakfast sausage is fantastic. So is diced cooked bacon (about 6 strips, crumbled). For a vegetarian version, use sautéed mushrooms and bell peppers instead of ham. My sister makes them with chopped sun-dried tomatoes and spinach, and they’re surprisingly good.
Gluten-Free Adaptation: Substitute the all-purpose flour with a 1:1 gluten-free baking flour blend that contains xanthan gum. I’ve tested this with Bob’s Red Mill 1:1 Baking Flour, and it works perfectly. Don’t use almond flour or coconut flour—the texture will be completely different.
Dairy-Free Version: Use unsweetened oat milk or almond milk in place of whole milk. Substitute the butter with melted coconut oil or a dairy-free butter stick. Use a dairy-free cream cheese alternative (I like Kite Hill). And use your favorite dairy-free shredded cheese. The texture will be slightly less tender, but still delicious.
Spicy Kick: Add 1/4 teaspoon of cayenne pepper to the dry ingredients, or fold in 2 tablespoons of diced pickled jalapeños along with the ham and cheese. My husband loves this version. I call them “Wake-Up Muffins.”
Breakfast Muffin Sandwich: Slice a cooled muffin in half horizontally, toast it lightly, and add a fried egg. It’s basically a breakfast sandwich without the hassle of making a biscuit from scratch. I do this on weekends when I have an extra five minutes.
Serving & Storage Suggestions
These muffins are incredibly versatile when it comes to serving. Here’s how I handle them:
Serving Temperature: They’re best warm, straight from the oven, when the cheese is still melty and the edges are slightly crisp. But honestly, they’re almost as good at room temperature. I’ve eaten them cold straight from the fridge and still enjoyed them. They’re not fussy.
What to Serve With Them: A piece of fruit on the side makes it a complete breakfast. Apple slices, a banana, or a handful of grapes all work. For a heartier meal, serve them alongside scrambled eggs or a simple fruit salad. They also pair beautifully with a mug of hot coffee or a glass of cold milk.
Storage: Store leftover muffins in an airtight container at room temperature for up to 2 days. For longer storage, refrigerate them for up to 5 days. I line the container with a paper towel to absorb excess moisture, which keeps the muffins from getting soggy. Change the paper towel every day if you’re storing them for more than 2 days.
Freezing: These freeze beautifully. Let the muffins cool completely, then place them in a single layer on a baking sheet and freeze for 1 hour. Transfer the frozen muffins to a zip-top freezer bag, squeezing out as much air as possible. They’ll keep for up to 3 months. Thaw overnight in the refrigerator or reheat directly from frozen.
Reheating: The best way to reheat a muffin is in a 350°F oven for 5 to 7 minutes (8 to 10 minutes if frozen). This restores the crisp exterior and melty interior. The microwave works in a pinch—20 seconds for one muffin—but the texture will be softer. For a compromise, microwave for 15 seconds, then pop it in a toaster oven for 2 minutes.
Flavor Development: Here’s something interesting: these muffins actually taste better on day two. The flavors meld together overnight, and the ham and cheese become more cohesive. I often make a double batch on Sunday specifically for Monday and Tuesday breakfasts. My kids don’t know they’re eating leftovers, and I’m not telling them.
Nutritional Information & Benefits
These muffins are a balanced breakfast option that keeps you full until lunch. Here’s the estimated nutritional breakdown per muffin (based on 10 muffins):
| Nutrient | Amount Per Muffin |
|---|---|
| Calories | 245 |
| Total Fat | 12g |
| Saturated Fat | 7g |
| Cholesterol | 65mg |
| Sodium | 480mg |
| Total Carbohydrates | 22g |
| Dietary Fiber | 1g |
| Sugars | 3g |
| Protein | 11g |
These muffins provide a good amount of protein from the ham, cheese, and eggs—about 11 grams per muffin. Protein at breakfast helps stabilize blood sugar and keeps you feeling full longer, which is especially helpful for school mornings when lunch might be hours away. The calcium from the cheese and milk supports bone health, and the B vitamins from the eggs and ham support energy metabolism.
If you’re watching your sodium intake, you can use low-sodium ham and reduce the added salt to 1/4 teaspoon. You can also use a reduced-fat cheddar cheese to lower the saturated fat content. For a lower-carb option, substitute the all-purpose flour with almond flour—but be aware that the texture will be denser and the muffins will be more calorie-dense per serving.
These muffins are not suitable for anyone with celiac disease unless you use certified gluten-free flour. They contain dairy (milk, butter, cream cheese, cheddar) and eggs, so they’re not vegan-friendly. However, with the substitutions listed in the variations section, you can adapt them for most dietary needs.
Conclusion
These Easy Ham and Cheese School Morning Muffins have become a staple in my kitchen, and I have a feeling they’ll become one in yours too. They’re the kind of recipe that saves your sanity on chaotic mornings, the kind that makes you feel like a hero when your kid runs out the door with a warm muffin in one hand and a backpack in the other. They’re forgiving enough for beginner bakers and versatile enough for seasoned cooks who want to experiment.
What I love most about this recipe is that it’s not precious. You don’t need special equipment or rare ingredients. You don’t need to plan ahead or set aside an entire morning. You just need 25 minutes and a willingness to eat something delicious. And honestly, isn’t that what we all need on a Tuesday morning?
I’d love to hear how these turn out for you. Did you add something unexpected? Did your kids love them? Did you burn the first batch like I did? Drop a comment below and let me know. And if you’re looking for other quick breakfast ideas, check out my recipe for easy freezer breakfast burritos—they’re another lifesaver for busy mornings. Happy baking, friends. You’ve got this.
Frequently Asked Questions
Can I use a different type of cheese?
Absolutely. Sharp cheddar is my favorite, but Gruyère, Swiss, Monterey Jack, or even pepper jack all work beautifully. Just avoid pre-shredded cheese if possible—it doesn’t melt as smoothly.
Can I make these muffins ahead of time?
Yes! They actually taste better on day two. Store them in an airtight container at room temperature for up to 2 days, or refrigerate for up to 5 days. You can also freeze them for up to 3 months.
Can I use a different type of meat?
Definitely. Cooked and crumbled breakfast sausage, diced cooked bacon, or even chopped cooked turkey all work great. For a vegetarian version, try sautéed mushrooms and bell peppers.
Why did my muffins turn out dry?
This usually happens from overmixing the batter or overbaking. Mix just until the flour disappears—lumps are fine. And start checking for doneness at 18 minutes. Every oven is different.
Can I make these gluten-free?
Yes. Use a 1:1 gluten-free baking flour blend that contains xanthan gum. I’ve tested this with Bob’s Red Mill 1:1 Baking Flour with great results. Don’t use almond flour or coconut flour—the texture will be completely different.
Pin This Recipe!
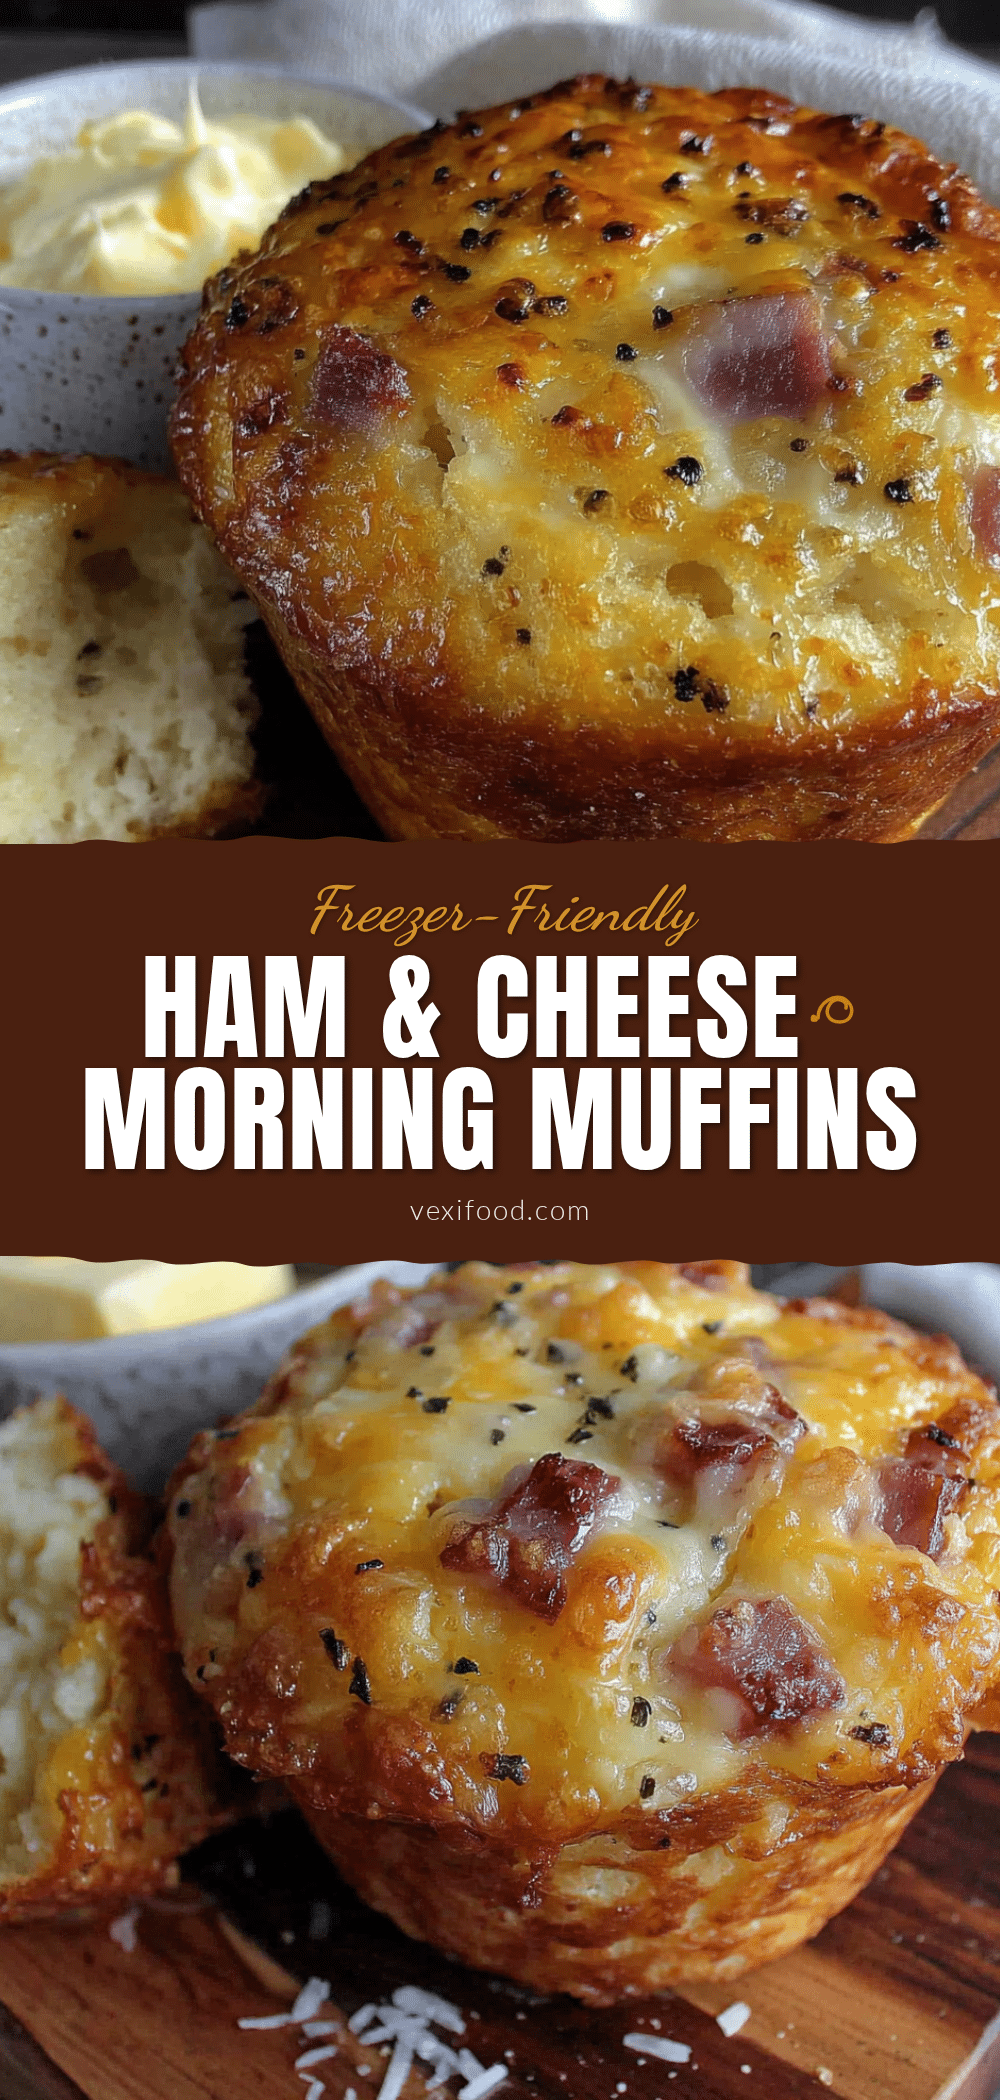
Easy Ham and Cheese School Morning Muffins

These savory ham and cheese muffins are ready in 25 minutes, made with pantry-friendly ingredients, and perfect for busy school mornings. They’re moist, flavorful, and kid-approved.
- Prep Time: 10 minutes
- Cook Time: 20 minutes
- Total Time: 30 minutes
- Yield: 10 muffins 1x
- Category: Breakfast
- Cuisine: American
Ingredients
- 2 cups (250g) all-purpose flour
- 2 teaspoons baking powder
- 1/2 teaspoon baking soda
- 1/2 teaspoon salt
- 1/2 teaspoon smoked paprika
- 1/4 teaspoon Dijon mustard powder
- 1/4 teaspoon black pepper
- 2 large eggs, room temperature
- 1 cup (240ml) whole milk
- 1/4 cup (56g) unsalted butter, melted and slightly cooled
- 2 ounces (56g) cream cheese, softened
- 1 cup (about 150g) diced cooked ham
- 1 cup (100g) shredded sharp cheddar cheese
- 2 tablespoons fresh chives, finely chopped (optional)
Instructions
- Preheat oven to 375°F (190°C). Line a 12-cup muffin pan with 10 paper liners.
- In a medium bowl, whisk together flour, baking powder, baking soda, salt, smoked paprika, mustard powder, and black pepper.
- In a large bowl, beat softened cream cheese until smooth. Add eggs and whisk until fully incorporated. Pour in milk and melted butter; whisk until combined.
- Pour dry ingredients into wet ingredients. Stir gently with a rubber spatula just until flour disappears (10-12 strokes). Do not overmix.
- Fold in diced ham, shredded cheddar, and chives with a few gentle turns.
- Divide batter evenly among the 10 lined muffin cups, filling each about 3/4 full (batter should mound slightly above rim).
- Bake for 18-22 minutes, until golden brown and a toothpick inserted in center comes out clean or with a few moist crumbs.
- Cool in pan for 5 minutes, then transfer to a wire rack. Let cool at least 2 minutes before serving.
Notes
For extra-golden tops, brush muffins with melted butter right after baking. Muffins taste even better on day two. Store in an airtight container at room temperature for up to 2 days, refrigerate for up to 5 days, or freeze for up to 3 months.
Nutrition
- Serving Size: 1 muffin
- Calories: 245
- Sugar: 3
- Sodium: 480
- Fat: 12
- Saturated Fat: 7
- Carbohydrates: 22
- Fiber: 1
- Protein: 11
Keywords: ham and cheese muffins, breakfast muffins, school morning muffins, easy muffins, savory muffins