Love this? Save it for later!
Share the inspiration with your friends
I was standing in the dairy aisle last Tuesday, staring at a tiny tub of fancy honey butter that cost almost seven dollars, when a memory hit me so hard I almost laughed out loud. I was five years old at my Aunt Jo’s kitchen table, the one with the wobbly leg she always fixed with a folded napkin, watching her slap a spoonful of soft, golden butter onto a slice of warm bread. She’d drizzle honey over it from a plastic bear, then mash it all together with the back of her fork until it turned into this glorious, sweet, messy spread. I remember thinking she was a magician.
That was the first time I ever tasted honey butter. And honestly? Nothing store-bought has ever come close. Not even the expensive stuff in the pretty glass jar. There’s something about making it yourself, about watching the butter soften and the honey swirl in, that feels like a small, quiet act of love. I forgot about that moment for years, until I was standing there in the grocery store, annoyed at the price tag.
So I did what any sensible person on a budget would do. I put the fancy tub back, grabbed a block of salted butter and a bottle of honey, and headed home to recreate that memory. Maybe you’ve been there too—staring at a price tag and thinking, “I can definitely make that myself.” And you know what? You absolutely can. This easy homemade honey butter recipe in a jar is not just cheaper; it’s better. It’s creamier, more flavorful, and way more fun to make. Plus, the kids can help. Let me tell you, watching my nephew’s face light up when he got to stir the butter himself was worth way more than seven bucks.
Why You’ll Love This Recipe
This recipe has become a staple in my kitchen, and I bet it’ll become one in yours too. Here’s why it’s earned a permanent spot on my counter:
- Quick & Easy: You can whip this up in under 10 minutes. Seriously. No cooking, no complicated steps. Just a bowl, a spoon, and a little elbow grease.
- Simple Ingredients: You likely already have both ingredients in your pantry. Butter and honey. That’s it. No fancy grocery trips needed.
- Perfect for Family Meals: Great for slathering on pancakes, waffles, toast, muffins, or even roasted sweet potatoes. It turns an ordinary breakfast into something special without any extra stress.
- Crowd-Pleaser: I’ve brought this to brunches and watched it disappear in minutes. Kids and adults both go crazy for it. It’s one of those things that everyone loves.
- Unbelievably Delicious: The texture is silky and spreadable, and the flavor is perfectly balanced—sweet but not cloying, rich but not heavy. It’s comfort food in a jar.
What makes this recipe different from all the others? It’s the texture. I tested this a dozen times to get it just right. The secret is letting the butter come to room temperature before you start. Cold butter will give you a lumpy mess. But soft, almost squishy butter? That whips up into something dreamy. I also use a pinch of salt to cut the sweetness, even if I’m using salted butter. It sounds weird, but trust me on this one. It makes the honey flavor pop.
This recipe isn’t just good—it’s the kind that makes you close your eyes after the first bite. It’s simple, affordable, and tastes like a hug. Perfect for busy mornings when you need a little something special without a lot of fuss.
What Ingredients You Will Need
This recipe uses simple, wholesome ingredients to deliver bold flavor and satisfying texture without the fuss. You probably have everything you need right now.
- 1 cup (2 sticks) unsalted butter, softened to room temperature (I prefer Kerrygold for its rich, creamy flavor, but any good-quality butter works. Let it sit out for about 30-45 minutes until it’s soft but not melting.)
- 1/3 cup honey (Use a mild, floral honey like clover or orange blossom. Avoid strong-flavored honey like buckwheat, which can overpower the butter. Local honey is a great choice if you have it!)
- 1/4 teaspoon fine sea salt (Optional, but highly recommended. It balances the sweetness and enhances the honey flavor. If you’re using salted butter, you can skip this or use just a tiny pinch.)
Ingredient Selection Tips: For the best texture, make sure your butter is truly at room temperature. It should be soft enough that you can press a finger into it easily, but not so soft that it’s greasy or melted. If you’re in a hurry, you can cut the butter into small cubes and let it sit for 15 minutes. But honestly, patience pays off here.
Substitution Guidance: You can use salted butter and omit the extra salt, but I find the flavor is a little flatter. For a dairy-free version, use a high-quality vegan butter stick (not margarine). Miyoko’s or Earth Balance work well. The texture will be slightly different, but still delicious. For a lower-sugar option, you can use a sugar-free honey substitute, but the flavor won’t be quite the same. I’d recommend just using real honey and using a little less if you’re watching sugar.
Equipment Needed
You don’t need much for this recipe. That’s part of the beauty of it.
- A medium mixing bowl (Glass or ceramic works best. Avoid plastic, as it can retain odors.)
- A hand mixer or stand mixer (You can do this by hand with a whisk and a lot of determination, but a mixer makes it much easier and gives you a fluffier texture. I’ve done it both ways, and the mixer is worth the extra minute to clean it.)
- A rubber spatula (For scraping down the sides of the bowl and getting every last bit of honey butter into the jar.)
- A jar with a tight-fitting lid (A 12-ounce mason jar or a small Weck jar works perfectly. Make sure it’s clean and dry.)
- A small whisk (Optional, but helpful for incorporating the honey if you’re mixing by hand.)
Budget-Friendly Options: If you don’t have a hand mixer, you can absolutely make this by hand. Just make sure your butter is very soft, and use a strong whisk. It’ll take about 5-7 minutes of steady whisking, but it’s a great arm workout! For the jar, you can reuse a small jam jar or even a clean yogurt container. No need to buy anything fancy.
Preparation Method
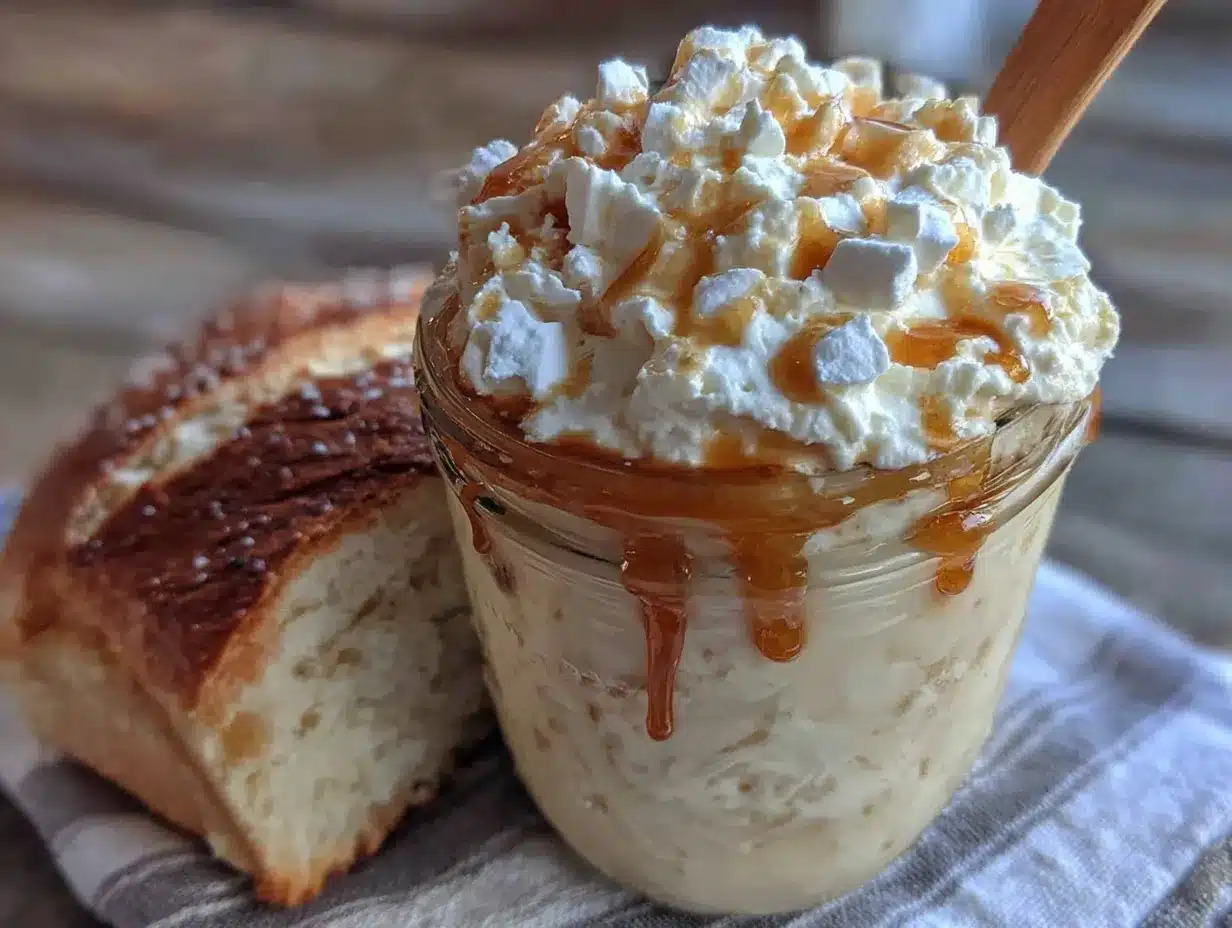
Follow these steps, and you’ll have the most delicious homemade honey butter in under 10 minutes. I promise it’s foolproof.
- Soften the butter: Take your butter out of the fridge about 30-45 minutes before you plan to make the honey butter. Cut it into small cubes to speed things up. You want it soft but not melted. If it’s too cold, it won’t whip properly. If it’s too warm, it’ll be greasy.
- Whip the butter: Place the softened butter in a medium mixing bowl. Using a hand mixer or stand mixer fitted with the paddle attachment, beat the butter on medium speed for about 2 minutes, until it’s light, fluffy, and pale in color. Scrape down the sides of the bowl with a rubber spatula halfway through. You’re looking for a smooth, creamy texture with no lumps.
- Add the honey: Drizzle the honey into the whipped butter. Add the salt if you’re using it. Start mixing on low speed so the honey doesn’t splash everywhere, then increase to medium speed. Beat for another 1-2 minutes, until the honey is fully incorporated and the mixture is smooth and glossy. Scrape down the sides again to make sure everything is combined.
- Taste and adjust: This is the fun part. Dip a clean spoon in and taste it. Want it sweeter? Add another tablespoon of honey and mix again. Want more salt? Add a tiny pinch. I always add a little extra honey because I have a sweet tooth, but you do you.
- Transfer to a jar: Using your rubber spatula, scrape every last bit of honey butter into your clean jar. Press it down gently to remove any air pockets. Smooth the top with the spatula.
- Chill or serve: You can serve it immediately if you want a soft, spreadable butter. Or, pop the jar in the fridge for about 30 minutes to firm it up. I like it both ways, honestly. If you’re serving it with warm bread or pancakes, the softer version is amazing.
Sensory Cues: When you’re whipping the butter, listen for the sound. It should be a soft, rhythmic slap against the bowl. When it’s ready, it’ll look pale yellow and almost pillowy. When you add the honey, the color will deepen to a warm golden hue. The smell? It’s intoxicating—sweet, buttery, and slightly floral.
Personal Tip for Efficiency: I like to make a double batch and keep one jar in the fridge for later. It keeps perfectly for up to two weeks. Just let it sit at room temperature for 10 minutes before serving to soften.
Cooking Tips & Techniques
I’ve made this recipe more times than I can count, and I’ve learned a few things along the way. Here are my best tips for perfect honey butter every time.
- Don’t rush the softening step. I know it’s tempting to microwave the butter to speed things up, but I’ve ruined more than a few batches that way. Microwaved butter melts unevenly, leaving you with greasy spots and solid chunks. Just let it sit out. Set a timer if you have to.
- Use room temperature honey too. If your honey is cold or crystallized, it won’t blend smoothly. Warm it slightly by placing the jar in a bowl of warm water for a few minutes. Don’t microwave it—you don’t want to cook the honey.
- Scrape, scrape, scrape. Seriously. Stop the mixer a couple of times and scrape down the sides of the bowl. If you don’t, you’ll end up with streaks of unincorporated honey, and nobody wants that.
- If your honey butter separates, don’t panic. It happens sometimes, especially if the butter was too cold. Just let it come to room temperature, then whip it again for a minute. It’ll come back together.
- Add a pinch of cinnamon or vanilla. This isn’t in the main recipe, but it’s a fun twist. A tiny bit of cinnamon makes it taste like a warm cinnamon roll. A splash of vanilla adds a cozy, bakery-style flavor. I do this when I’m making it for a special breakfast.
I once forgot to soften the butter and tried to whip it straight from the fridge. Big mistake. The mixer struggled, the honey didn’t blend, and I ended up with a lumpy, sad mess. I had to start over. Learn from my failure, friends. Soft butter is non-negotiable.
Variations & Adaptations
This recipe is incredibly versatile. Here are a few ways to switch it up depending on what you’re in the mood for.
- Cinnamon Honey Butter: Add 1/2 teaspoon of ground cinnamon along with the honey. It’s amazing on toast, muffins, or even stirred into oatmeal. I make this version every fall and it disappears fast.
- Vanilla Bean Honey Butter: Scrape the seeds from half a vanilla bean and mix them in with the honey. Or use 1 teaspoon of vanilla bean paste. It’s fancy enough for a holiday brunch but simple enough for a weekday treat.
- Spiced Honey Butter: Add 1/4 teaspoon of pumpkin pie spice or apple pie spice. It’s perfect for spreading on scones or gingerbread. My sister-in-law requests this every Christmas.
- Vegan Honey Butter: Use a high-quality vegan butter stick and agave nectar or maple syrup instead of honey. The texture will be a bit softer, but the flavor is still delicious. I’ve tested this with Miyoko’s butter and it works great.
- Savory Honey Butter: Skip the salt and add a pinch of flaky sea salt on top after it’s in the jar. Or mix in some fresh thyme or rosemary for a savory-sweet spread that’s incredible on dinner rolls.
Dietary Adjustments: For a lower-sugar option, use less honey—start with 2 tablespoons and add more to taste. For a dairy-free version, use vegan butter. For a raw honey version, make sure your honey is labeled as raw and don’t heat it above 95°F to preserve the beneficial enzymes.
Serving & Storage Suggestions
This honey butter is incredibly versatile. Here’s how to serve it and keep it fresh.
Serving: Serve it at room temperature for the best spreadable texture. It’s perfect on warm biscuits, pancakes, waffles, French toast, or a simple slice of crusty bread. I also love it on roasted sweet potatoes, cornbread, or even stirred into a bowl of oatmeal. For a fun presentation, spoon it into a small ramekin and top with a drizzle of honey and a pinch of flaky salt.
Storage: Store your honey butter in an airtight jar in the refrigerator for up to two weeks. Make sure the lid is tight to prevent it from absorbing other flavors in the fridge. If you’re giving it as a gift, tie a ribbon around the jar and attach a small tag with serving suggestions.
Reheating: You don’t really need to reheat it. Just take it out of the fridge about 10-15 minutes before you want to use it. If you’re in a hurry, you can microwave it for 5-10 seconds on low power, but be careful not to melt it. You want it soft, not liquid.
How Flavors Develop: The flavors actually meld and deepen after a day or two in the fridge. The honey becomes more integrated, and the salt balances out. I actually prefer it on day two. It’s smoother and more cohesive.
Nutritional Information & Benefits
Here’s the approximate nutritional breakdown for one tablespoon of honey butter (based on the standard recipe with salted butter and honey).
| Nutrient | Amount per Tbsp |
|---|---|
| Calories | 102 |
| Total Fat | 11g |
| Saturated Fat | 7g |
| Carbohydrates | 6g |
| Sugar | 6g |
| Protein | 0g |
| Sodium | 45mg |
Health Benefits: Honey is a natural sweetener with antioxidants and antibacterial properties. It’s also a better choice than refined sugar for your morning toast. Butter, in moderation, provides fat-soluble vitamins like A, D, and E. Of course, this is a treat, not a health food. But using real ingredients feels better than processed spreads.
Dietary Considerations: This recipe is gluten-free and vegetarian. For a vegan version, use vegan butter and agave. For a low-carb version, you can use a sugar-free honey substitute, but the texture and flavor will change. Honey is a common allergen for some people, so be mindful if you’re serving it to guests.
Personal Wellness Perspective: I believe in enjoying food without guilt. This honey butter is a small luxury that makes everyday meals feel special. A little bit goes a long way, so you can enjoy the flavor without overdoing it. It’s all about balance, right?
Conclusion
This easy homemade honey butter recipe in a jar is proof that the best things in life are often the simplest. It’s affordable, quick, and incredibly satisfying to make. Every time I open the fridge and see that little jar, I smile a little. It reminds me of Aunt Jo’s kitchen, of warm bread and sticky fingers, of the magic that happens when you take a few simple ingredients and turn them into something special.
I hope you give this recipe a try. Customize it with cinnamon or vanilla, or keep it classic. Serve it on pancakes, biscuits, or just eat it with a spoon (no judgment here). And when you do, I’d love to hear about it. Leave a comment below and tell me how you served yours. Did the kids help you stir? Did you add your own twist? Share your honey butter story with me. It’s the little moments like these that make cooking so rewarding.
Now go make some magic in your kitchen. You’ve got this.
Frequently Asked Questions
Can I use salted butter instead of unsalted?
Yes, absolutely. If you’re using salted butter, just omit the extra salt in the recipe. The flavor will still be delicious, though I find it’s slightly less balanced. Taste it and adjust if needed.
How long does homemade honey butter last?
Stored in an airtight jar in the refrigerator, it will keep for up to two weeks. Make sure the lid is tight to prevent it from picking up other flavors. You can also freeze it for up to three months.
Can I make this without a mixer?
Yes, you can make it by hand. Make sure your butter is very soft, and use a strong whisk. It’ll take about 5-7 minutes of steady whisking, but it works. Your arm might get a little tired, but the result is worth it.
My honey butter turned out grainy. What went wrong?
This usually happens if the butter was too cold when you mixed it. The cold butter doesn’t incorporate the honey evenly, leaving a grainy texture. Let the butter come to room temperature next time, and whip it until it’s light and fluffy before adding the honey.
Can I use this honey butter for baking?
You can, but it’s best used as a spread. If you want to use it in baking, you’ll need to account for the extra sugar and liquid from the honey. It works well in recipes that already call for honey or brown sugar, like muffins or quick breads.
PrintEasy Homemade Honey Butter Recipe in a Jar

This easy homemade honey butter is creamy, sweet, and perfect for spreading on pancakes, waffles, toast, or biscuits. Made with just butter and honey, it’s a quick and affordable treat that tastes better than store-bought.
- Prep Time: 10 minutes
- Cook Time: 0 minutes
- Total Time: 10 minutes
- Yield: 16 servings 1x
- Category: Condiment
- Cuisine: American
Ingredients
- 1 cup (2 sticks) unsalted butter, softened to room temperature
- 1/3 cup honey
- 1/4 teaspoon fine sea salt (optional)
Instructions
- Soften the butter: Take your butter out of the fridge about 30-45 minutes before you plan to make the honey butter. Cut it into small cubes to speed things up. You want it soft but not melted.
- Whip the butter: Place the softened butter in a medium mixing bowl. Using a hand mixer or stand mixer fitted with the paddle attachment, beat the butter on medium speed for about 2 minutes, until it’s light, fluffy, and pale in color. Scrape down the sides of the bowl with a rubber spatula halfway through.
- Add the honey: Drizzle the honey into the whipped butter. Add the salt if you’re using it. Start mixing on low speed so the honey doesn’t splash everywhere, then increase to medium speed. Beat for another 1-2 minutes, until the honey is fully incorporated and the mixture is smooth and glossy. Scrape down the sides again to make sure everything is combined.
- Taste and adjust: Dip a clean spoon in and taste it. Want it sweeter? Add another tablespoon of honey and mix again. Want more salt? Add a tiny pinch.
- Transfer to a jar: Using your rubber spatula, scrape every last bit of honey butter into your clean jar. Press it down gently to remove any air pockets. Smooth the top with the spatula.
- Chill or serve: You can serve it immediately if you want a soft, spreadable butter. Or, pop the jar in the fridge for about 30 minutes to firm it up.
Notes
For best texture, ensure butter is at room temperature (soft but not melted). If using salted butter, omit the extra salt. Honey butter can be stored in the refrigerator for up to two weeks. Let it sit at room temperature for 10-15 minutes before serving to soften. For a fun twist, add 1/2 teaspoon cinnamon or 1 teaspoon vanilla extract.
Nutrition
- Serving Size: 1 tablespoon
- Calories: 102
- Sugar: 6
- Sodium: 45
- Fat: 11
- Saturated Fat: 7
- Carbohydrates: 6
Keywords: honey butter, homemade honey butter, easy honey butter, honey butter recipe, butter and honey, spread, breakfast, brunch