Love this? Save it for later!
Share the inspiration with your friends
I swore I wasn’t a jam-and-preserves person. For years. I’d walk right past that aisle in the grocery store, completely unimpressed by the sticky, overly sweet jars lined up like sugary soldiers. Give me a fresh piece of fruit any day, I’d say, with all the confidence of someone who had clearly never tasted the real thing. Then I found myself at a tiny farm stand last September, a Tuesday afternoon I think, with a paper bag full of pears that were so ripe they practically hummed. I had no plan for them. Honestly, I just bought them because they smelled like autumn in a way that made me stop in my tracks.
So there I was, three days later, staring at a counter full of pears that were starting to get that “use me now or lose me” look. I had a cracked ceramic bowl full of them, a half-empty bag of sugar, and a stubborn refusal to let good fruit go to waste. I remembered my neighbor, Mrs. Gable, mentioning she made her own pear preserves every year, and I’d nodded politely while internally rolling my eyes. But desperation is a funny motivator. I grabbed a cinnamon stick, found a vanilla bean hiding in the back of my spice drawer, and figured I’d give it a shot just to save the pears. I mean, what was the worst that could happen?
An hour later, I was standing over the stove, stirring a pot of what looked like liquid gold, and I caught myself sneaking spoonfuls straight from the pot. The warmth of the cinnamon, the deep floral notes of the vanilla, and the pear itself—soft, tender, and perfectly sweet—it was like nothing I’d ever tasted from a store-bought jar. Maybe you’ve been there, that moment when you realize you’ve been wrong about something your whole life and it feels weirdly good to admit it. That’s why I keep making this homemade cinnamon vanilla pear preserves recipe. It’s not just about saving fruit. It’s about proving yourself wrong in the most delicious way possible.
Why You’ll Love This Recipe
Let me tell you, after testing this recipe about four times in two weeks (my coworkers were very happy test subjects), I can say with confidence that this is the pear preserve recipe you’ve been looking for. It’s not complicated, it doesn’t require a ton of fancy equipment, and it tastes like you spent hours in the kitchen when really, you didn’t.
- Only 3 Main Ingredients: Pears, sugar, and a little cinnamon and vanilla. That’s it. No pectin, no lemon juice, no mysterious additives. Just pure, honest fruit preserves.
- No Canning Experience Needed: If the word “canning” makes you nervous, relax. This recipe works perfectly as a refrigerator or freezer preserve. You don’t need a water bath or any of that stress.
- Perfect for Gifting: Tie a ribbon around a jar of these preserves and you’ve got a gift that looks like you spent a fortune. People will think you’re a domestic goddess (or god).
- Incredibly Versatile: Spoon it over yogurt, spread it on toast, glaze a pork roast, or eat it straight from the jar at midnight. I won’t judge.
- Uses Up Ripe Pears: We’ve all been there—pears that are too soft to eat raw but too good to throw away. This recipe is your solution.
What makes this recipe different from the hundreds of other pear preserve recipes out there? It’s the vanilla. Most recipes rely solely on sugar and spice, but adding a whole vanilla bean (or good quality extract) creates a depth of flavor that’s almost caramel-like. It’s not just sweet—it’s warm, complex, and a little bit luxurious. The first time I made this, I actually closed my eyes after that first spoonful. It’s comfort food reimagined—simpler, faster, but with the same soul-soothing satisfaction. Perfect for impressing guests without stress, or turning a simple breakfast into something memorable.
What Ingredients You Will Need
This recipe uses simple, wholesome ingredients to deliver bold flavor and satisfying texture without the fuss. Most of these are probably already in your kitchen, which makes this a perfect last-minute project.
- Ripe but firm pears (about 2 pounds or 900 grams) — Look for Bartlett, Anjou, or Bosc pears. They should be fragrant and yield slightly to pressure but not be mushy. I personally prefer Bartlett for their softer texture when cooked, but Bosc holds its shape a bit better if you like chunkier preserves.
- Granulated sugar (1 cup or 200 grams) — Regular white sugar works best here. You can reduce it slightly if your pears are very sweet, but sugar is what preserves the fruit and gives it that gorgeous syrupy texture. Don’t substitute with honey or maple syrup for this recipe—it changes the consistency.
- One cinnamon stick (or 1 teaspoon ground cinnamon) — I really recommend using a whole cinnamon stick if you have one. It infuses the preserves with a gentle warmth without making it gritty. If you only have ground, add it toward the end of cooking to avoid bitterness.
- One vanilla bean (or 1 tablespoon pure vanilla extract) — This is the secret weapon. The tiny black specks from a real vanilla bean make the preserves look beautiful and taste incredible. If you’re using extract, go for pure vanilla, not imitation. Trust me on this one.
- Lemon juice (1 tablespoon or 15 ml) — Just a splash. It helps balance the sweetness and keeps the pears from browning while you prep them. Fresh squeezed is nice, but bottled works fine in a pinch.
- A pinch of salt — Sounds weird, I know, but salt amplifies sweetness and rounds out the flavors. Don’t skip it.
That’s seriously it. You might also want a little water (about 1/4 cup or 60 ml) to get things started if your pears aren’t super juicy. I’ve made this with both organic supermarket pears and farmers’ market finds, and honestly, the fresher the fruit, the better the result. If you’re using frozen pears, thaw them first and drain off the excess liquid or you’ll be cooking forever.
Equipment Needed
You don’t need a professional kitchen to make these preserves. Here’s what you’ll need:
- A heavy-bottomed pot or Dutch oven — Something like a 4-quart (about 4 liter) pot works perfectly. The heavy bottom prevents scorching, which is the number one mistake people make with fruit preserves. I’ve used my old enameled cast iron pot for years and it’s never let me down.
- A wooden spoon or silicone spatula — Metal utensils can react with the acid in the fruit and leave a metallic taste. Stick with wood or silicone.
- A sharp knife and cutting board — For prepping the pears. A vegetable peeler is also helpful if you prefer peeled preserves (I do, but some people like the texture of the skin).
- A jar or two with lids — Any clean glass jar works. Mason jars are ideal, but I’ve reused pasta sauce jars plenty of times. Just make sure they’re sterilized (boil them for 10 minutes or run them through the dishwasher).
- A small bowl — For holding the scraped vanilla bean pod after you’ve used the seeds. Don’t throw it away! You can add the pod to the pot while cooking for extra flavor.
If you don’t have a vanilla bean, no problem. Good quality extract works, and you can skip the scraping step entirely. And if you’re wondering about a candy thermometer, you don’t need one. I’ve made this recipe dozens of times and I just use the “plate test” (more on that in the tips section).
Preparation Method
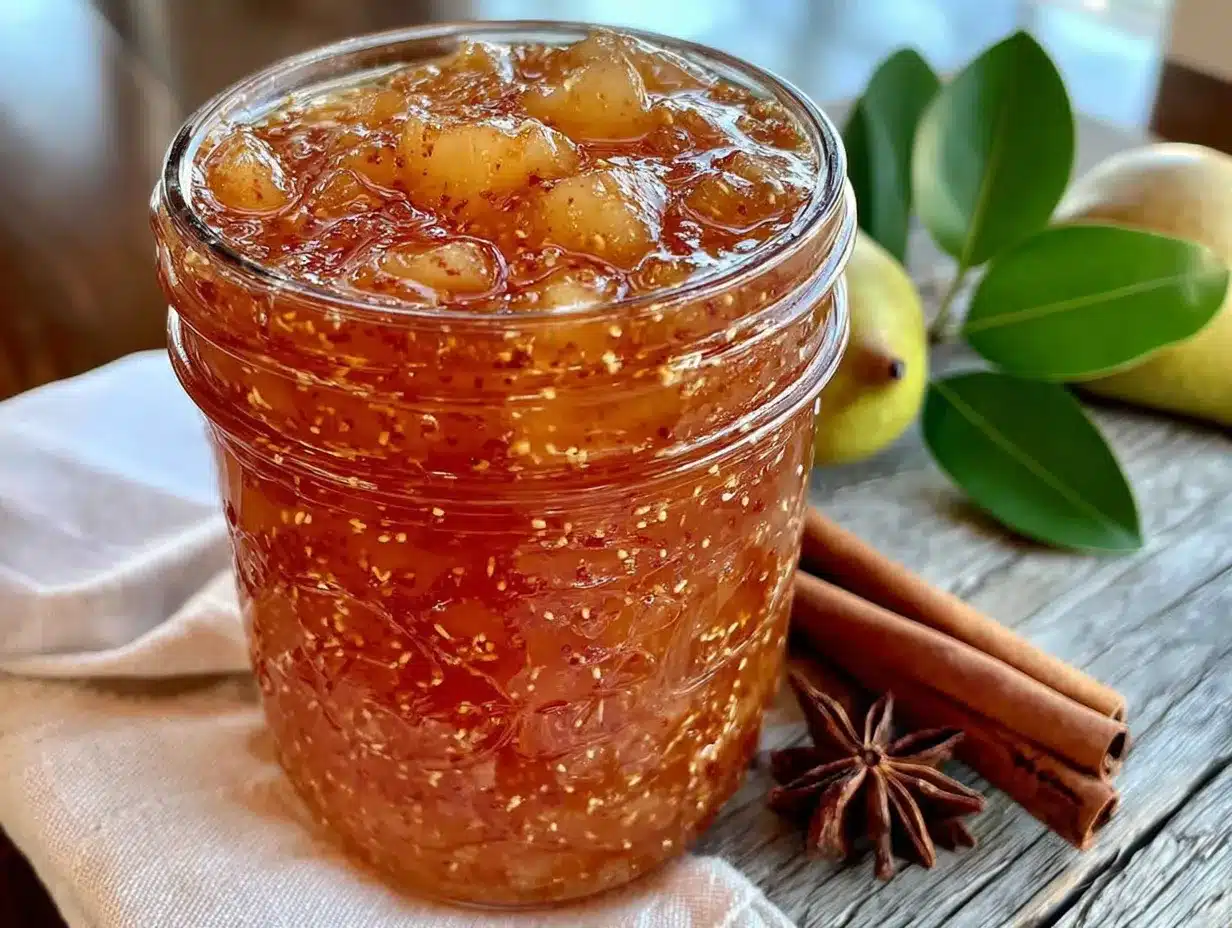
Alright, let’s get cooking. This whole process takes about 45 minutes to an hour, but most of that is hands-off simmering time. Here’s how to make your own batch of homemade cinnamon vanilla pear preserves.
- Prep the pears. Wash your pears thoroughly. If you want a smoother preserve, peel them with a vegetable peeler. I usually peel about half and leave the skin on half for a nice texture contrast. Cut the pears into quarters, remove the cores and seeds, then chop them into roughly 1/2-inch (about 1 cm) cubes. Don’t stress about uniformity—some smaller pieces will break down and create that jammy texture while larger chunks give you those lovely fruit pieces. Toss the chopped pears with the lemon juice in a bowl to prevent browning.
- Split the vanilla bean. Lay the vanilla bean on your cutting board. Use a sharp paring knife to slice it lengthwise down the middle, but don’t cut all the way through. Open it up like a book and use the back of your knife to scrape out the tiny black seeds. Add both the seeds and the empty pod to a small bowl. If you’re using extract, just measure it out and add it later.
- Combine everything in the pot. Add your chopped pears, sugar, the vanilla seeds and pod (or extract), the cinnamon stick, and a pinch of salt to your heavy-bottomed pot. Pour in about 1/4 cup (60 ml) of water. Give everything a good stir to combine. Let it sit for about 10 minutes. This allows the sugar to start drawing out the pears’ natural juices, which helps everything cook evenly.
- Bring to a gentle boil. Place the pot over medium heat and stir occasionally as the sugar dissolves and the mixture starts to bubble. You’ll see the pears release more liquid. Once it reaches a gentle boil, reduce the heat to medium-low. You want a steady simmer, not a violent boil. Bubbles should be lazy and consistent, not aggressive.
- Simmer and stir. Let the mixture simmer for about 25 to 35 minutes, stirring every 5 minutes or so to prevent sticking. The preserves will start to thicken and the color will deepen to a beautiful golden amber. The pears will soften and some will break down naturally. If you notice the mixture getting too thick or starting to stick, add a splash more water—about a tablespoon at a time.
- Test for doneness. This is the fun part. Place a small plate in the freezer for a few minutes. Drop a small spoonful of the preserves onto the cold plate and let it sit for 30 seconds. Push it with your finger—if it wrinkles and doesn’t run back together, it’s done. If it’s still runny, cook for another 5 minutes and test again. This method has never failed me, even when I was a complete beginner.
- Remove the spices. Once the preserves have reached the right consistency, fish out the cinnamon stick and the vanilla bean pod. The pod has given up all its flavor at this point, so you can rinse it, dry it, and bury it in your sugar bowl for vanilla-scented sugar. Waste not, want not.
- Cool and jar. Remove the pot from the heat and let the preserves cool for about 10 to 15 minutes. They will continue to thicken as they cool. Ladle the warm preserves into your clean jars, leaving about 1/2 inch (1 cm) of headspace at the top. Wipe the rims clean, screw on the lids, and let them cool completely at room temperature before refrigerating.
I remember the first time I made this, I forgot to take out the cinnamon stick before tasting it and got a mouthful of bark. Learn from my mistake. Also, don’t be alarmed if your preserves seem a little thin when hot—they set up beautifully as they cool. Patience, my friend.
Cooking Tips & Techniques
After making this recipe more times than I can count (and messing up a few batches along the way), I’ve picked up some tricks that make the process smoother and the results better.
Don’t rush the maceration step. Letting the pears sit with the sugar for those 10 minutes before cooking makes a huge difference. It draws out the natural pectin and juice, which means you need less added liquid and the final texture is more jammy. I once skipped this step because I was in a hurry, and the preserves turned out watery and took forever to thicken. Never again.
Watch your heat. High heat might seem like a good idea to speed things up, but it’s the enemy of good preserves. It can scorch the sugar, leaving you with a burnt taste that no amount of vanilla can fix. Keep it at a gentle simmer and be patient. I ruined my second batch by cranking the heat and walking away to answer a text. The smell of burnt sugar haunted my kitchen for days.
Use the plate test, not a thermometer. I know some recipes insist on reaching 220°F (104°C), but I find the plate test more reliable, especially for small batches. The setting point of preserves depends on the sugar content and the natural pectin in the fruit, which varies. The cold plate method takes the guesswork out.
Skim the foam if you want. As the preserves cook, a pinkish foam might rise to the surface. This is just air bubbles and impurities. You can skim it off with a spoon for a clearer, more beautiful final product, or you can stir it back in. I usually skim it because I like the way the preserves look in the jar, but it’s purely cosmetic.
Plan for overflow. Your pot might look half full when you start, but the mixture can bubble up quite a bit. Use a pot that gives you at least 2 to 3 inches (5 to 8 cm) of headspace above the ingredients. I learned this the hard way when I had to scrub burnt sugar off my stovetop.
Variations & Adaptations
One of the best things about this recipe is how easy it is to customize. Here are some variations I’ve tried and loved.
Spiced Pear Preserves: Add a star anise pod, a piece of fresh ginger (about 1 inch, peeled and sliced), and a strip of orange zest along with the cinnamon stick. The combination of warm and citrusy flavors is incredible. I made this version for the holidays last year and it was a hit on cheese boards.
Vanilla Pear and Cardamom: Swap the cinnamon for 4 to 5 crushed green cardamom pods. The floral, slightly citrusy notes of cardamom pair beautifully with pear and vanilla. This version is amazing swirled into oatmeal or yogurt. It’s my personal favorite for breakfast.
Low-Sugar Version: You can reduce the sugar to 3/4 cup (150 grams) if you’re watching your intake. The preserves will be a bit looser and won’t keep as long (use within 2 weeks), but the flavor is still fantastic. You can also use a sugar substitute like monk fruit sweetener, but the texture will be different. I’ve tested this with half the sugar and it worked fine, just don’t expect a firm set.
Spiced Pear and Apple Preserves: Replace half the pears with firm apples like Granny Smith or Honeycrisp. The apples add natural pectin, giving you a firmer set without any added pectin. Plus, the flavor combination is like autumn in a jar. This is a great way to use up odds and ends from your fruit bowl.
Alcohol-Infused Version: Add 2 tablespoons of bourbon, rum, or brandy during the last 5 minutes of cooking. The alcohol mostly cooks off, leaving behind a warm, complex depth. I tried this with a good quality bourbon and it was dangerously delicious on vanilla ice cream.
For dietary restrictions, this recipe is naturally gluten-free, dairy-free, and vegan. If you have allergies to cinnamon or vanilla, you can simply omit them—the pear preserves will still be lovely, just simpler. You could also try substituting with a pinch of nutmeg or allspice instead.
Serving & Storage Suggestions
These preserves are incredibly versatile, and I love finding new ways to use them. Here are some of my favorites.
Classic Toast or Biscuits: Spread generously on warm, buttered toast, English muffins, or freshly baked biscuits. The combination of warm bread and cool, fruit-studded preserves is pure comfort. I like to use a thick sourdough or a flaky buttermilk biscuit.
Yogurt and Oatmeal: Swirl a spoonful into plain Greek yogurt or a bowl of warm oatmeal. It adds natural sweetness and a lovely fruitiness without the processed sugar of flavored yogurts. I do this almost every morning during pear season.
Cheese Board Star: Serve alongside sharp cheddar, creamy brie, or tangy goat cheese. The sweetness of the preserves balances the saltiness of the cheese perfectly. Add some crackers and sliced apples, and you’ve got an impressive appetizer in minutes.
Glaze for Meats: Brush over pork chops, chicken thighs, or even salmon during the last few minutes of grilling or roasting. The sugar caramelizes and creates a gorgeous, flavorful glaze. I did this with pork tenderloin for a dinner party and everyone asked for the recipe.
Ice Cream Topping: Warm a few spoonfuls and drizzle over vanilla ice cream or pound cake. It’s a simple dessert that feels fancy. Add a sprinkle of toasted walnuts or pecans for crunch.
Storage: Store your preserves in an airtight container in the refrigerator for up to 3 weeks. For longer storage, you can freeze them for up to 6 months. Leave a little headspace in the jar to allow for expansion. Thaw in the refrigerator overnight before using. The flavors actually deepen and meld after a day or two, so don’t be discouraged if they taste a little simple right after cooking—give them time.
I don’t recommend water bath canning this recipe unless you’re experienced and follow a tested canning recipe, as the acid and sugar levels need to be precise for safe shelf storage. For most of us, the fridge or freezer method is perfectly fine and much less stressful.
Nutritional Information & Benefits
While I wouldn’t call preserves a health food, there are some nice benefits to making your own. A 2-tablespoon serving (about 30 grams) contains approximately:
- Calories: 45-55
- Carbohydrates: 12-14 grams
- Sugar: 10-12 grams (mostly from added sugar and natural fruit sugars)
- Fiber: 0.5-1 gram
- Vitamin C: 2-4% of daily value
- Potassium: 30-40 mg
Pears themselves are a good source of dietary fiber and vitamin C, especially if you leave the skin on. They also contain antioxidants like flavonoids, which support heart health. The cinnamon adds anti-inflammatory properties and can help with blood sugar regulation—though with the sugar in preserves, that effect is minimal. Vanilla is rich in vanillin, which has antioxidant and calming properties. Plus, making your own preserves means you control exactly what goes in, avoiding the high fructose corn syrup and preservatives found in many store-bought versions.
This recipe is suitable for gluten-free, dairy-free, and vegan diets. It’s not low-carb due to the sugar, but you can reduce it as mentioned in the variations section. Always check your ingredients if you have specific allergies—some vanilla extracts contain alcohol or other additives.
Conclusion
Honestly, I never thought I’d be the person who gets excited about making preserves. But here I am, three batches later, with a fridge full of golden jars and a new appreciation for the simple magic of cooking fruit down with a little sugar and spice. This homemade cinnamon vanilla pear preserves recipe has become my go-to for using up ripe pears, impressing guests, and treating myself to something special without any fuss.
The beauty of this recipe is that it’s forgiving. Your pears don’t have to be perfect. Your cubes don’t have to be uniform. You can forget to add the vanilla until the last minute (I’ve done it) and it still turns out delicious. It’s the kind of recipe that builds confidence in the kitchen, because you realize that you can create something genuinely wonderful with just a few simple ingredients and a little patience.
I’d love to hear how your batch turns out. Did you add a special spice? Use a different fruit combination? Serve it in a way I haven’t thought of? Drop a comment below and share your creation. And if you found this helpful, please share it with someone who has a bag of pears that needs using up. Happy preserving, friends—you’ve got this.
Frequently Asked Questions
Can I use canned pears instead of fresh?
You can, but the results won’t be as good. Canned pears are already cooked and packed in syrup, so they break down very quickly and the preserves can turn mushy. If you’re in a pinch, drain them well, reduce the sugar by about half, and cook for a much shorter time. Fresh pears really do give the best texture and flavor.
Why didn’t my preserves set properly?
This usually happens for one of three reasons: the pears were too ripe (overly ripe fruit has less natural pectin), you didn’t cook it long enough, or you used too much water. Next time, try adding a tablespoon of lemon juice (the acid helps with setting) or cook the mixture a bit longer. Remember, the preserves will thicken more as they cool.
Can I double this recipe?
Absolutely. Just make sure you use a large enough pot—the mixture can bubble up quite a bit. Keep in mind that a larger batch will take a bit longer to cook down, usually an extra 10 to 15 minutes. Stir more frequently to prevent scorching, and use the plate test to check for doneness rather than relying on a set time.
How do I know if my preserves have gone bad?
Look for signs of mold, an off smell, or a fizzy texture when you open the jar. If the lid is bulging or the preserves have an alcoholic or yeasty smell, discard them immediately. Properly stored refrigerator preserves should last 2 to 3 weeks. If you see any signs of spoilage, it’s better to be safe and throw them out.
Can I use this recipe for other fruits?
Yes, with a few adjustments. Firm fruits like apples, quince, and firm plums work well with the same method. Softer fruits like peaches, nectarines, and berries will cook down faster and may need less sugar. I’ve made a version with apples and pears that was fantastic. Just adjust the cooking time based on the fruit’s texture and water content.
Pin This Recipe!
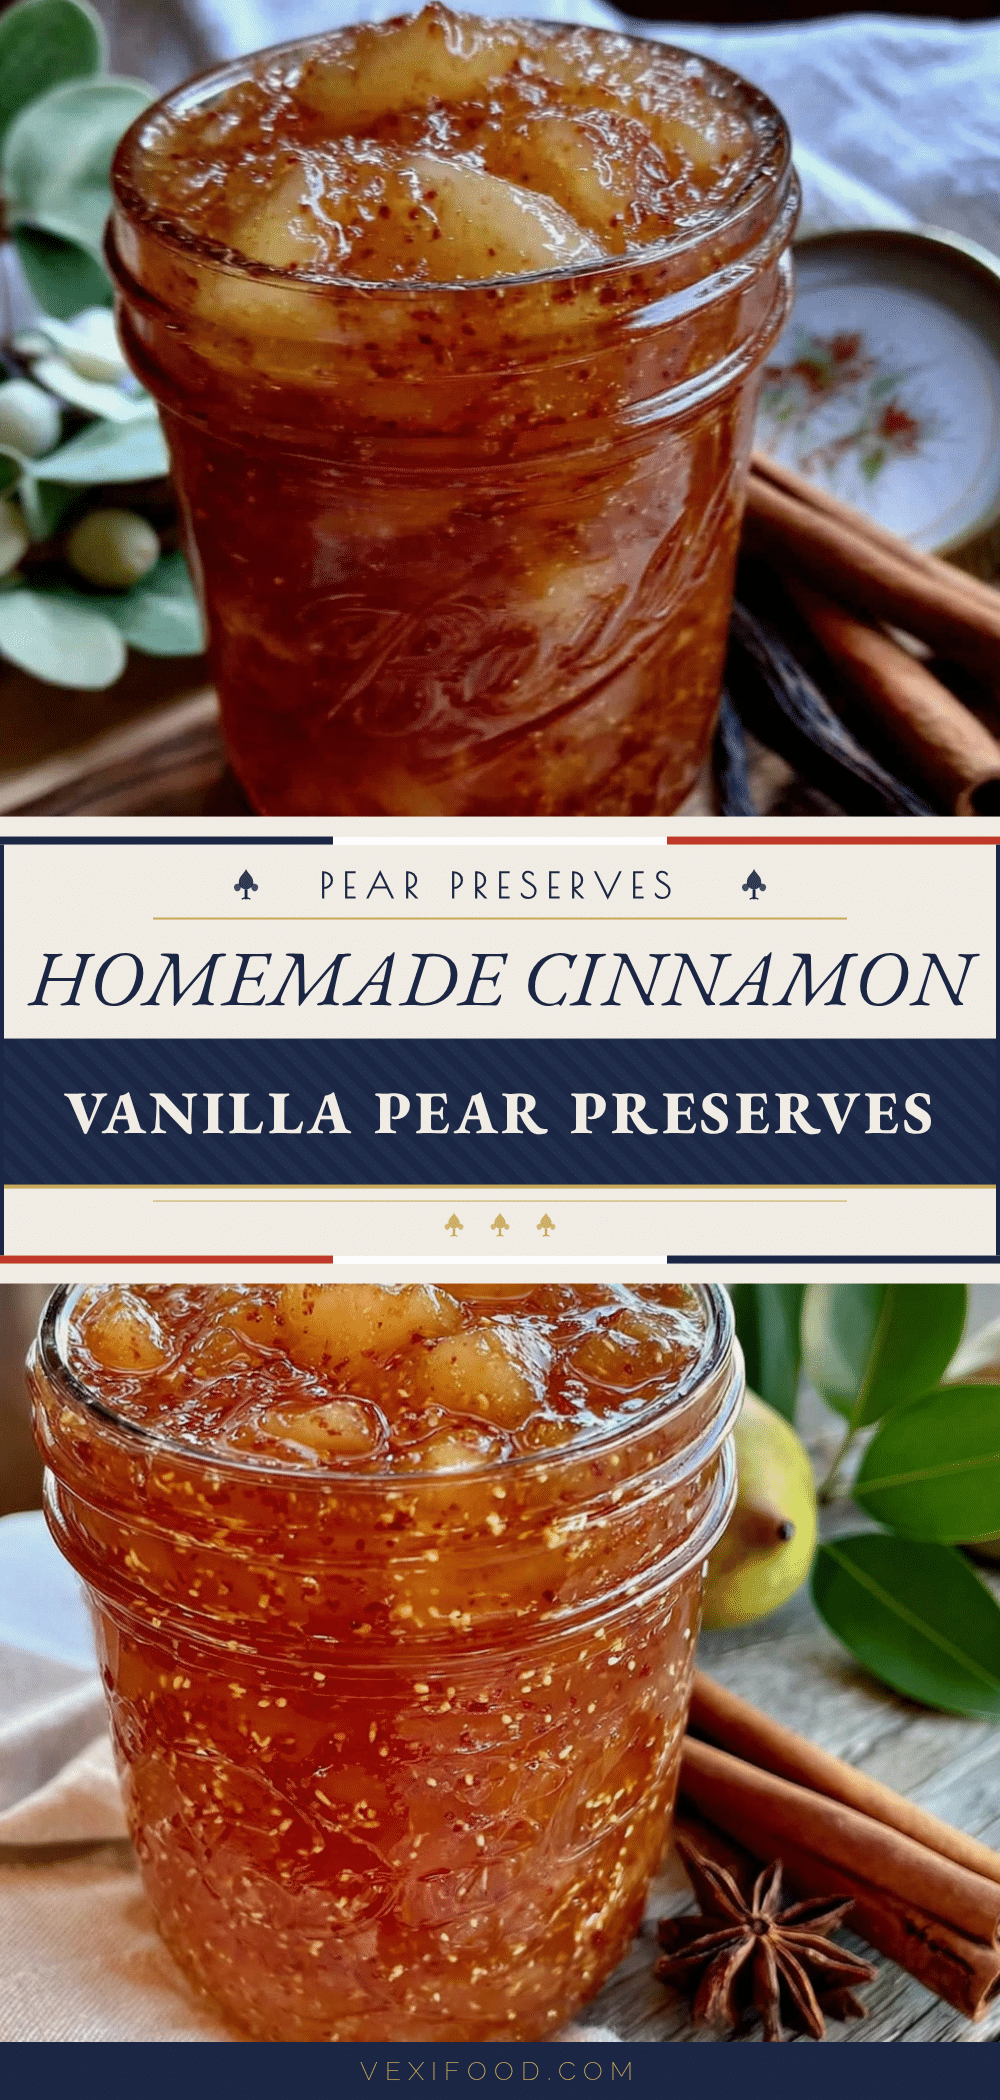
Homemade Cinnamon Vanilla Pear Preserves: Easy 3-Ingredient Recipe
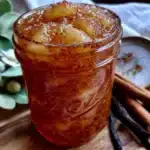
This easy 3-ingredient pear preserve recipe uses ripe pears, sugar, and a touch of cinnamon and vanilla for a warm, complex flavor. Perfect for using up ripe pears, it requires no canning experience and is great for gifting or everyday use.
- Prep Time: 15 minutes
- Cook Time: 35 minutes
- Total Time: 50 minutes
- Yield: 4 servings 1x
- Category: Preserves
- Cuisine: American
Ingredients
- 2 pounds (900 grams) ripe but firm pears (Bartlett, Anjou, or Bosc), chopped into 1/2-inch cubes
- 1 cup (200 grams) granulated sugar
- 1 cinnamon stick (or 1 teaspoon ground cinnamon)
- 1 vanilla bean (or 1 tablespoon pure vanilla extract)
- 1 tablespoon (15 ml) lemon juice
- Pinch of salt
- 1/4 cup (60 ml) water (if needed)
Instructions
- Prep the pears: Wash, peel if desired, quarter, core, and chop into 1/2-inch cubes. Toss with lemon juice to prevent browning.
- Split the vanilla bean: Slice lengthwise, scrape out seeds, and reserve both seeds and pod. If using extract, measure and set aside.
- Combine everything in the pot: Add pears, sugar, vanilla seeds and pod (or extract), cinnamon stick, salt, and water. Stir and let sit for 10 minutes.
- Bring to a gentle boil over medium heat, stirring occasionally. Reduce heat to medium-low for a steady simmer.
- Simmer for 25-35 minutes, stirring every 5 minutes, until thickened and golden amber. Add water a tablespoon at a time if too thick.
- Test for doneness: Place a small plate in the freezer. Drop a spoonful of preserves on the cold plate; if it wrinkles when pushed, it’s done. If not, cook 5 more minutes and test again.
- Remove the cinnamon stick and vanilla bean pod. Rinse and dry the pod for vanilla sugar.
- Cool for 10-15 minutes, then ladle into clean jars, leaving 1/2 inch headspace. Wipe rims, seal, and cool completely before refrigerating.
Notes
Don’t rush the maceration step; let pears sit with sugar for 10 minutes. Use gentle heat to avoid scorching. The plate test is more reliable than a thermometer. Skim foam for clearer preserves. Use a pot with 2-3 inches headspace to prevent overflow. Preserves thicken as they cool.
Nutrition
- Serving Size: 2 tablespoons (30 gr
- Calories: 50
- Sugar: 11
- Sodium: 1
- Carbohydrates: 13
- Fiber: 0.5
Keywords: pear preserves, cinnamon vanilla pear preserves, homemade preserves, easy pear recipe, 3-ingredient preserves, no pectin preserves, refrigerator preserves